Using WebBrowser (cont.)
Detailed settings window
You can make detail network settings on projector, when connecting without the administrator authority or when connecting through an access point (infrastructure mode).
 LAN settings
1
2
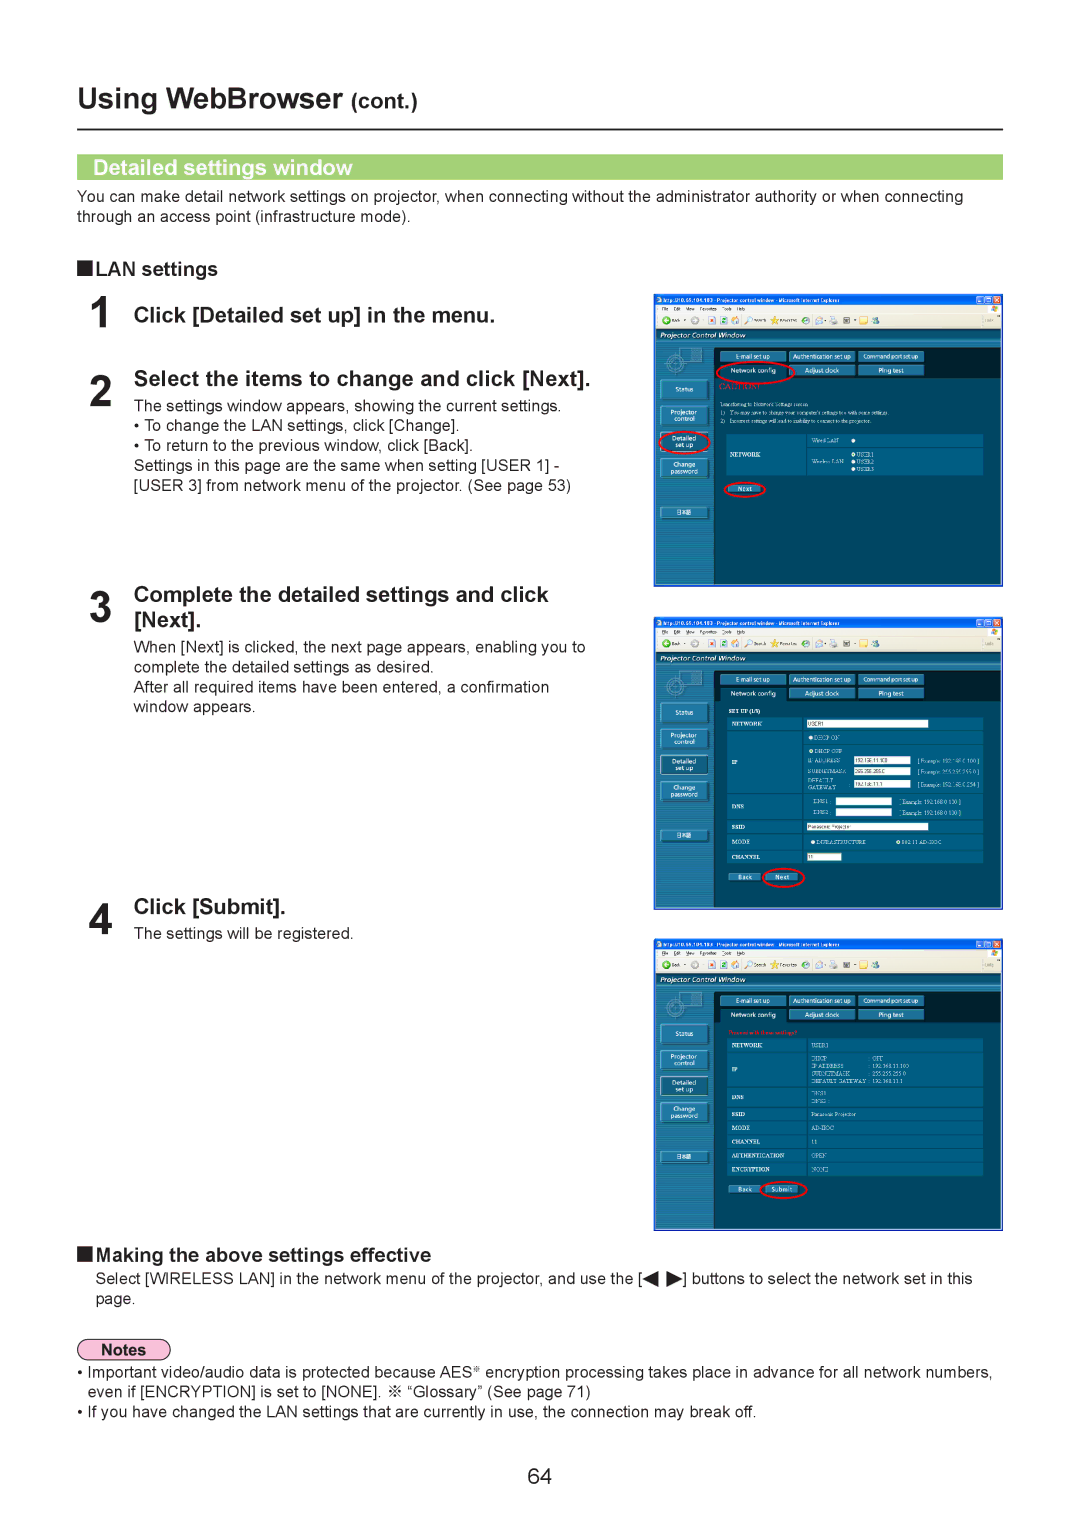
Click [Detailed set up] in the menu.
Select the items to change and click [Next].
The settings window appears, showing the current settings.
•To change the LAN settings, click [Change].
•To return to the previous window, click [Back].
Settings in this page are the same when setting [USER 1] - [USER 3] from network menu of the projector. (See page 53)
3 Complete[Next]. the detailed settings and click
When [Next] is clicked, the next page appears, enabling you to complete the detailed settings as desired.
After all required items have been entered, a confirmation window appears.
4 Click [Submit].
The settings will be registered.
 Making the above settings effective
Select [WIRELESS LAN] in the network menu of the projector, and use the [![]()
![]() ] buttons to select the network set in this page.
] buttons to select the network set in this page.
•Important video/audio data is protected because AES※ encryption processing takes place in advance for all network numbers, even if [ENCRYPTION] is set to [NONE]. ※ “Glossary” (See page 71)
•If you have changed the LAN settings that are currently in use, the connection may break off.
64