Various projection methods (cont.)
Multiple Source Live Mode
You can simultaneously project one computer’s screen on up to eight projectors.
Projection can be provided for the projector having the same network number of either “1” through ”4” or “USER1” through “USER3”
1 | Press the |
into a full screen display (the status when no index window is displayed). (See |
page 35)
If you press the
2
3
4
5
6
7
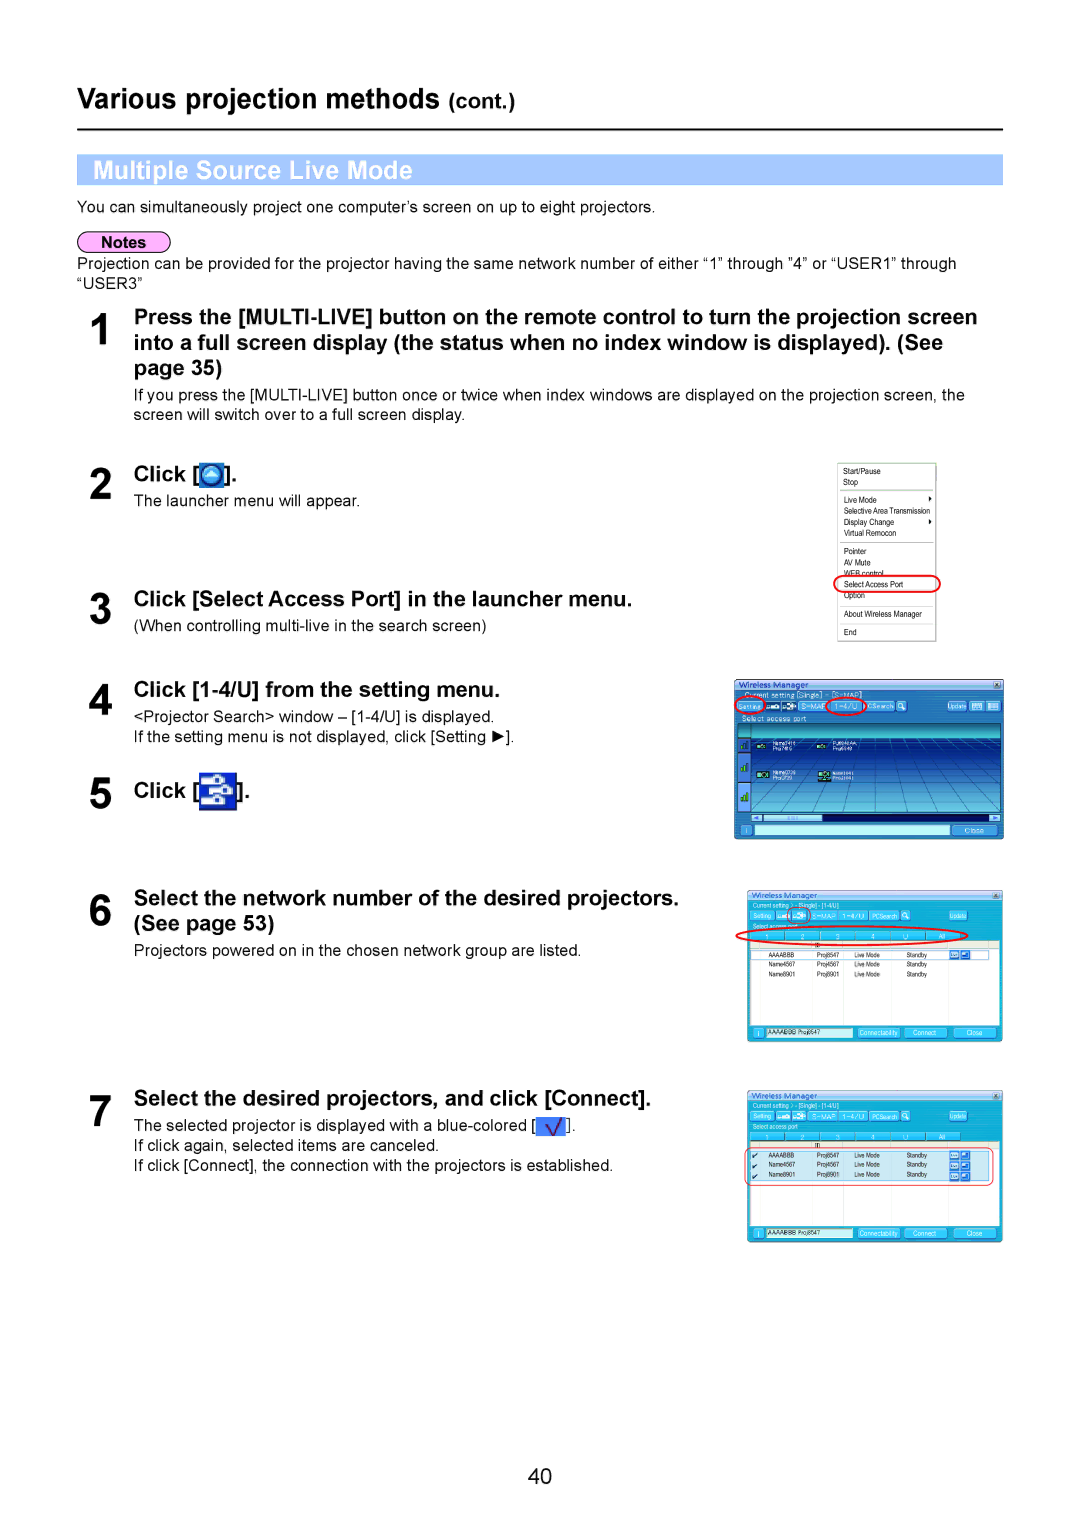
Click [![]() ].
].
The launcher menu will appear.
Click [Select Access Port] in the launcher menu.
(When controlling
Click [1-4/U] from the setting menu.
<Projector Search> window –
If the setting menu is not displayed, click [Setting ![]() ].
].
Click [![]() ].
].
Select the network number of the desired projectors. (See page 53)
Projectors powered on in the chosen network group are listed.
Select the desired projectors, and click [Connect].
The selected projector is displayed with a ![]() ]. If click again, selected items are canceled.
]. If click again, selected items are canceled.
If click [Connect], the connection with the projectors is established.
Start/Pause
Stop
Live Mode
Selective Area Transmission
Display Change
Virtual Remocon
Pointer
AV Mute
WEB control
Select Access Port
Option
About Wireless Manager
End
Current
Current setting > - [Single] - |
|
|
| |
Setting |
| PCSearch |
| Update |
Select access port |
|
|
|
|
|
|
|
| All |
AAAABBB | Proj8547 | Live Mode | Standby |
|
Name4567 | Proj4567 | Live Mode | Standby |
|
Name8901 | Proj8901 | Live Mode | Standby |
|
|
| Connectability | Connect | Close |
Current setting > - [Single] - |
|
|
| |
Setting |
| PCSearch |
| Update |
Select access port |
|
|
|
|
|
|
|
| All |
AAAABBB | Proj8547 | Live Mode | Standby |
|
Name4567 | Proj4567 | Live Mode | Standby |
|
Name8901 | Proj8901 | Live Mode | Standby |
|
Connectability | Connect | Close |
40