Network/Security setting of the projector (cont.)
Setting network number (for wireless LAN)
1
2
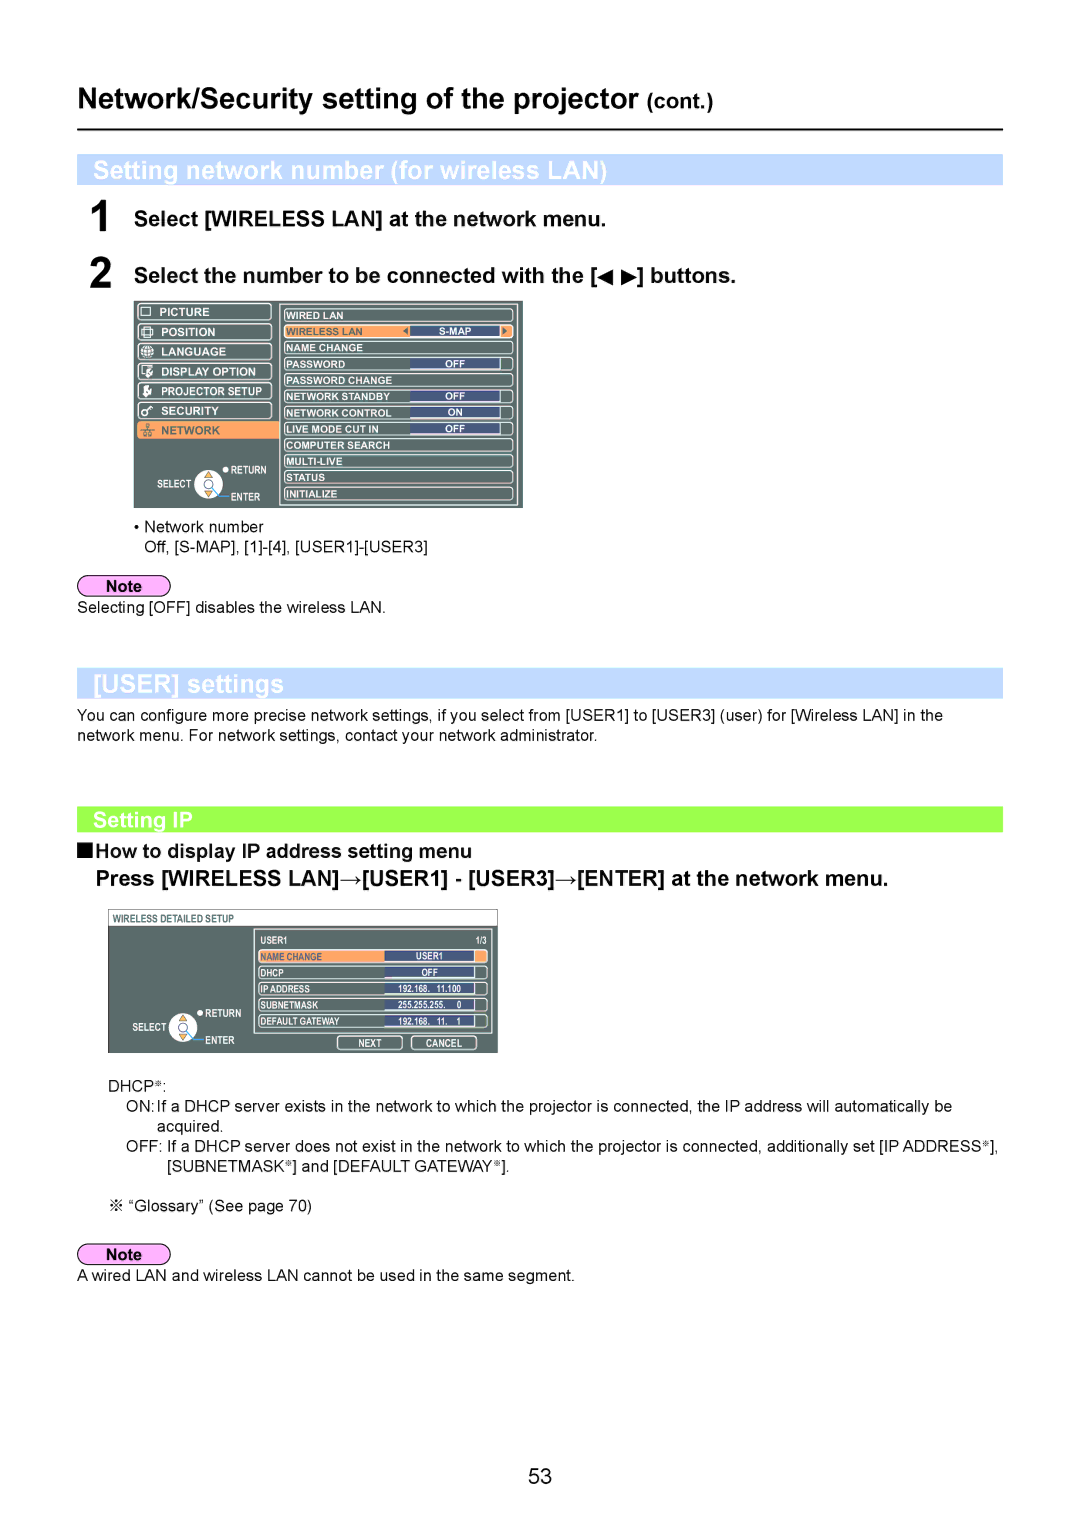
Select [WIRELESS LAN] at the network menu.
Select the number to be connected with the [![]()
![]() ] buttons.
] buttons.
PICTURE
POSITION
![]() LANGUAGE
LANGUAGE
![]() DISPLAY OPTION
DISPLAY OPTION
![]() PROJECTOR SETUP
PROJECTOR SETUP
SECURITY NETWORK
WIRED LAN |
|
WIRELESS LAN |
|
NAME CHANGE |
|
PASSWORD |
|
OFF | |
PASSWORD CHANGE |
|
NETWORK STANDBY |
|
OFF | |
NETWORK CONTROL |
|
ON | |
LIVE MODE CUT IN |
|
OFF | |
COMPUTER SEARCH |
|
|
SELECT
![]() RETURN
RETURN
![]() ENTER
ENTER
STATUS |
INITIALIZE |
•Network number
Off,
Selecting [OFF] disables the wireless LAN.
[USER] settings
You can configure more precise network settings, if you select from [USER1] to [USER3] (user) for [Wireless LAN] in the network menu. For network settings, contact your network administrator.
Setting IP
 How to display IP address setting menu
Press [WIRELESS LAN]→[USER1] - [USER3]→[ENTER] at the network menu.
WIRELESS DETAILED SETUP
|
| USER1 |
|
| 1/3 | |
|
| NAME CHANGE |
|
|
|
|
|
|
| USER1 |
|
| |
|
| DHCP |
|
|
|
|
|
|
| OFF |
|
| |
|
| IP ADDRESS |
|
|
|
|
|
|
| 192.168. 11.100 |
| ||
| RETURN | SUBNETMASK |
| 255.255.255. | 0 |
|
|
|
|
|
|
| |
SELECT | DEFAULT GATEWAY |
| 192.168. 11. | 1 |
| |
|
|
| ||||
ENTER |
| NEXT | CANCEL | |||
|
| |||||
DHCP※:
ON: If a DHCP server exists in the network to which the projector is connected, the IP address will automatically be acquired.
OFF: If a DHCP server does not exist in the network to which the projector is connected, additionally set [IP ADDRESS※], [SUBNETMASK※] and [DEFAULT GATEWAY※].
※“Glossary” (See page 70)
A wired LAN and wireless LAN cannot be used in the same segment.
53