1. Installation
Installing the BitStorm 2600 on a Wall
Wall mounting requires two wood screws suitable for the weight of the fully cabled unit. These are not included. Use at a minimum
 Procedure
To install the BitStorm 2600 on a wall:
1.Identify the
2.Orient the unit so that the bottom is facing you and the faceplate is at the top.
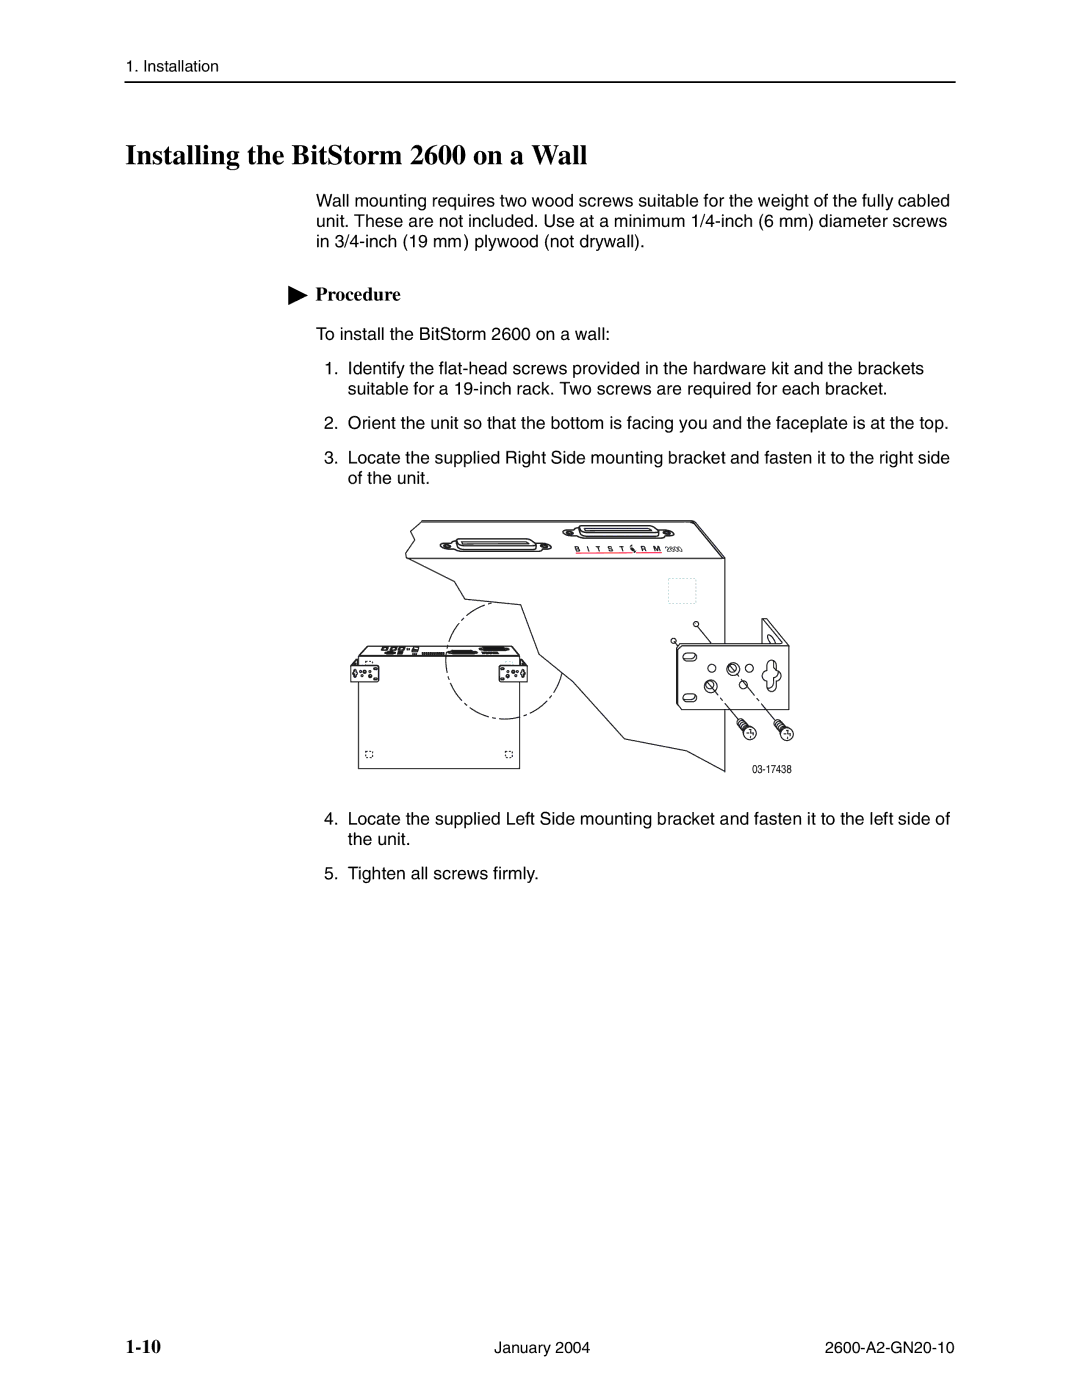
3.Locate the supplied Right Side mounting bracket and fasten it to the right side of the unit.
![]() 2600
2600
4.Locate the supplied Left Side mounting bracket and fasten it to the left side of the unit.
5.Tighten all screws firmly.
January 2004 |