Front and rear panel
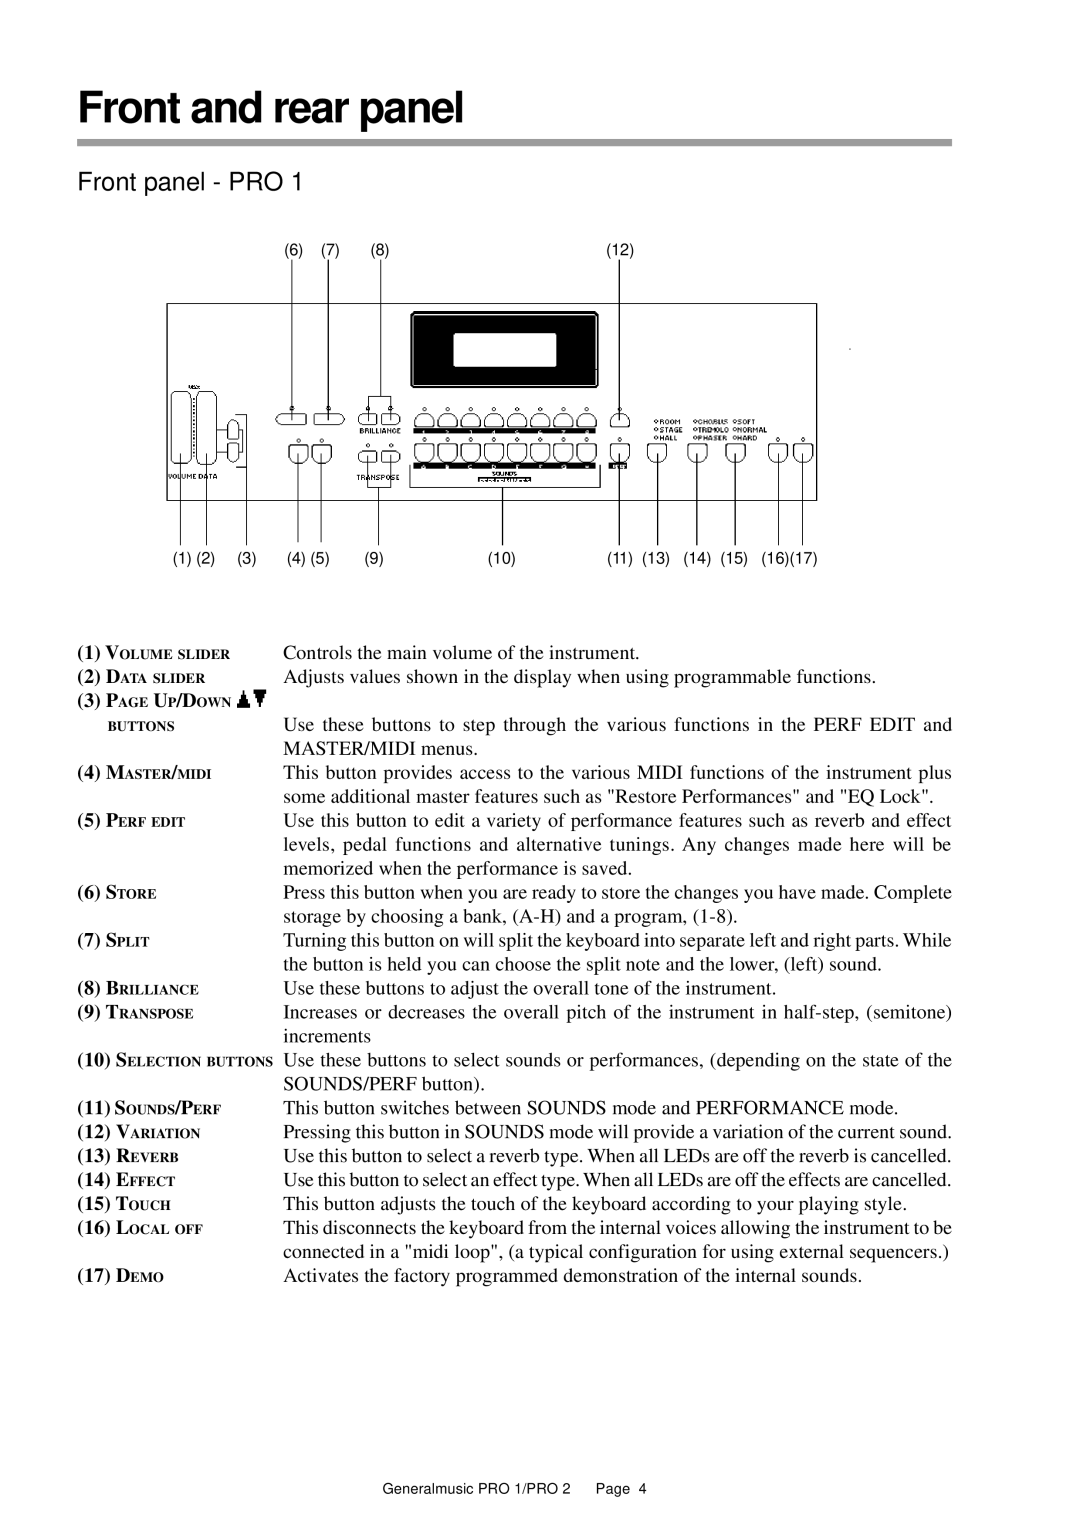
Front panel - PRO 1
(6) | (7) | (8) | (12) |
(1) (2) | (3) | (4) (5) | (9) | (10) | (11) | (13) | (14) | (15) | (16)(17) |
(1)VOLUME SLIDER Controls the main volume of the instrument.
(2) DATA SLIDER | Adjusts values shown in the display when using programmable functions. |
(3)PAGE UP/DOWN ![]()
![]()
BUTTONS | Use these buttons to step through the various functions in the PERF EDIT and |
| MASTER/MIDI menus. |
(4)MASTER/MIDIThis button provides access to the various MIDI functions of the instrument plus
|
| some additional master features such as "Restore Performances" and "EQ Lock". |
(5) | PERF EDIT | Use this button to edit a variety of performance features such as reverb and effect |
|
| levels, pedal functions and alternative tunings. Any changes made here will be |
|
| memorized when the performance is saved. |
(6) | STORE | Press this button when you are ready to store the changes you have made. Complete |
|
| storage by choosing a bank, |
(7) | SPLIT | Turning this button on will split the keyboard into separate left and right parts. While |
|
| the button is held you can choose the split note and the lower, (left) sound. |
(8) | BRILLIANCE | Use these buttons to adjust the overall tone of the instrument. |
(9) TRANSPOSE | Increases or decreases the overall pitch of the instrument in | |
|
| increments |
(10)SELECTION BUTTONS Use these buttons to select sounds or performances, (depending on the state of the SOUNDS/PERF button).
(11)SOUNDS/PERFThis button switches between SOUNDS mode and PERFORMANCE mode.
(12) | VARIATION | Pressing this button in SOUNDS mode will provide a variation of the current sound. |
(13) | REVERB | Use this button to select a reverb type. When all LEDs are off the reverb is cancelled. |
(14) | EFFECT | Use this button to select an effect type. When all LEDs are off the effects are cancelled. |
(15) TOUCH | This button adjusts the touch of the keyboard according to your playing style. | |
(16) | LOCAL OFF | This disconnects the keyboard from the internal voices allowing the instrument to be |
|
| connected in a "midi loop", (a typical configuration for using external sequencers.) |
(17) | DEMO | Activates the factory programmed demonstration of the internal sounds. |