1.5 CONTROLLING AUXILIARIES

1.5.1 Activating Switcher Auxiliaries, F1-F3

Three function keys (F1-F3) manually control the three auxiliaries that can be connected to the CM9760-SAT. To operate an auxiliary, press an F1-F3button. Know how your system is configured and programmed before operating auxiliaries.

• For momentary operation, pressing a key sends a micropulse to the equipment connected to the auxiliary output.

• For latching operation, pressing a function key is similar to an on/off switch.

• For keyed operation, the auxiliary operates as long as the key is held down.

Even though an auxiliary is programmed to operate when there is an alarm, it can also be operated manually by pressing the function key.

Figure 3-12

Activating Switcher Aux’s

1.5.2 Activating Receiver Auxiliaries, F4 AND F5

With properly equipped and correctly wired receiver auxiliaries, you can activate as many auxiliaries as allowed by the receiver from a KBD200 or KBD300/KBD300V keyboard. The F4 key acts as ON and F5 as OFF for each receiver auxiliary. If a receiver has multiple auxil- iaries, precede the F4 or F5 key with the appropriate auxiliary number from the number pad.

Figure 3-13

Activating Receiver Aux’s

2.0 9760-SAT OPERATIONS

2.1 SELECTING LINK (SATELLITE) CAMERAS

Link cameras connected to a CM9760-SAT are available for viewing by any 9760 operator for which access to the camera has been parti- tioned. Link camera identification and availability is realized through the configuration of the Link Camera flat file (see Section 2, 3.3 LINK CAMERAS FILE ). Cameras listed in the Link Cameras file are accessed just as those listed in the Cameras configuration file; namely, by using the associated logical number entered for each listed camera. The logical number is the call-reference used for keyboard command and control operations by 9760 keyboard operators to call-up satellite (link cameras).

2.1.1 Calling Link Cameras

To call a specific link camera to a 9760 system monitor from a 9760 keyboard, do the following:

a.Be sure the monitor you wish to use to view the display is available and selected.

b.Enter the logical number of the link camera that you wish to call into the keypad of the 9760-KBD and press the CAM button. The referenced camera display should appear on the monitor.

NOTE: You can call up all link cameras attached to all SATs within a node from the same operator position, one at a time, if you want. Access to the camera called must have been granted beforehand (see Section 2, 3.3 Link Cameras File).

2.1.2 Cycling Through Link Cameras

Link camera entries can also be accessed by cycling through the available camera field from the 9760 keyboard by pressing the FWD or BWD buttons.

IMPORTANT: Any time another link camera is called by the same operator to a different monitor on the 9760 SIDE of a configura- tion without releasing control of a previously called camera, the next available tie line is utilized. Conceivably, a single operator could quickly lock up all available tie lines.

3-4C1510M-A (2/03)

SECTION 3

Page 39
Image 39
Pelco C1501M, C1503M, C549M-A, C542M-B, C538M, C544M SAT Operations, Controlling Auxiliaries, Selecting Link Satellite Cameras

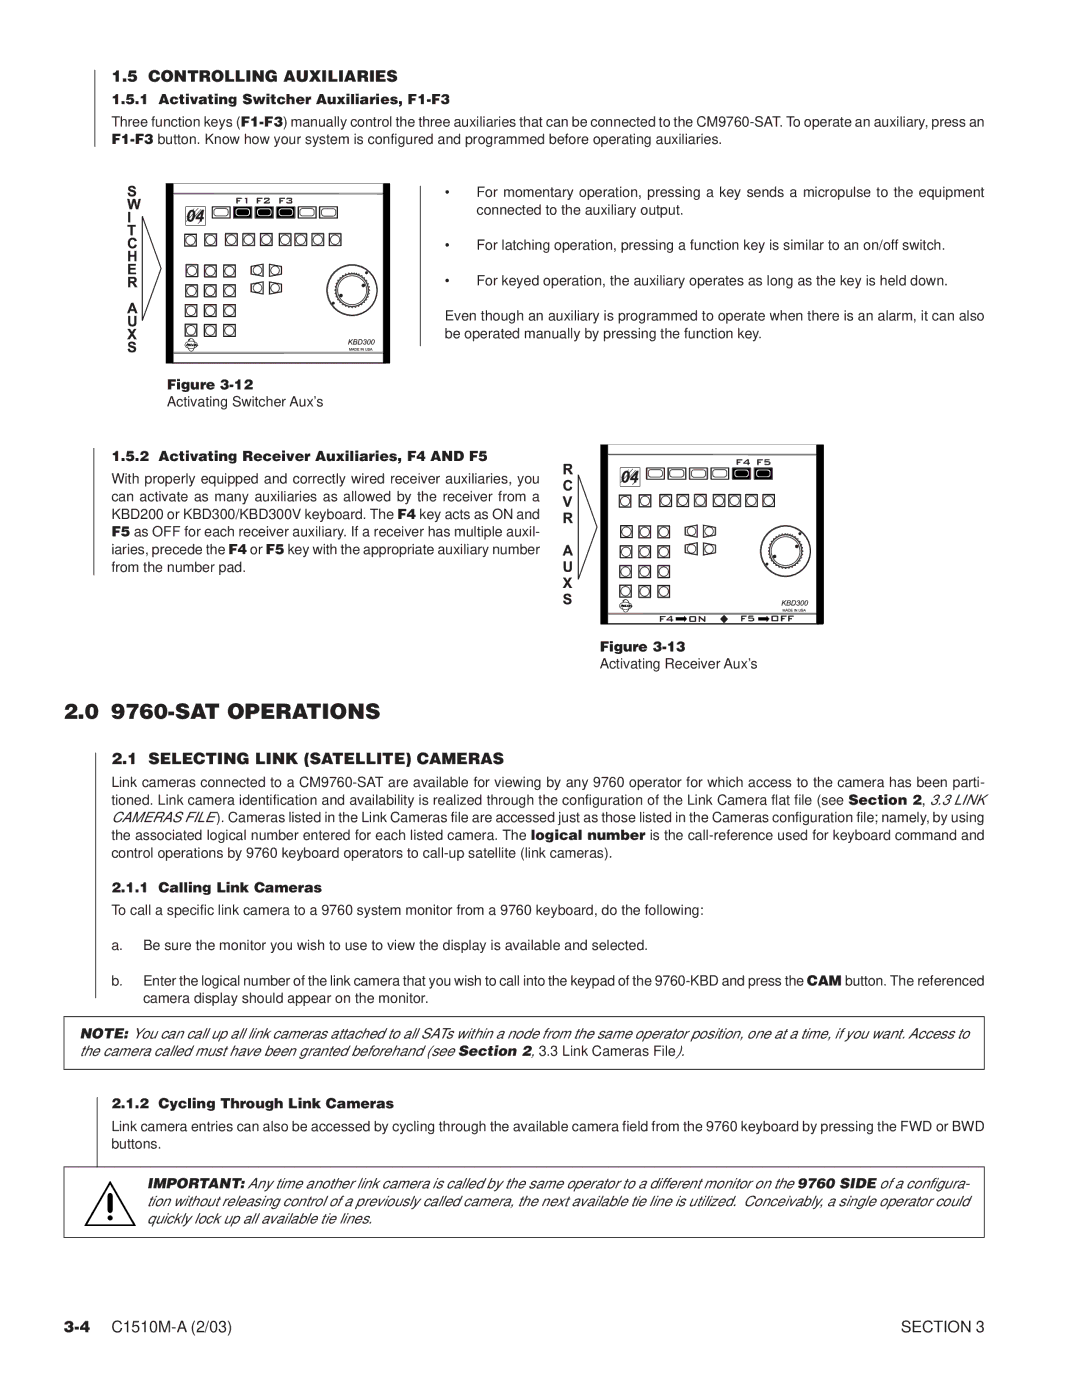
C578M, C572M, C539M-A, C543M-A, C579M specifications

Pelco, a leader in advanced video surveillance technology, offers a range of high-performance cameras designed to meet the diverse needs of professional security applications. The Pelco C578M, C1501M, C573M-D, C539M-A, and C572M models represent the latest innovations in surveillance technology, combining superior image quality, robustness, and flexibility.

The Pelco C578M is a high-resolution dome camera equipped with advanced features such as digital noise reduction and wide dynamic range, ensuring clear images in varying lighting conditions. Its 4MP image sensor provides exceptional detail, making it ideal for critical environments where clarity is paramount. The C578M supports H.265 compression technology, significantly reducing bandwidth and storage requirements while maintaining superior image quality.

The C1501M model is designed for outdoor environments, featuring an IP66-rated enclosure to withstand harsh weather. This camera comes with a 2MP resolution and a 3.6mm fixed lens, providing a wide field of view. Its built-in infrared capabilities enable night vision, allowing for effective surveillance even in complete darkness, making it an ideal choice for perimeter security.

Next, the C573M-D offers dual functionality with its PTZ capabilities. This camera can pan, tilt, and zoom, allowing for flexible monitoring of large areas. With a 5MP resolution, it captures detailed images that are essential for identifying subjects in diverse scenes. The C573M-D is equipped with analytics features such as motion detection and line crossing, enhancing its capability to react to potential security threats.

The C539M-A is notable for its advanced analytics integration, which enables intelligent video analysis. Featuring a wide-angle lens and 4MP resolution, this camera excels in applications requiring both broad coverage and detailed monitoring. The built-in audio support further enhances situational awareness, making it a versatile tool for comprehensive surveillance.

Lastly, the C572M boasts a compact design without compromising on performance. This camera features a 4MP image sensor and is ideal for discreet installations. Its ability to operate seamlessly with existing security infrastructures via ONVIF compatibility enhances its appeal for system integrators.

In conclusion, Pelco’s C578M, C1501M, C573M-D, C539M-A, and C572M cameras exemplify cutting-edge surveillance technology. Each model offers unique features tailored to different security challenges, ensuring that users can find the right solution for their specific needs without compromising on quality or performance. Whether for indoor or outdoor applications, these cameras represent Pelco’s commitment to providing reliable and effective security solutions.