Configuring the System
Before you use the DX4000 to record and monitor video, you should configure the system settings discussed below.
DATE AND TIME
The Date/Time menu contains the following options for controlling date and time on the DX4000:
•Date: Choose this option to set the date on the DX4000. This date establishes the internal calendar for the DX4000, and all recorded video is based on this setting.
•Date Format: Choose a date format that you want to display on the video panels. This format is saved with the video as it is recorded. Choices are yyyy/mm/dd, mm/dd/yyyy, and dd/mm/yyyy.
•Time: Choose this option to set the current time on the DX4000. This time establishes the internal clock on the DX4000, and all recorded video is based on this setting.
•Time Format: Choose a time format that you want to display on the video panels. This format is saved with the video as it is recorded. Choices are 24 hour and AM/PM.
•Daylight Saving: Select this setting if you are in a state or country that follows daylight saving time. This setting ensures that recorded video displays the proper time when clocks are changed to reflect daylight saving time each year. You must select Daylight Saving time on both the DX4000 and the computer on which the remote agent is running. Use the Time Zone tab on the Date and Properties screen on the remote computer to adjust its clock automatically for daylight saving changes. Refer to the operation manual for instructions on configuring the system from the remote agent application.
•Time Zone: Select the time zone in which the DX4000 is located. Time zones are determined based on the number of hours they are offset from Greenwich Mean Time (GMT). Time zones are also associated with a major city. As you select a time, the city is listed on the line below.
To set the date and time
1.Press the Menu button on the front panel of the DX4000. The Setup screen appears.
2.Enter your password, and then press the Enter button.
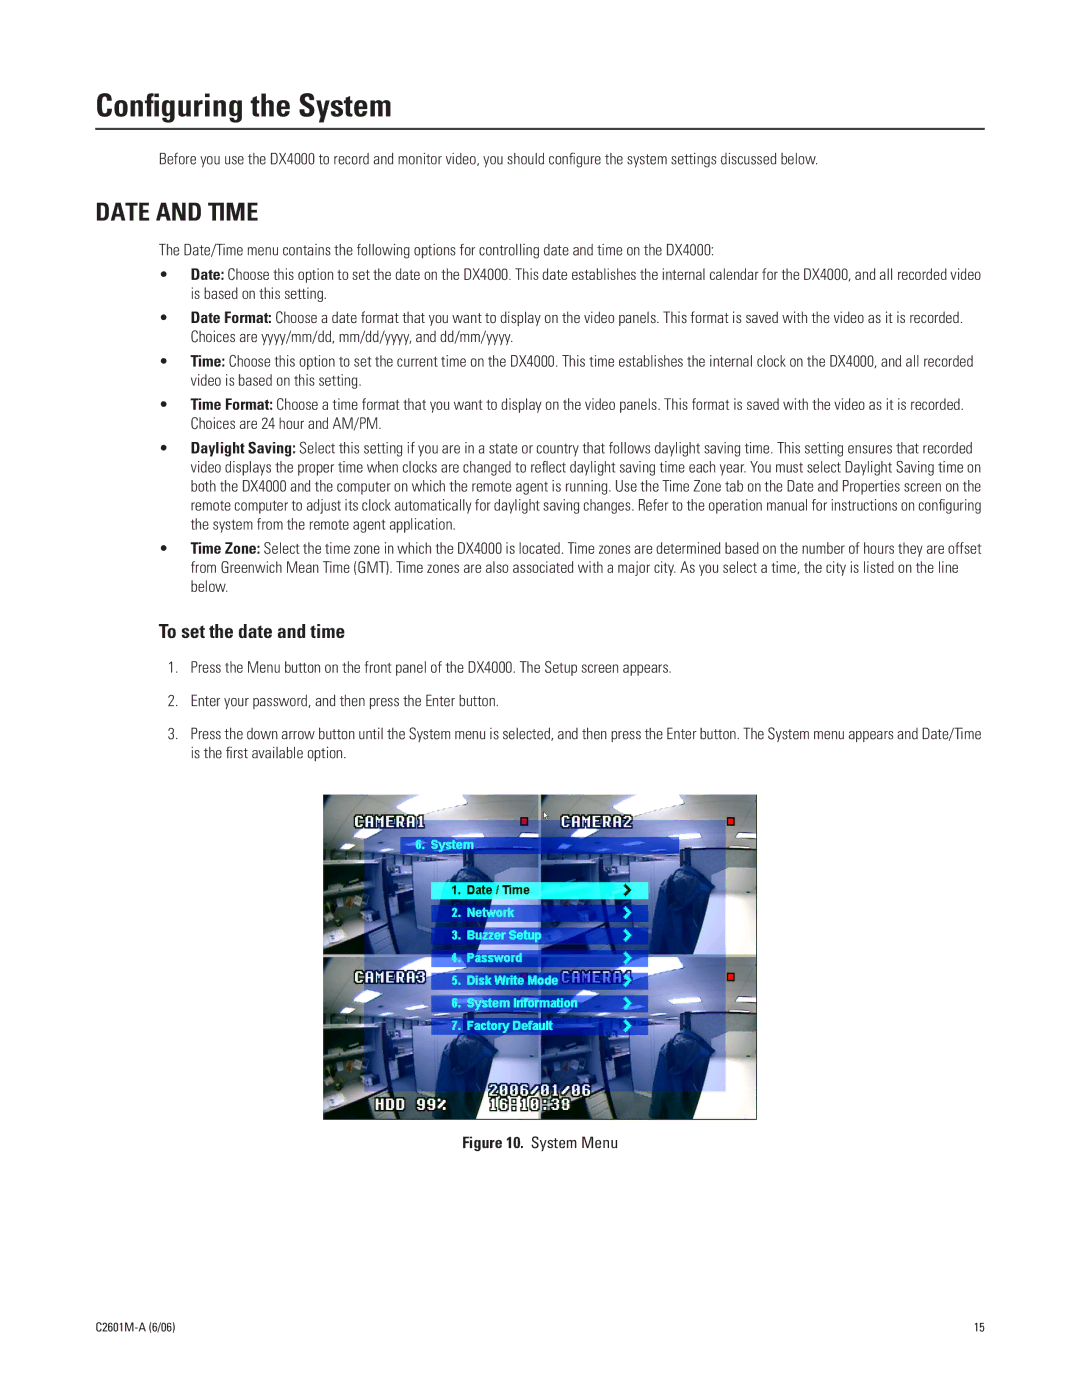
3.Press the down arrow button until the System menu is selected, and then press the Enter button. The System menu appears and Date/Time is the first available option.
Figure 10. System Menu
15 |