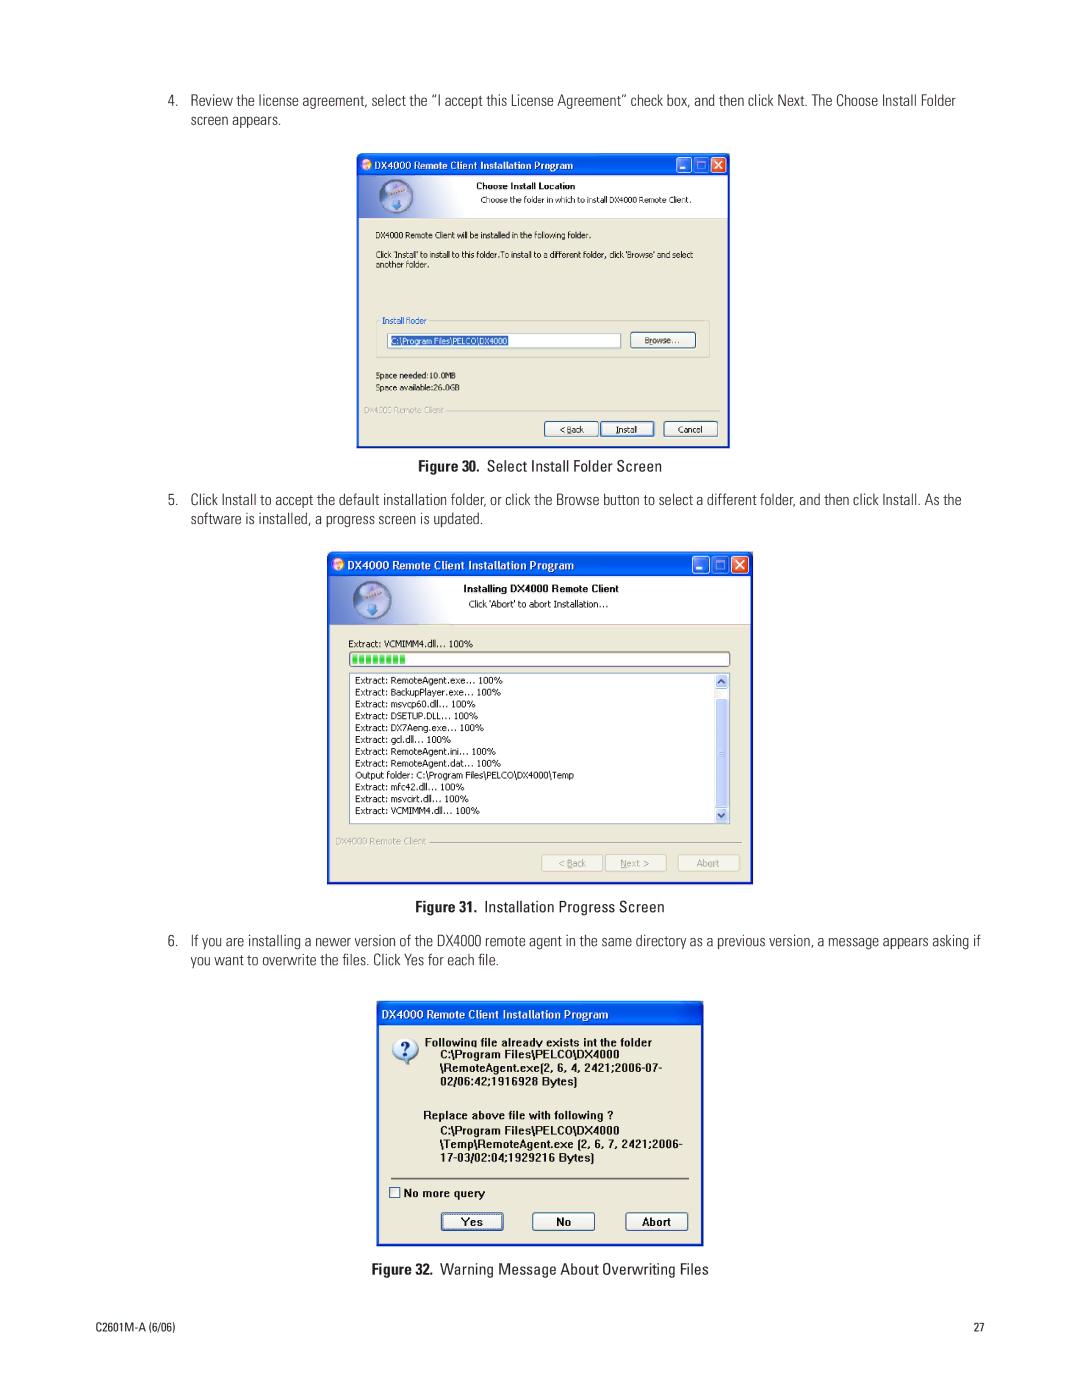
4.Review the license agreement, select the “I accept this License Agreement” check box, and then click Next. The Choose Install Folder screen appears.
Figure 30. Select Install Folder Screen
5.Click Install to accept the default installation folder, or click the Browse button to select a different folder, and then click Install. As the software is installed, a progress screen is updated.
Figure 31. Installation Progress Screen
6.If you are installing a newer version of the DX4000 remote agent in the same directory as a previous version, a message appears asking if you want to overwrite the files. Click Yes for each file.
Figure 32. Warning Message About Overwriting Files
| 27 |
