2. Setting up the monitor |
|
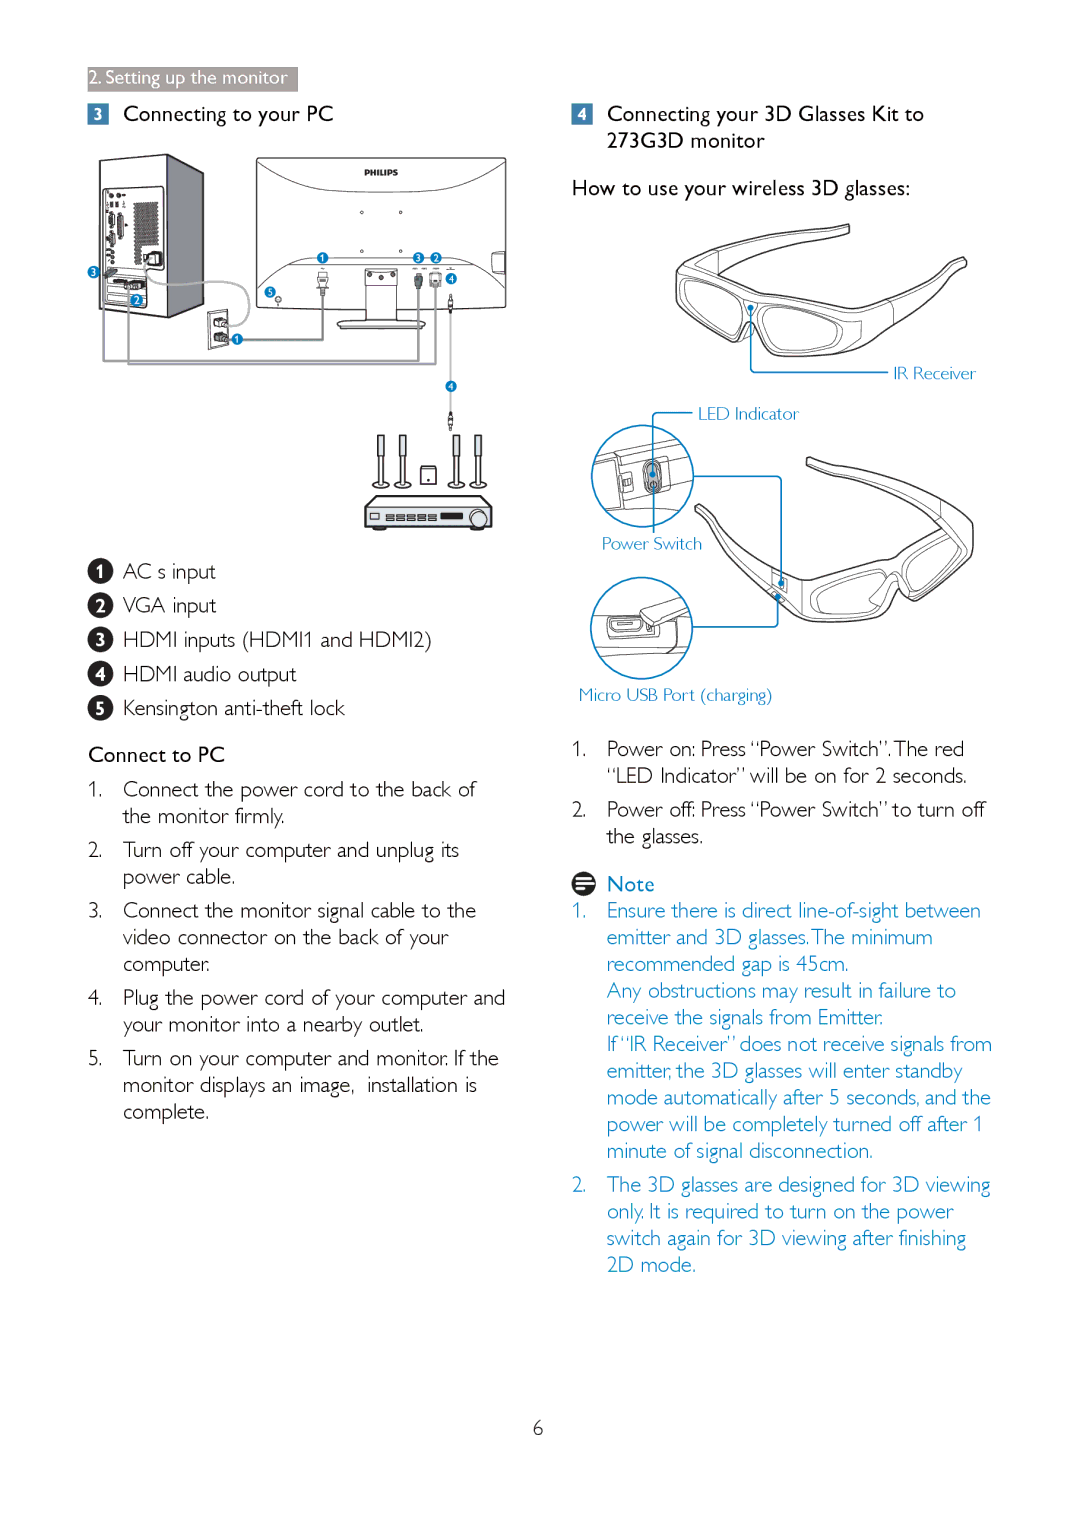
Connecting to your PC | Connecting your 3D Glasses Kit to |
| 273G3D monitor |
| How to use your wireless 3D glasses: |
4 |
5 |
4 |
IR Receiver
LED Indicator
1AC s input
2VGA input
3HDMI inputs (HDMI1 and HDMI2)
4HDMI audio output
5Kensington
Connect to PC
1.Connect the power cord to the back of the monitor firmly.
2.Turn off your computer and unplug its power cable.
3.Connect the monitor signal cable to the video connector on the back of your computer.
4.Plug the power cord of your computer and your monitor into a nearby outlet.
5.Turn on your computer and monitor. If the monitor displays an image, installation is complete.
Power Switch
Micro USB Port (charging)
1.Power on: Press “Power Switch”.The red “LED Indicator” will be on for 2 seconds.
2.Power off: Press “Power Switch” to turn off the glasses.
![]() Note
Note
1.Ensure there is direct
Any obstructions may result in failure to receive the signals from Emitter.
If “IR Receiver” does not receive signals from emitter, the 3D glasses will enter standby mode automatically after 5 seconds, and the power will be completely turned off after 1 minute of signal disconnection.
2.The 3D glasses are designed for 3D viewing only. It is required to turn on the power switch again for 3D viewing after finishing 2D mode.
6