![]() Note
Note
•The type plate is located on the back of this player.
1 Connect the AC power cable to the wall
socket.
» This player is ready to be set up for use.
4 Get started
![]() Caution
Caution
•Use of controls or adjustments or performance of procedures other than herein may result in hazardous radiation exposure or other unsafe operation.
Always follow the instructions in this chapter in sequence.
Prepare the remote control
1Press and push the battery compartment to slide it open (see “1” in the illustration).
2Insert two AAA batteries with correct polarity
3Push and slide back the battery compartment (see “3” in the illustration).
![]() Note
Note
•If you are not going to use the remote control for a long time, remove the batteries.
•Do not mix batteries (old and new or carbon and alkaline, etc.).
•Batteries contain chemical substances, so they should be disposed of properly.
Find theTV input
1Press ![]() to turn on this player.
to turn on this player.
2Turn on the TV and switch to the video input (refer to the TV user manual on how to select the A/V input).
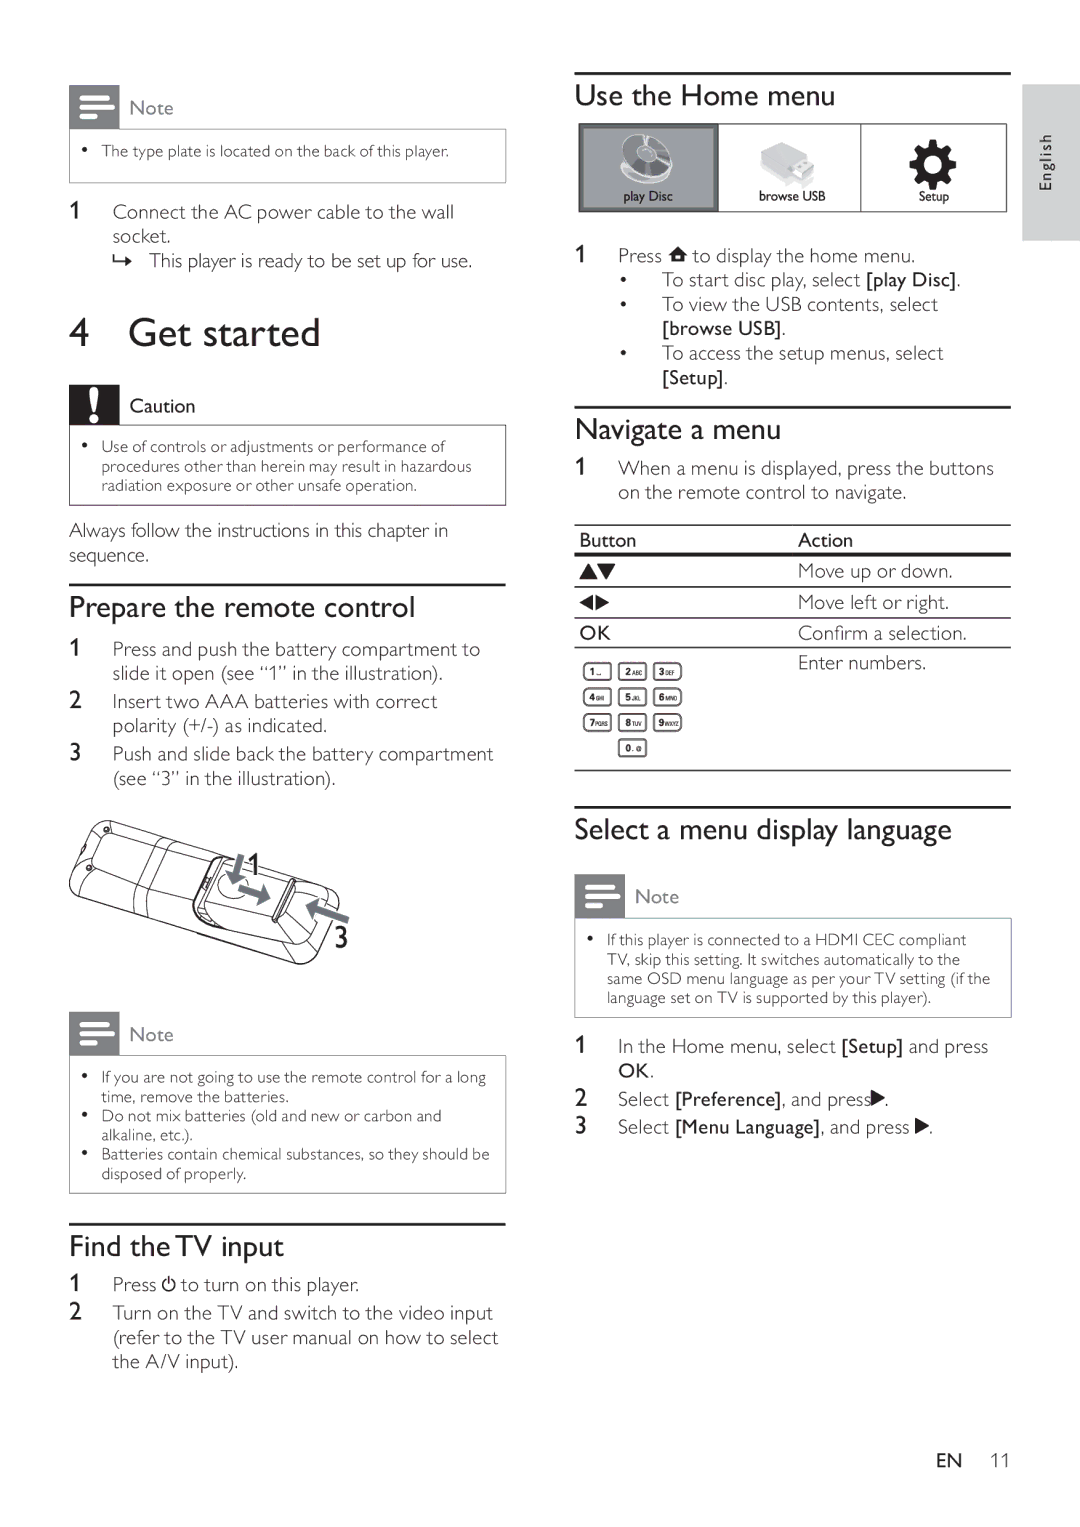
Use the Home menu
English
1 Press ![]() to display the home menu.
to display the home menu.
•To start disc play, select [play Disc].
•To view the USB contents, select [browse USB].
•To access the setup menus, select [Setup].
Navigate a menu
1When a menu is displayed, press the buttons on the remote control to navigate.
Button |
|
| Action | |||
|
|
|
|
|
| Move up or down. |
|
|
|
|
|
| Move left or right. |
OK |
|
| Confirm a selection. | |||
|
|
|
|
|
| Enter numbers. |
|
|
|
|
|
| |
|
|
|
|
|
|
|
|
|
|
|
|
|
|
|
|
|
|
|
|
|
|
|
|
|
|
|
|
|
|
|
|
|
|
|
|
|
|
|
|
|
|
|
|
|
|
|
|
|
|
|
|
|
|
|
|
|
|
|
|
|
|
|
Select a menu display language
![]() Note
Note
•If this player is connected to a HDMI CEC compliant TV, skip this setting. It switches automatically to the same OSD menu language as per your TV setting (if the language set on TV is supported by this player).
1 In the Home menu, select [Setup] and press OK.
2Select [Preference], and press![]() .
.
3 Select [Menu Language], and press ![]() .
.
EN 11