5Use more of your camcorder
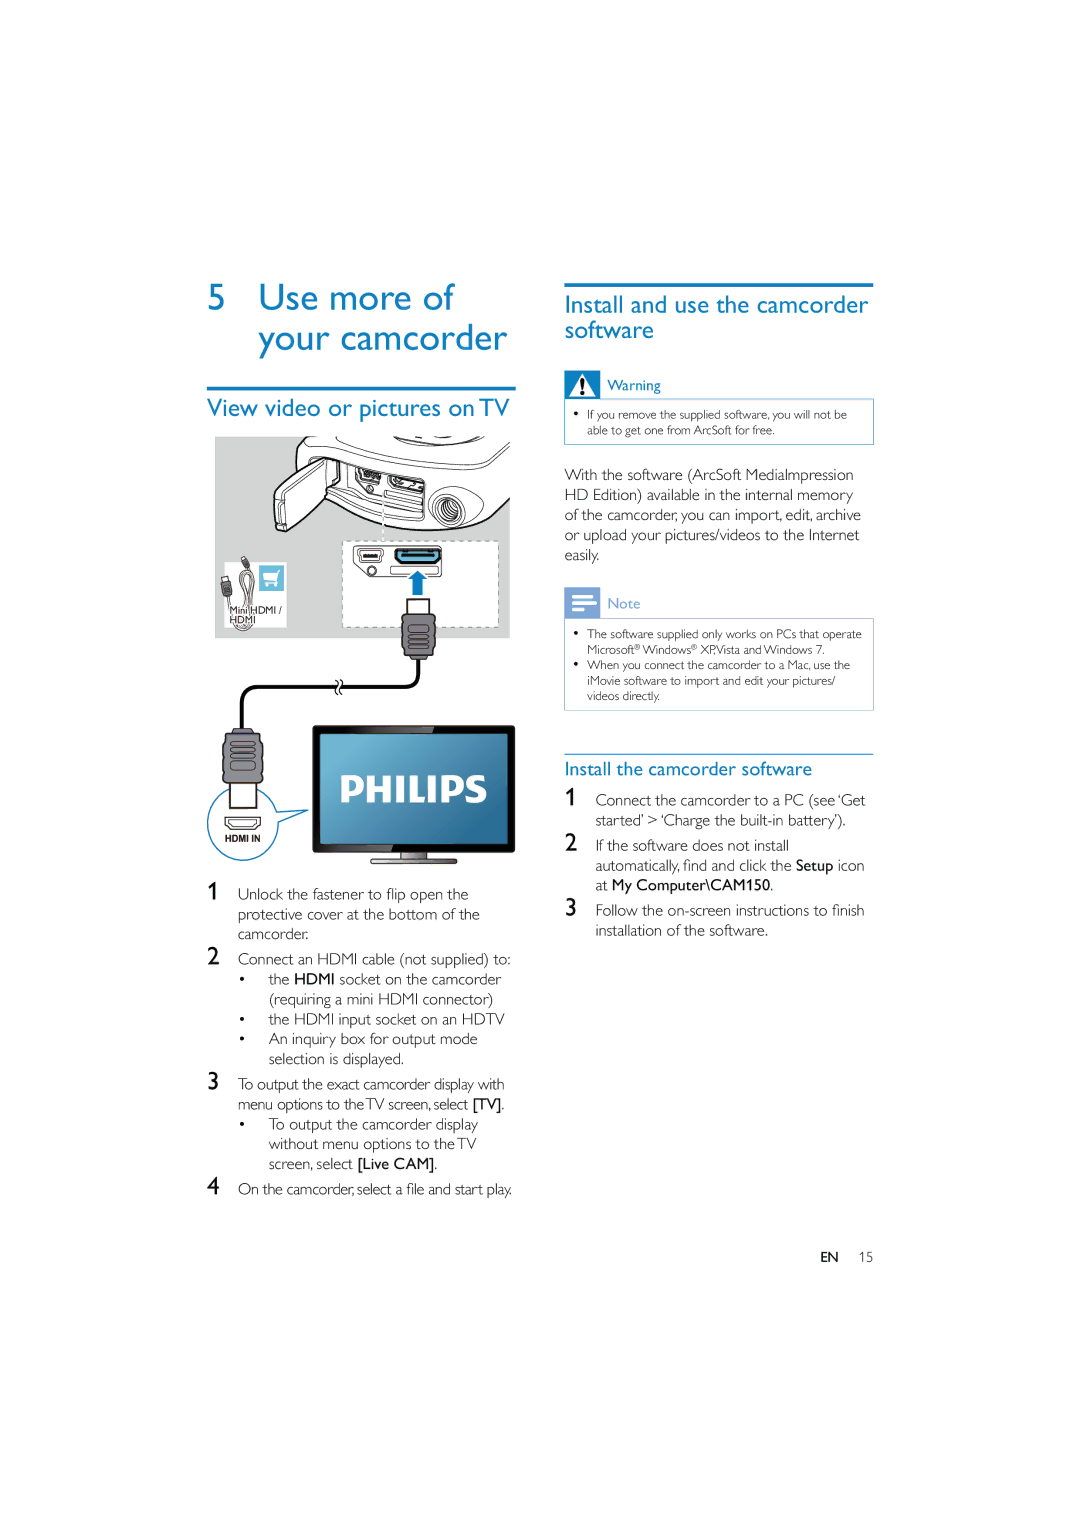
View video or pictures on TV
Mini HDMI /
HDMI
Install and use the camcorder software
![]() Warning
Warning
•If you remove the supplied software, you will not be able to get one from ArcSoft for free.
With the software (ArcSoft MediaImpression HD Edition) available in the internal memory of the camcorder, you can import, edit, archive or upload your pictures/videos to the Internet easily.
![]() Note
Note
•The software supplied only works on PCs that operate Microsoft® Windows® XP,Vista and Windows 7.
•When you connect the camcorder to a Mac, use the iMovie software to import and edit your pictures/ videos directly.
1Unlock the fastener to flip open the protective cover at the bottom of the camcorder.
2Connect an HDMI cable (not supplied) to:
•the HDMI socket on the camcorder (requiring a mini HDMI connector)
•the HDMI input socket on an HDTV
•An inquiry box for output mode selection is displayed.
3To output the exact camcorder display with menu options to theTV screen, select [TV].
•To output the camcorder display without menu options to theTV screen, select [Live CAM].
4 On the camcorder, select a file and start play.
Install the camcorder software
1Connect the camcorder to a PC (see ‘Get started’ > ‘Charge the
2If the software does not install automatically, find and click the Setup icon at My Computer\CAM150.
3Follow the
EN 15
