
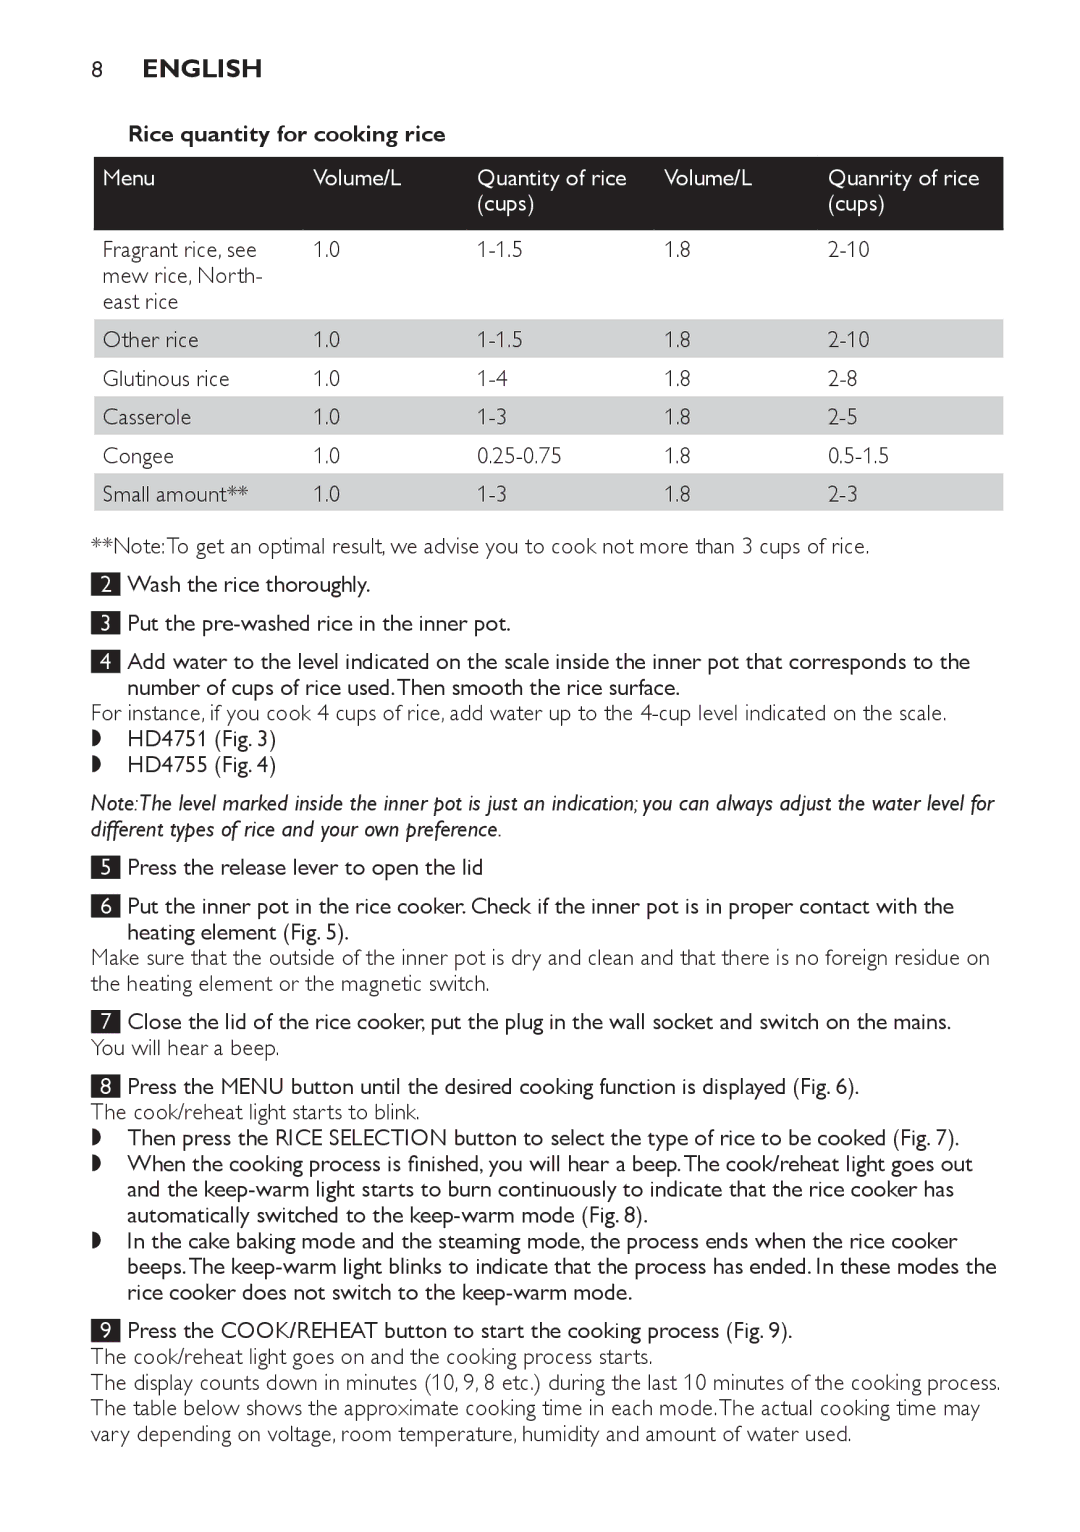
HD4751, HD4755 specifications
The Philips HD4755 and HD4751 are notable coffee makers from Philips, designed to enhance the coffee brewing experience with their user-friendly features and innovative technologies. Both models are part of Philips’ commitment to delivering high-quality appliances that cater to the needs of coffee lovers.One of the main features of the HD4755 and HD4751 is their capacity to brew up to 15 cups of coffee in one cycle, making them ideal for households or gatherings. The large 1.2-liter water tank ensures that you can serve multiple cups without needing to refill frequently, providing convenience for both everyday use and special occasions.
Both models boast a user-friendly interface, featuring an intuitive control panel that allows for easy operation. The LCD display, coupled with clearly marked buttons, helps users select their preferred brewing options with ease. This accessibility makes these coffee makers suitable for users of all ages, whether you are a coffee veteran or a newcomer.
In terms of brewing technology, Philips incorporates a unique AromaSwirl feature in both models, which ensures that coffee is evenly distributed and mixed during the brewing process. This technology enhances the flavor profile of your coffee, allowing for a rich and aromatic experience. With the built-in water filter, users can enjoy cleaner, better-tasting coffee by effortlessly reducing impurities in the water.
The HD4755 and HD4751 also emphasize energy efficiency with their auto shut-off feature, which kicks in after a predefined period of inactivity. This not only conserves energy but also promotes safety, giving users peace of mind.
Maintenance is simple with these models, as they have a removable filter holder and a non-stick warming plate that makes cleaning straightforward. Additionally, both models include a drip-stop function, allowing you to pour a cup mid-brew without making a mess.
Overall, the Philips HD4755 and HD4751 are versatile coffee makers equipped with practical features and advanced brewing technologies. They provide an excellent option for anyone looking to enjoy a delicious cup of coffee with minimal effort, making them a smart addition to any kitchen. Whether you’re hosting guests or savoring a quiet morning brew, these coffee makers are engineered to deliver satisfaction with every cup.