11 Appendix
Mount to a wall
![]() Caution
Caution
•Risk of product damage! Always consult professional personnel to safely mount the product to a wall.
•Risk of injury! Ensure that no supply ducts such as gas, water or electricity are harmed when you drill the holes.
What’s in the supplied mounting kit
4 x wall mount screws (2 for main unit, 2 for speakers)
What else you’ll need
•Electric drill
•Screwdriver
•Pencil
Mount the main unit and speakers
![]() Caution
Caution
•Mount the main unit and speakers to a solid concrete wall or plaster board wall only!
You can mount the main unit and speakers to the wall.
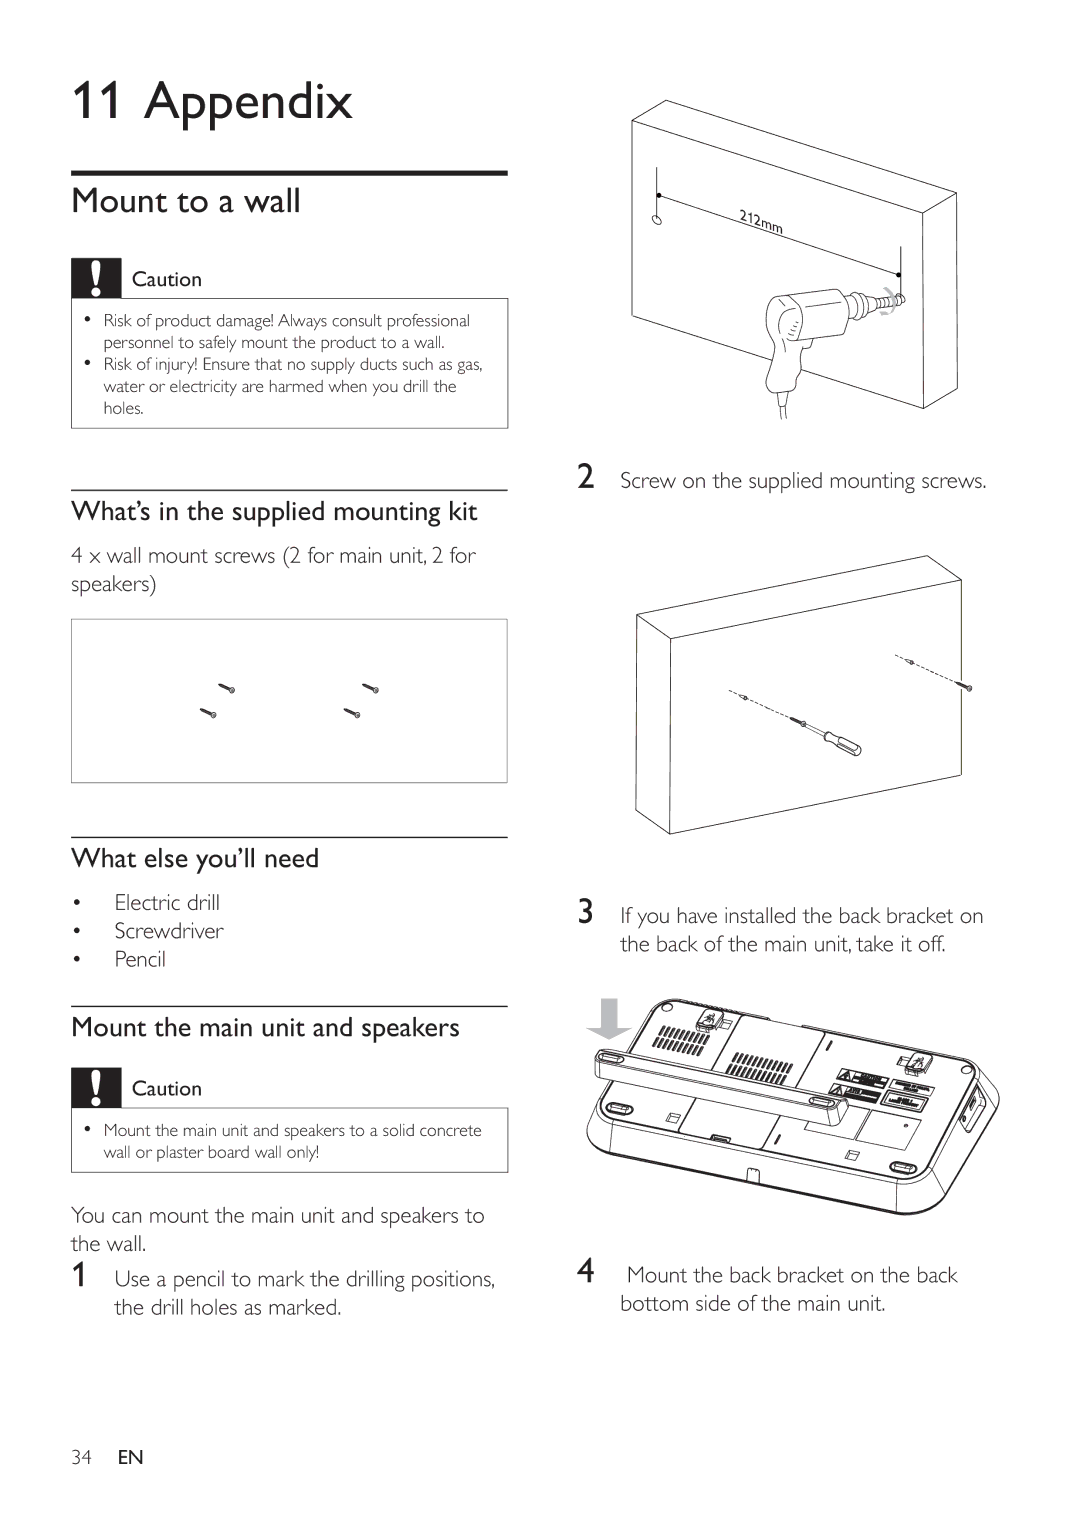
1Use a pencil to mark the drilling positions, the drill holes as marked.
2Screw on the supplied mounting screws.
3If you have installed the back bracket on the back of the main unit, take it off.
4Mount the back bracket on the back bottom side of the main unit.
34EN