Connections
Step 1: Set up the speakers | Step 2: Connecting speakers | ||
|
| and subwoofer |
|
| Front |
| Front |
| Right | Center | |
| Left | ||
AUDIO
~AC | FRONT CENTER | FRONT | REAR | REAR SUB- |
MAINS | RIGHT | LEFT | RIGHT | LEFT |
SPEAKERS (4 )
TV IN
Rear Right | Rear Left | Subwoofer |
E n g l i s h
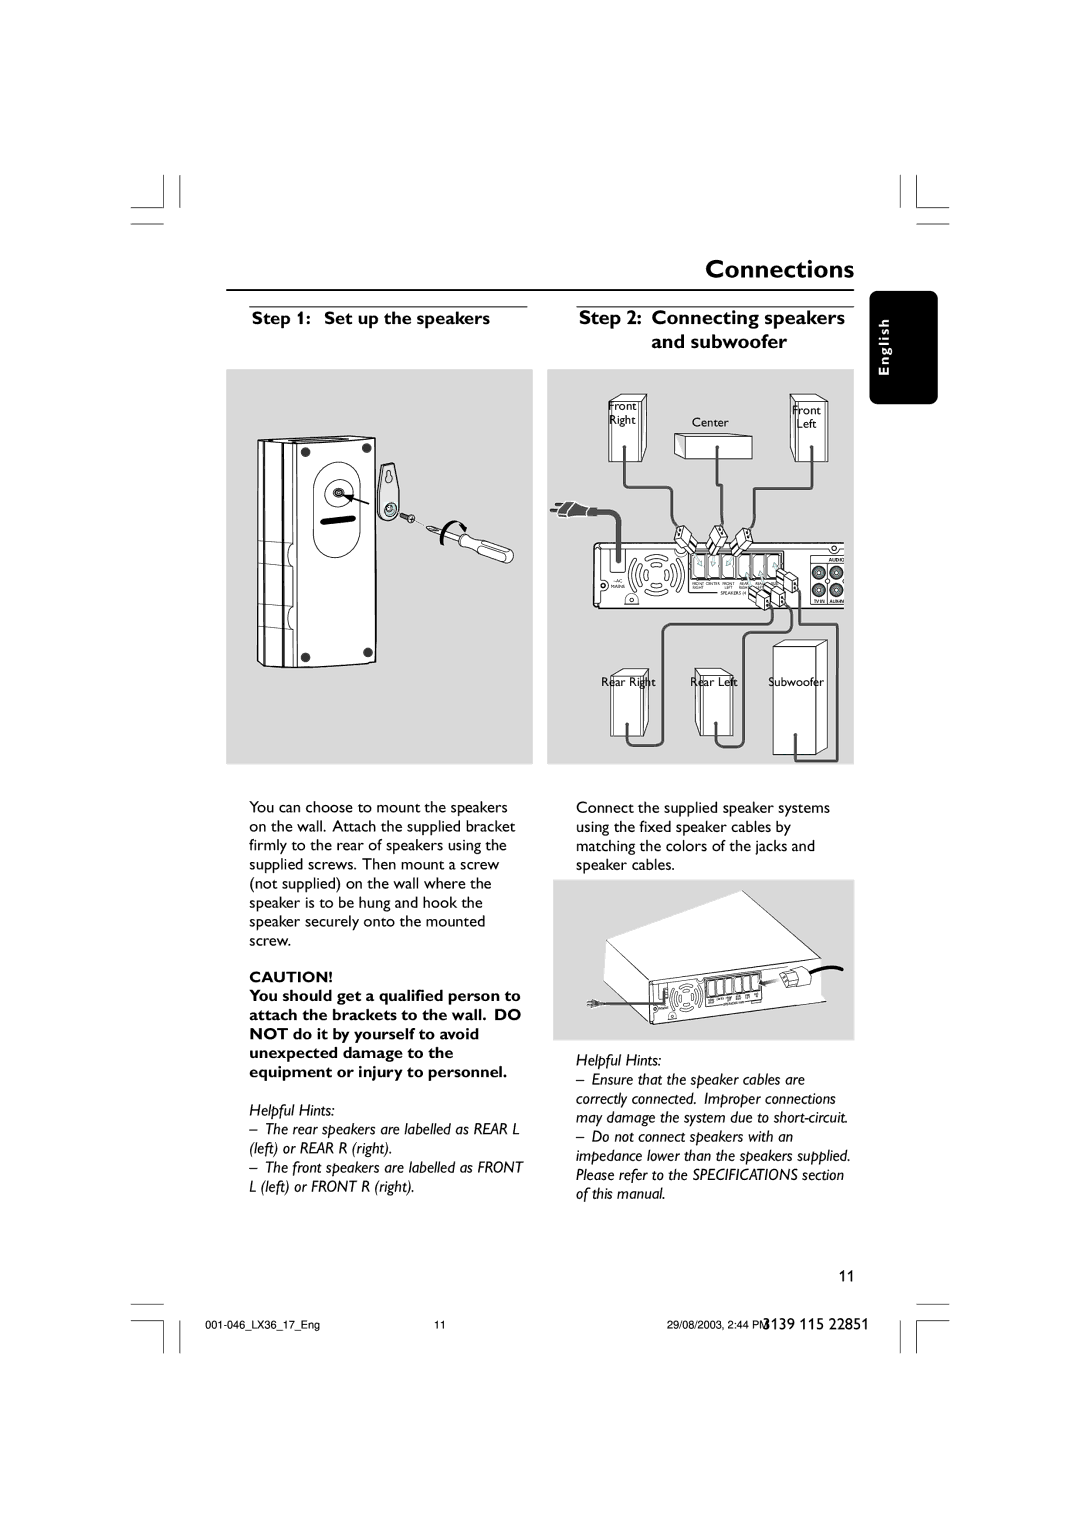
You can choose to mount the speakers on the wall. Attach the supplied bracket firmly to the rear of speakers using the supplied screws. Then mount a screw (not supplied) on the wall where the speaker is to be hung and hook the speaker securely onto the mounted screw.
CAUTION!
You should get a qualified person to attach the brackets to the wall. DO NOT do it by yourself to avoid unexpected damage to the equipment or injury to personnel.
Helpful Hints:
–The rear speakers are labelled as REAR L (left) or REAR R (right).
–The front speakers are labelled as FRONT L (left) or FRONT R (right).
Connect the supplied speaker systems using the fixed speaker cables by matching the colors of the jacks and speaker cables.
|
|
| SURR. | SURR. | SUB- | |
FRONT | CENTER | FRONT | LEFT | W | ||
LEFT | RIGHT | ) |
| |||
RIGHT | SPEAKERS | (4 |
| |||
~AC |
|
|
| |||
MAINS |
|
|
|
|
|
|
Helpful Hints:
–Ensure that the speaker cables are correctly connected. Improper connections may damage the system due to
–Do not connect speakers with an impedance lower than the speakers supplied. Please refer to the SPECIFICATIONS section of this manual.
11
11 | 3139 115 22851 | |
29/08/2003, 2:44 PM |
