E n g l i s h
Connections (Optional)
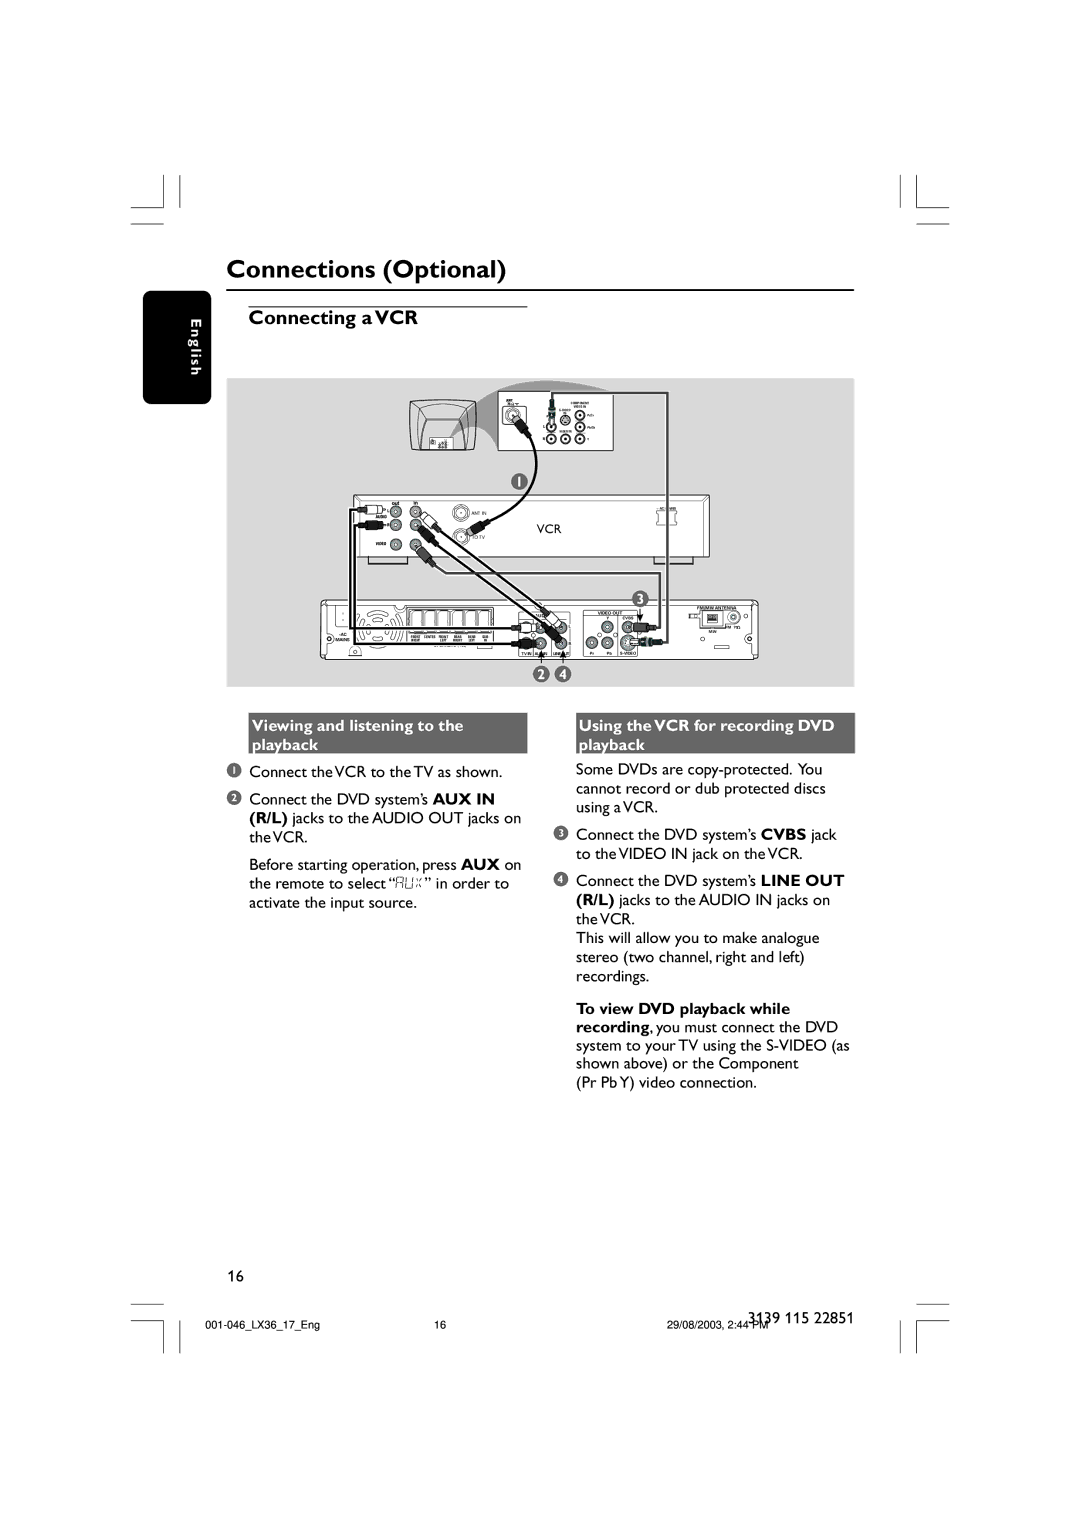
Connecting a VCR
ANT IN
TO TV
~AC | FRONT | CENTER FRONT | REAR | REAR | SUB- |
MAINS | RIGHT | LEFT | RIGHT | LEFT | W |
SPEAKERS (4 )
| COMPONENT |
| |
| VIDEO IN |
| |
|
|
| |
AUDIO | IN | Pr/Cr |
|
|
| ||
OUT |
|
|
|
|
| Pb/Cb |
|
| VIDEO IN |
|
|
|
| Y |
|
1 |
|
|
|
|
|
| ~ AC MAINS |
VCR |
|
| |
|
|
| 3 |
AUDIO |
| VIDEO OUT |
|
| Y | CVBS | |
| L |
|
|
| R |
|
|
TV IN | Pr | Pb |
2 4
FM/MW ANTENNA
FM 75
MW
Viewing and listening to the playback
1Connect the VCR to the TV as shown.
2Connect the DVD system’s AUX IN (R/L) jacks to the AUDIO OUT jacks on the VCR.
Before starting operation, press AUX on the remote to select “AUX” in order to activate the input source.
16
Using the VCR for recording DVD playback
Some DVDs are
3Connect the DVD system’s CVBS jack to the VIDEO IN jack on the VCR.
4Connect the DVD system’s LINE OUT (R/L) jacks to the AUDIO IN jacks on the VCR.
This will allow you to make analogue stereo (two channel, right and left) recordings.
To view DVD playback while recording, you must connect the DVD system to your TV using the
(Pr Pb Y) video connection.
3139 115 22851
29/08/2003, 2:44 PM