8 Rear Panel
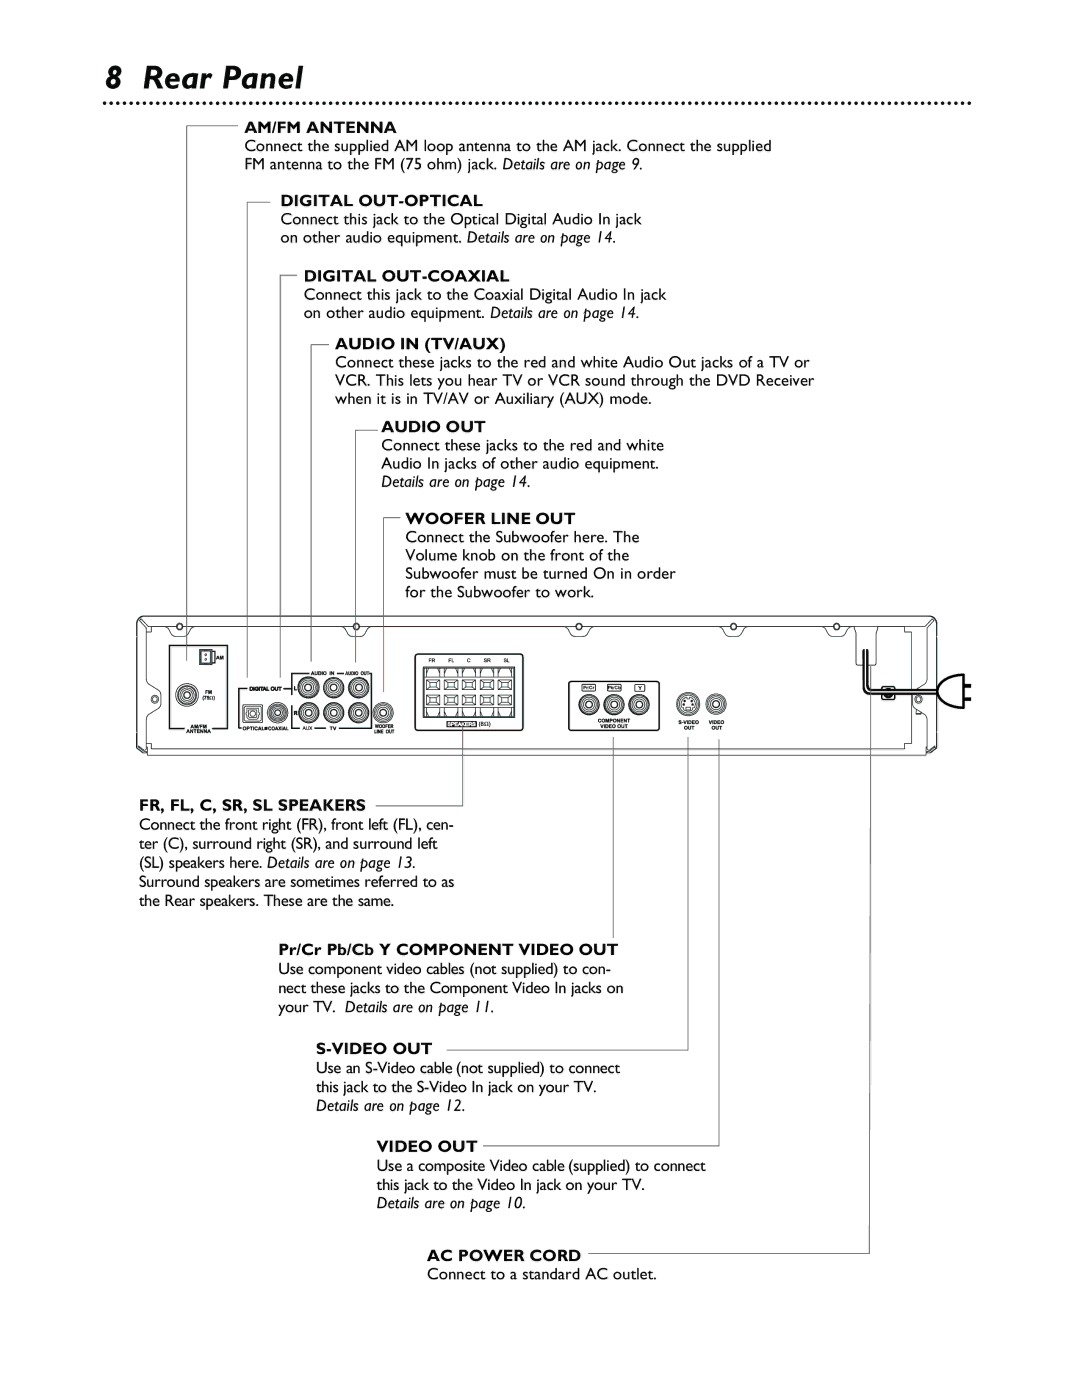
AM/FM ANTENNA
Connect the supplied AM loop antenna to the AM jack. Connect the supplied
FM antenna to the FM (75 ohm) jack. Details are on page 9.
DIGITAL OUT-OPTICAL
Connect this jack to the Optical Digital Audio In jack on other audio equipment. Details are on page 14.
DIGITAL OUT-COAXIAL
Connect this jack to the Coaxial Digital Audio In jack on other audio equipment. Details are on page 14.
AUDIO IN (TV/AUX)
Connect these jacks to the red and white Audio Out jacks of a TV or VCR. This lets you hear TV or VCR sound through the DVD Receiver when it is in TV/AV or Auxiliary (AUX) mode.
AUDIO OUT
Connect these jacks to the red and white
Audio In jacks of other audio equipment.
Details are on page 14.
WOOFER LINE OUT Connect the Subwoofer here. The Volume knob on the front of the Subwoofer must be turned On in order for the Subwoofer to work.
Pr/Cr Pb/Cb Y
FR, FL, C, SR, SL SPEAKERS
Connect the front right (FR), front left (FL), cen- ter (C), surround right (SR), and surround left (SL) speakers here. Details are on page 13. Surround speakers are sometimes referred to as the Rear speakers. These are the same.
Pr/Cr Pb/Cb Y COMPONENT VIDEO OUT Use component video cables (not supplied) to con- nect these jacks to the Component Video In jacks on your TV. Details are on page 11.
S-VIDEO OUT
Use an
VIDEO OUT
Use a composite Video cable (supplied) to connect this jack to the Video In jack on your TV.
Details are on page 10.
AC POWER CORD
