MX3600D MX3700D
Model No Serial No
Registration Card within 10 days. So please mail
Exclamation point calls
Table of Contents
Copyright Protection
Safety Information
Installation
Federal Communications Commission FCC
Introduction
Remote Control
Front Panel
Rear Panel
Connect to a standard AC outlet
Antenna Connections
First Time Setup
Where Do You Start?
To hear TV channels through the DVD Home Cinema System
Connecting to a TV with a Composite yellow Video In Jack
Hookups TV
Turn on the TV and set it to the correct Video In channel
Connect the DVD Receiver’s Pr/Cr Pb/Cb Y Component
Connecting to a TV with Component Video In Jacks
Hookups TV cont’d
Turn on the TV and set it to the correct Component Video
It is not necessary to set Video OUT to S-VIDEO
Connecting to a TV with an S-Video In jack
Turn on the TV and set it to the correct S-Video In chan
Connecting the Speakers
Hookups Speakers
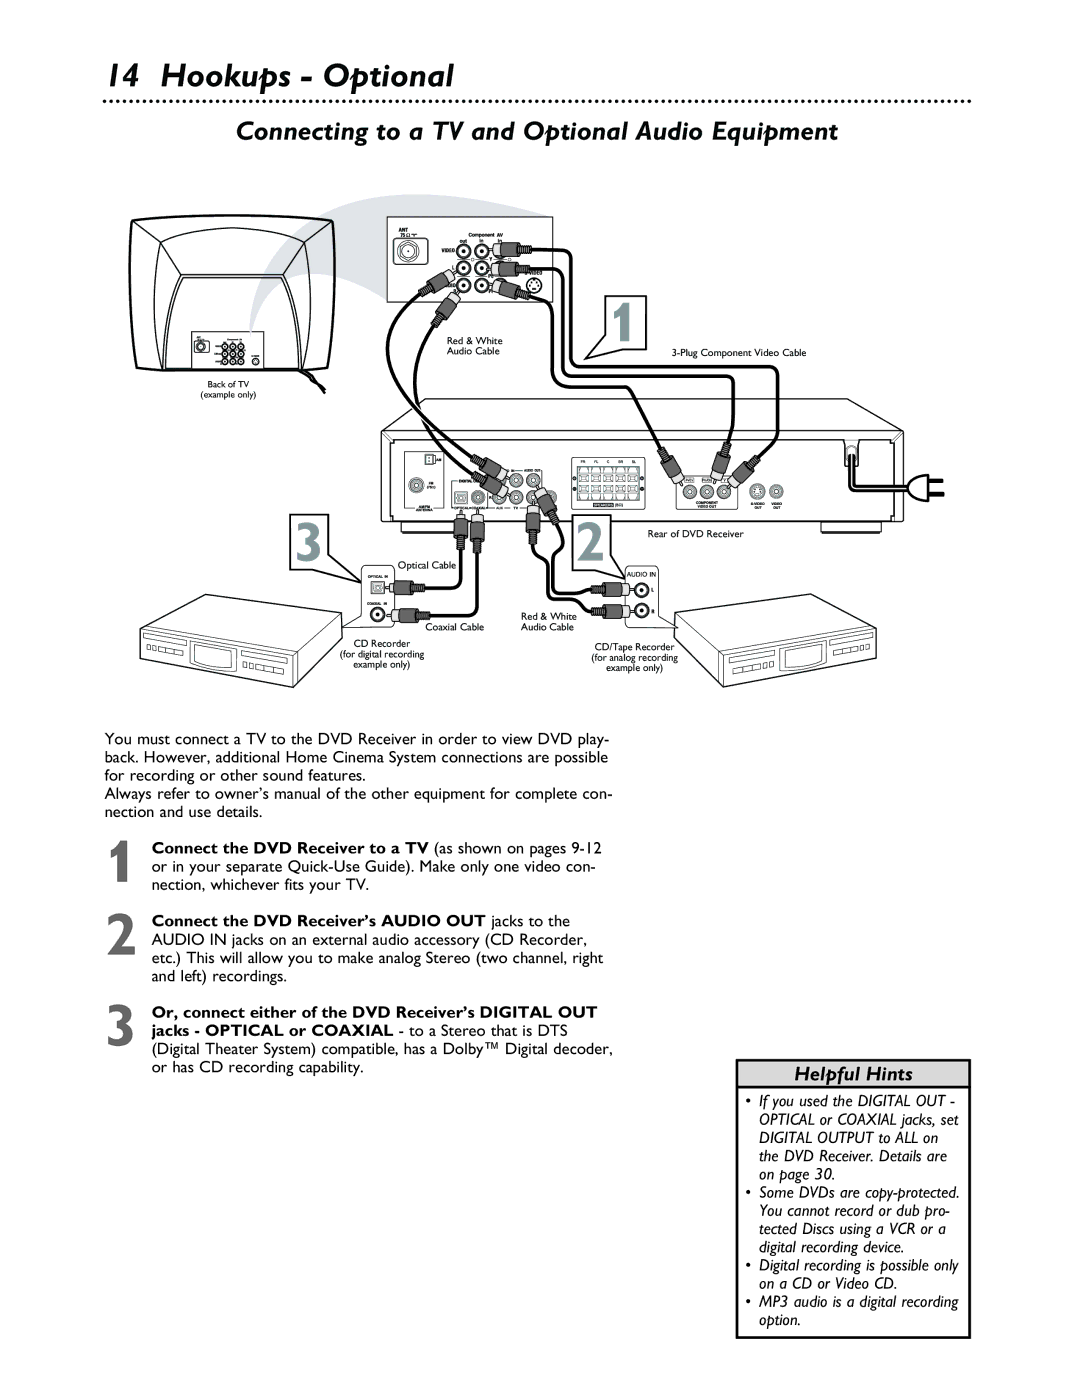
Connect the DVD Receiver to a TV as shown on pages
Connecting to a TV and Optional Audio Equipment
Hookups Optional
Connect the DVD Receiver’s Audio OUT jacks to
Audio in L/R jacks on the VCR
Connecting to a VCR or Cable/Satellite Box
Connect the DVD Receiver’s Audio OUT L/R jacks to
Connect the DVD Receiver’s Video OUT jack to the Video
Quick Disc Playback
DVD Disc Menus
Playback Features
Pausing Playback
To exit, press System Menu or OK
System Menu
System Menu Icons
Audio Language
Subtitles, Audio Language
Subtitles
Press System Menu
Searching
Slow Motion, Searching
Slow Motion
Press System Menu Press or to select Title or
Title/Chapter Selection, Time Search
Title/Chapter Selection
Press System Menu to remove the Menu Bar
Zoom
Status, Zoom
Status
Step
Angle, Step
Angle
Playback Control Video CD only
Playback Control, MP3 Features
MP3 Features
Press or to select Press 9 to select PBC on or PBC OFF
During Video CD, Audio CD, or MP3 playback, press
Repeat, Repeat A-B
During DVD playback, press Repeat on the remote to play a
To resume regular playback, press Repeat A-B again
Favorite Track Selection
While playback is stopped, press Program on the DVD
TV System NTSC, PAL
TV Shape
Video Out
Screen Saver, Video Out
Screen Saver
Scart option is not available for this DVD Receiver
Digital Output
Digital Output, Night Mode
Night Mode
Press 9 repeatedly to select z, then press
While playback is stopped, press System MENU. Press
Speaker Settings
Choose Rear Delay if
Choose Test Tone if you
Language Settings
DVD Audio, Subtitle, and Disc Menu Languages
Parental will be selected. Press
Press the Number buttons 0-9 on the remote control to
Parental Control Levels
Press 9 or 8 to select a Parental Control Level, then press
Defaults
Parental Control Password, Defaults
Parental Control Password
Are asked to enter the code for the first time
Adjusting Bass and Treble
Audio and Sound Features
Adjusting the Volume
Changing Surround Speaker Volume Levels
Press Surround repeatedly to select a surround sound
Surround Sound Options
Selecting Surround Sound
Radio Stations
Tuning Radio Stations
Selecting Preset Radio Stations
Programming Radio Stations
Sleep Timer
Helpful Hints
Helpful Hints cont’d
Front speakers/Surround speaker
Specifications
Specifications are subject to change without notice
Center Speaker
Glossary
CD Compact Disc audio
Index
Zoom
Limited Warranty
Audio System