E9017FD_EN.qx3 03.8.6 10:13 AM Page 6
Functional Overview | Setting Up your System | |
|
|
|
English
24.{ B K L
(left/right/up/down) select an item in the menu { B to choose a preset radio station (TUNER)
25.OK
acknowledge menu selection (DVD)
26.TUNER
press to put the System in TUNER mode and before using the remote control for TUNER features
27.VCR
press to put the System in VCR mode and before using the remote control for VCR features
28.RETURN
to return previous or remove setup menu (DVD)
29.CLEAR
to reset the setting (DVD) to reset the counter (VCR)
to delete last entry/Clear programmed recording (TIMER) (VCR)
30.ZOOM
enlarge DVD video image (DVD)
31.SUBTITLE
subtitle language selector (DVD)
32.ANGLE
select DVD camera angle (DVD)
33.
switch the System ON or OFF
34.DISPLAY/STATUS/EXIT
to access or remove the display screen during DVD or Audio CD playback (DVD)
to access or remove VCR’s
Basic Connections
•Please refer to the instruction books of your TV,VCR, Stereo System or other devices as necessary to make the best con- nections.
•Make one of the following connections, depending on the capabilities of your existing equipment.
The following guidelines are options for the best picture and sound quality available on your System.
Picture
1Use SCART RGB Output (DVD/VCR(AV1 TV)) for best picture quality (for DVD features).
2Use
3Use SCART Composite Output for good picture quality (for DVD and VCR features).
Sound
1Digital audio connections provide the clearest sound. Connect the System DIGITAL AUDIO OUT (COAXIAL) to your amplifier or receiver (for DVD features only).
2Use SCART Output (DVD/VCR(AV1 TV)) for better sound quality (for DVD and VCR features).
Warning!
–Never make or change connections with the power switched on.
–Connect the System directly to your TV, instead of eg. a VCR, to avoid distortion because DVD video discs are copy protected.
–If you use the Euro audio/video cable, it is not necessary to use other audio cables.
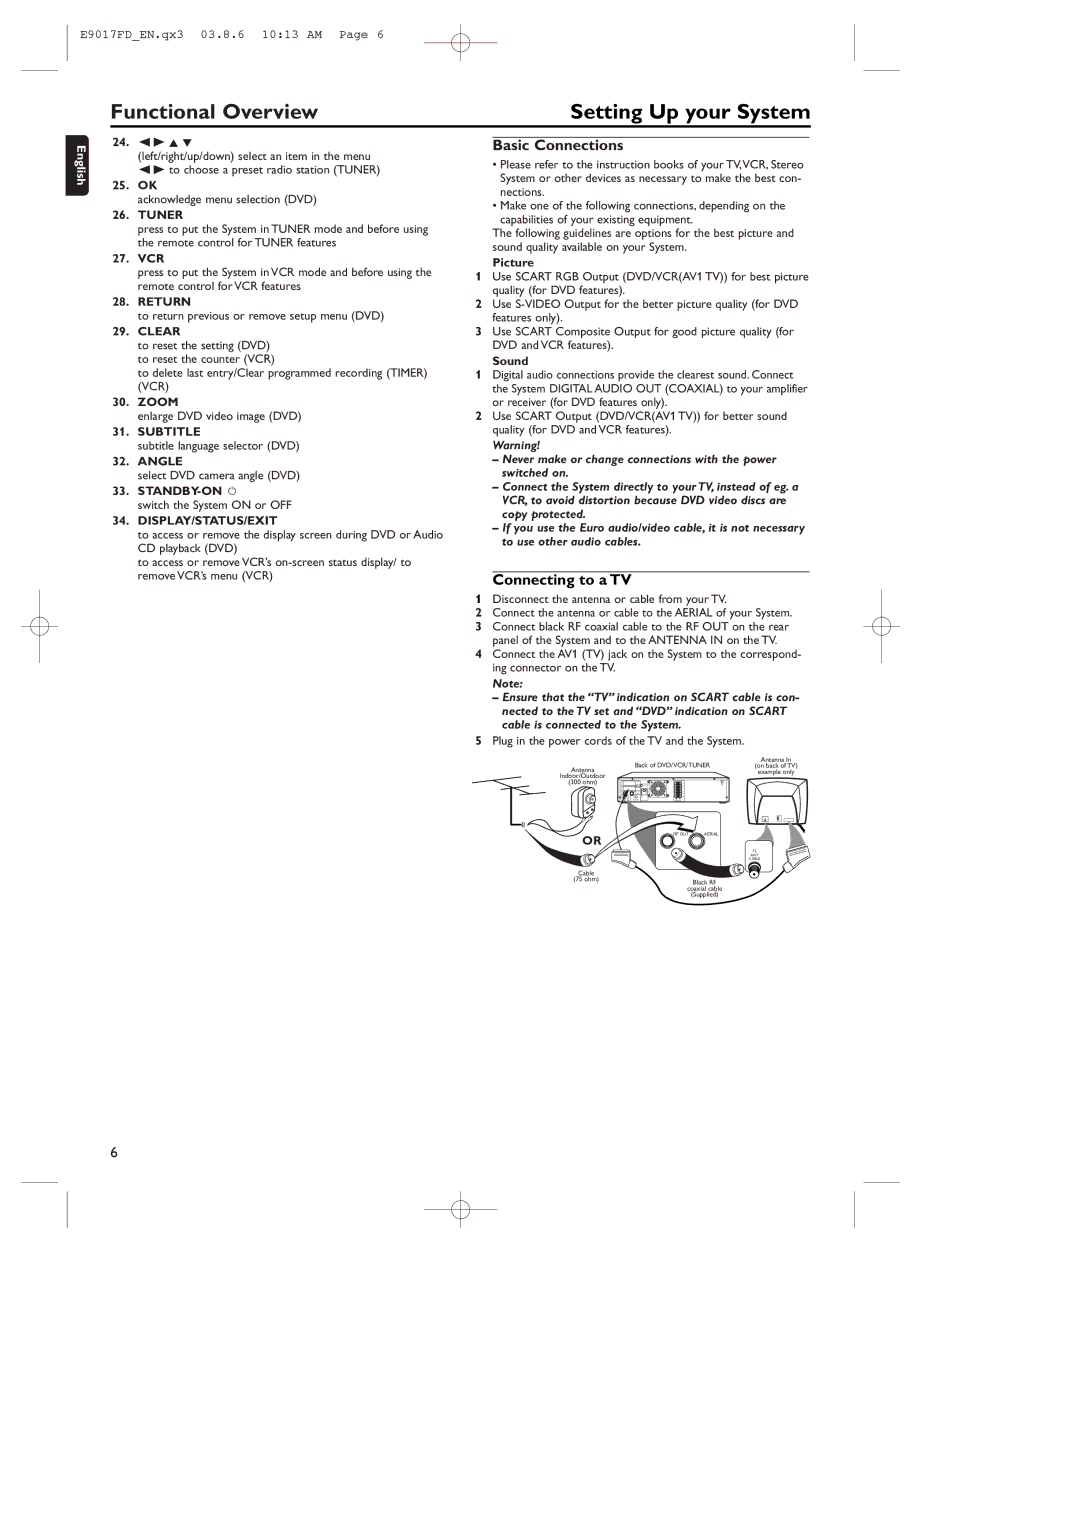
Connecting to a TV
1Disconnect the antenna or cable from your TV.
2Connect the antenna or cable to the AERIAL of your System.
3Connect black RF coaxial cable to the RF OUT on the rear panel of the System and to the ANTENNA IN on the TV.
4Connect the AV1 (TV) jack on the System to the correspond- ing connector on the TV.
Note:
–Ensure that the “TV” indication on SCART cable is con- nected to the TV set and “DVD” indication on SCART cable is connected to the System.
5Plug in the power cords of the TV and the System.
Back of DVD/VCR/TUNER | Antenna In | |
(on back of TV) | ||
Antenna | example only | |
Indoor/Outdoor | ||
| ||
(300 ohm) |
|
RF OUT | AERIAL |
OR
Cable
(75 ohm)
75
ANT
CABLE
Black RF
coaxial cable
(Supplied)
6