EN
3 Initial Operation
Package Contents
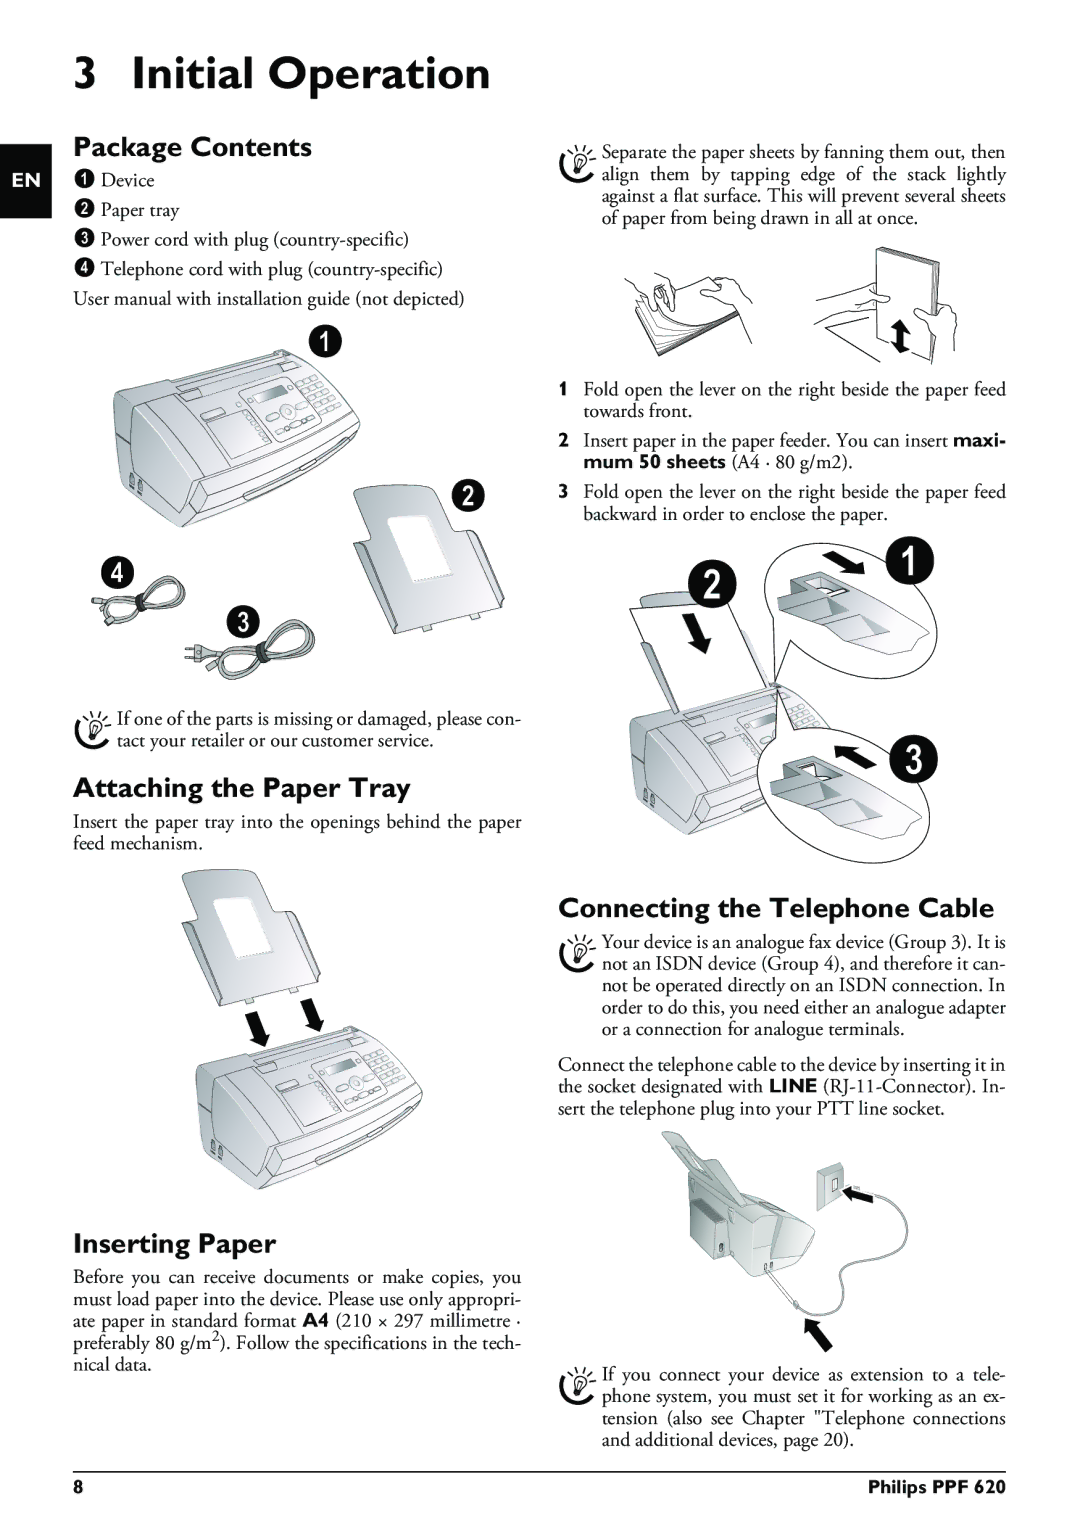
‚Device
ƒPaper tray
„Power cord with plug
…Telephone cord with plug
If one of the parts is missing or damaged, please con- tact your retailer or our customer service.
Attaching the Paper Tray
Insert the paper tray into the openings behind the paper feed mechanism.
Separate the paper sheets by fanning them out, then align them by tapping edge of the stack lightly against a flat surface. This will prevent several sheets of paper from being drawn in all at once.
1Fold open the lever on the right beside the paper feed towards front.
2Insert paper in the paper feeder. You can insert maxi- mum 50 sheets (A4 · 80 g/m2).
3Fold open the lever on the right beside the paper feed backward in order to enclose the paper.
Connecting the Telephone Cable
Your device is an analogue fax device (Group 3). It is not an ISDN device (Group 4), and therefore it can- not be operated directly on an ISDN connection. In order to do this, you need either an analogue adapter or a connection for analogue terminals.
Connect the telephone cable to the device by inserting it in the socket designated with LINE
Inserting Paper
Before you can receive documents or make copies, you must load paper into the device. Please use only appropri- ate paper in standard format A4 (210 × 297 millimetre ·
preferably 80 g/m2). Follow the specifications in the tech-
nical data.If you connect your device as extension to a tele- phone system, you must set it for working as an ex- tension (also see Chapter "Telephone connections and additional devices, page 20).
8 | Philips PPF 620 |
