3 Initial Operation
Setting up the Device
A tripod accessory is available if you want to elevate the device.
Connect power supply / charge battery
CAUTION!
Mains Voltage at the Site of Installation!
Check whether the mains voltage of the power supply matches the mains voltage avail- able at the setup location.
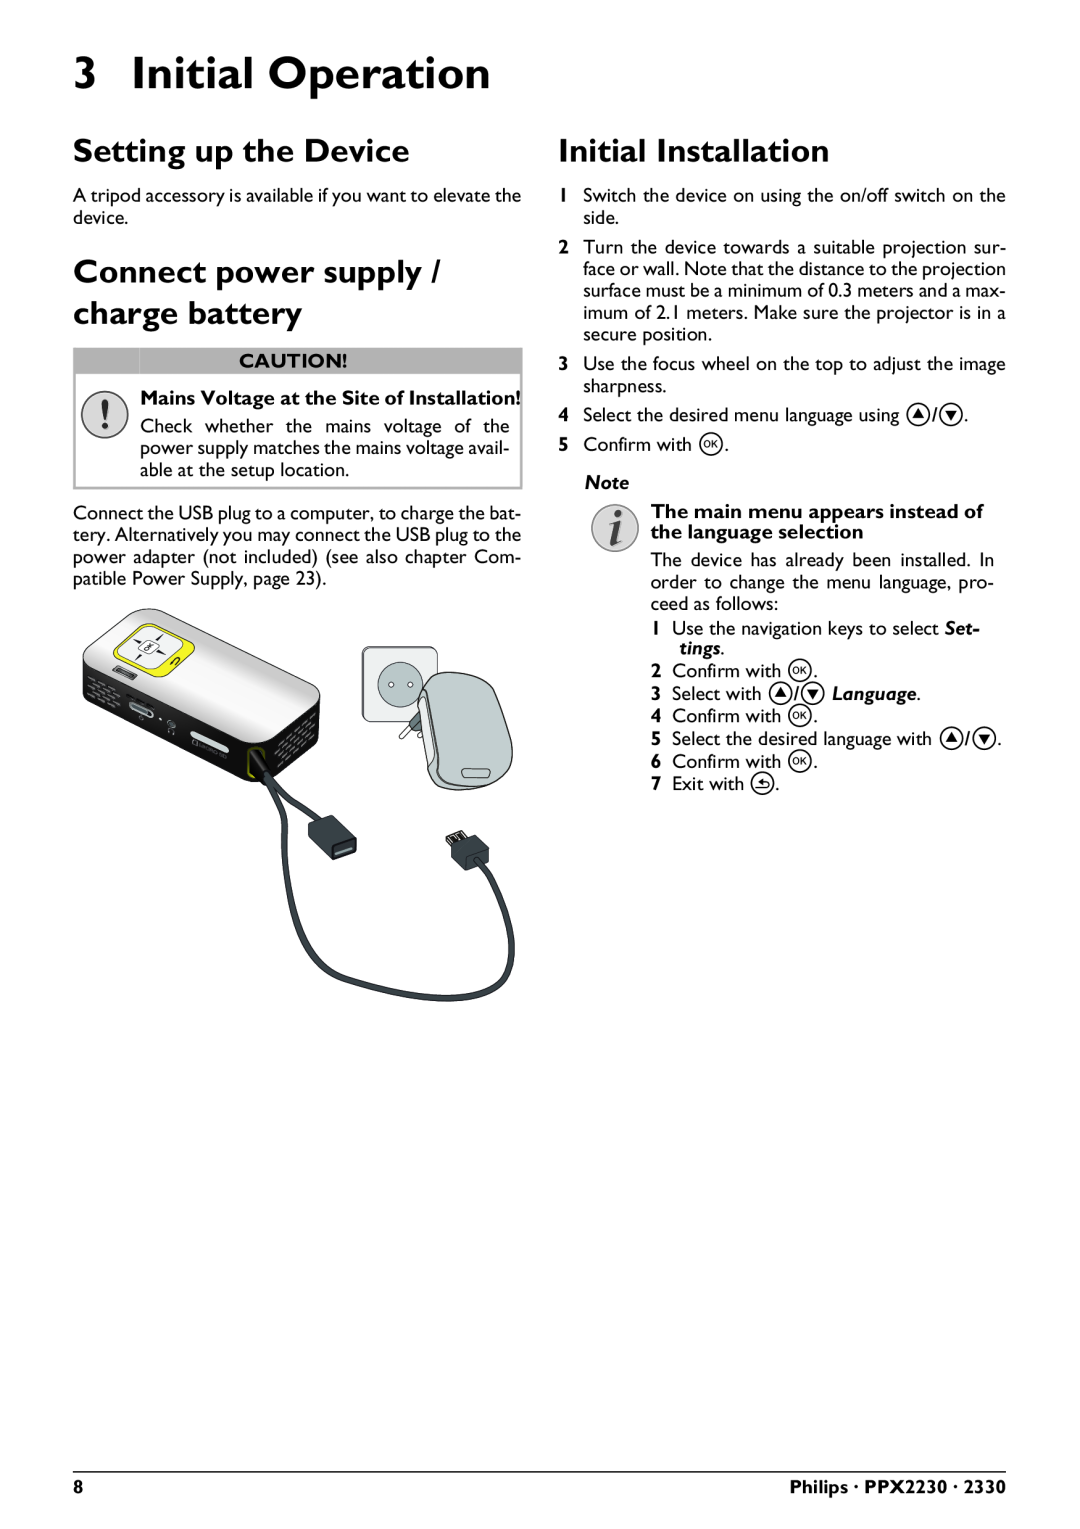
Connect the USB plug to a computer, to charge the bat- tery. Alternatively you may connect the USB plug to the power adapter (not included) (see also chapter Com- patible Power Supply, page 23).
Initial Installation
1Switch the device on using the on/off switch on the side.
2Turn the device towards a suitable projection sur- face or wall. Note that the distance to the projection surface must be a minimum of 0.3 meters and a max- imum of 2.1 meters. Make sure the projector is in a secure position.
3Use the focus wheel on the top to adjust the image sharpness.
4Select the desired menu language using ¡/¢.
5Confirm with à.
Note
The main menu appears instead of the language selection
The device has already been installed. In order to change the menu language, pro- ceed as follows:
1Use the navigation keys to select Set- tings.
2Confirm with à.
3Select with ¡/¢ Language.
4 Confirm with à.
5 Select the desired language with ¡/¢.
6 Confirm with à.
7 Exit with ¿.
8 | Philips · PPX2230 · 2330 |