34ENGLISH
![]() VCR/DVD
VCR/DVD
Audio
Audio
PC
Chapter 11 - Overview of SL400i connections
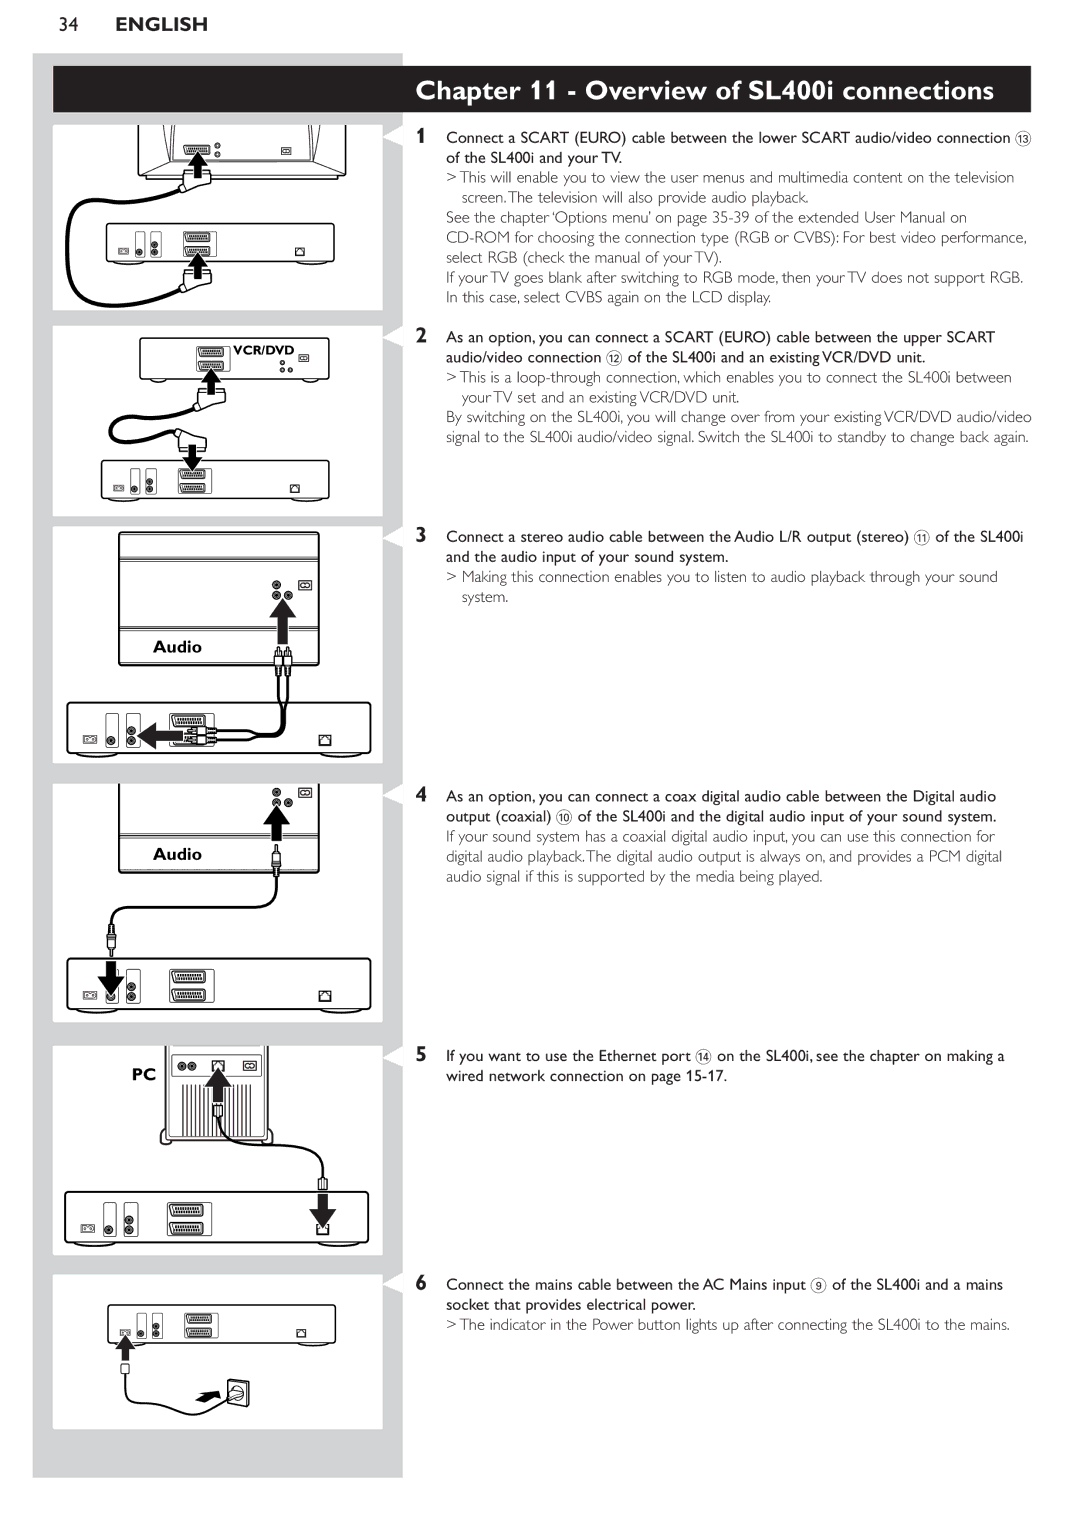
1 Connect a SCART (EURO) cable between the lower SCART audio/video connection # of the SL400i and your TV.
>This will enable you to view the user menus and multimedia content on the television screen.The television will also provide audio playback.
See the chapter ‘Options menu’ on page
If your TV goes blank after switching to RGB mode, then your TV does not support RGB. In this case, select CVBS again on the LCD display.
2 As an option, you can connect a SCART (EURO) cable between the upper SCART audio/video connection @ of the SL400i and an existing VCR/DVD unit.
>This is a
By switching on the SL400i, you will change over from your existing VCR/DVD audio/video signal to the SL400i audio/video signal. Switch the SL400i to standby to change back again.
3 Connect a stereo audio cable between the Audio L/R output (stereo) ! of the SL400i and the audio input of your sound system.
>Making this connection enables you to listen to audio playback through your sound system.
4 As an option, you can connect a coax digital audio cable between the Digital audio output (coaxial) 0 of the SL400i and the digital audio input of your sound system. If your sound system has a coaxial digital audio input, you can use this connection for digital audio playback.The digital audio output is always on, and provides a PCM digital audio signal if this is supported by the media being played.
5 If you want to use the Ethernet port $ on the SL400i, see the chapter on making a wired network connection on page
6 Connect the mains cable between the AC Mains input 9 of the SL400i and a mains socket that provides electrical power.
> The indicator in the Power button lights up after connecting the SL400i to the mains.
