Installing the Camera
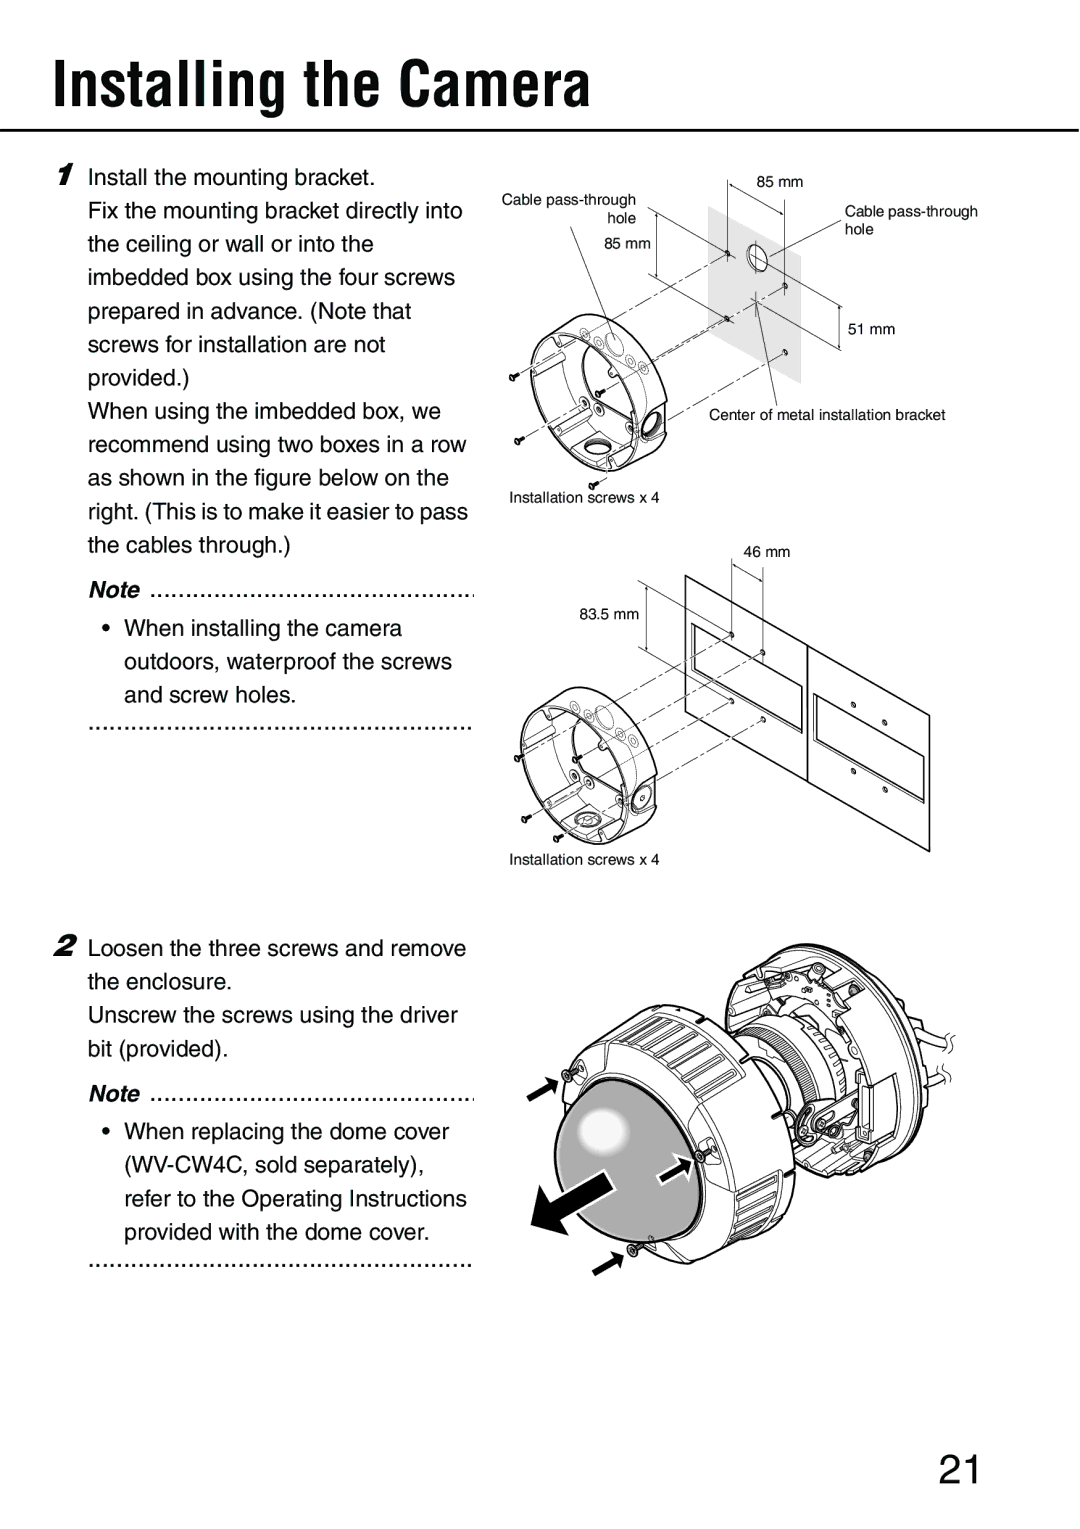
1Install the mounting bracket.
Fix the mounting bracket directly into the ceiling or wall or into the imbedded box using the four screws prepared in advance. (Note that screws for installation are not provided.)
When using the imbedded box, we recommend using two boxes in a row as shown in the figure below on the right. (This is to make it easier to pass the cables through.)
Cable
85 mm
Installation screws x 4
85 mm
Cable
51 mm
Center of metal installation bracket
46 mm
Note..................................................
• When installing the camera outdoors, waterproof the screws
and screw holes.
83.5 mm
......................................................
Installation screws x 4
2Loosen the three screws and remove
the enclosure.
Unscrew the screws using the driver
bit (provided).
Note..................................................
• When replacing the dome cover
......................................................
21
