| Note: |
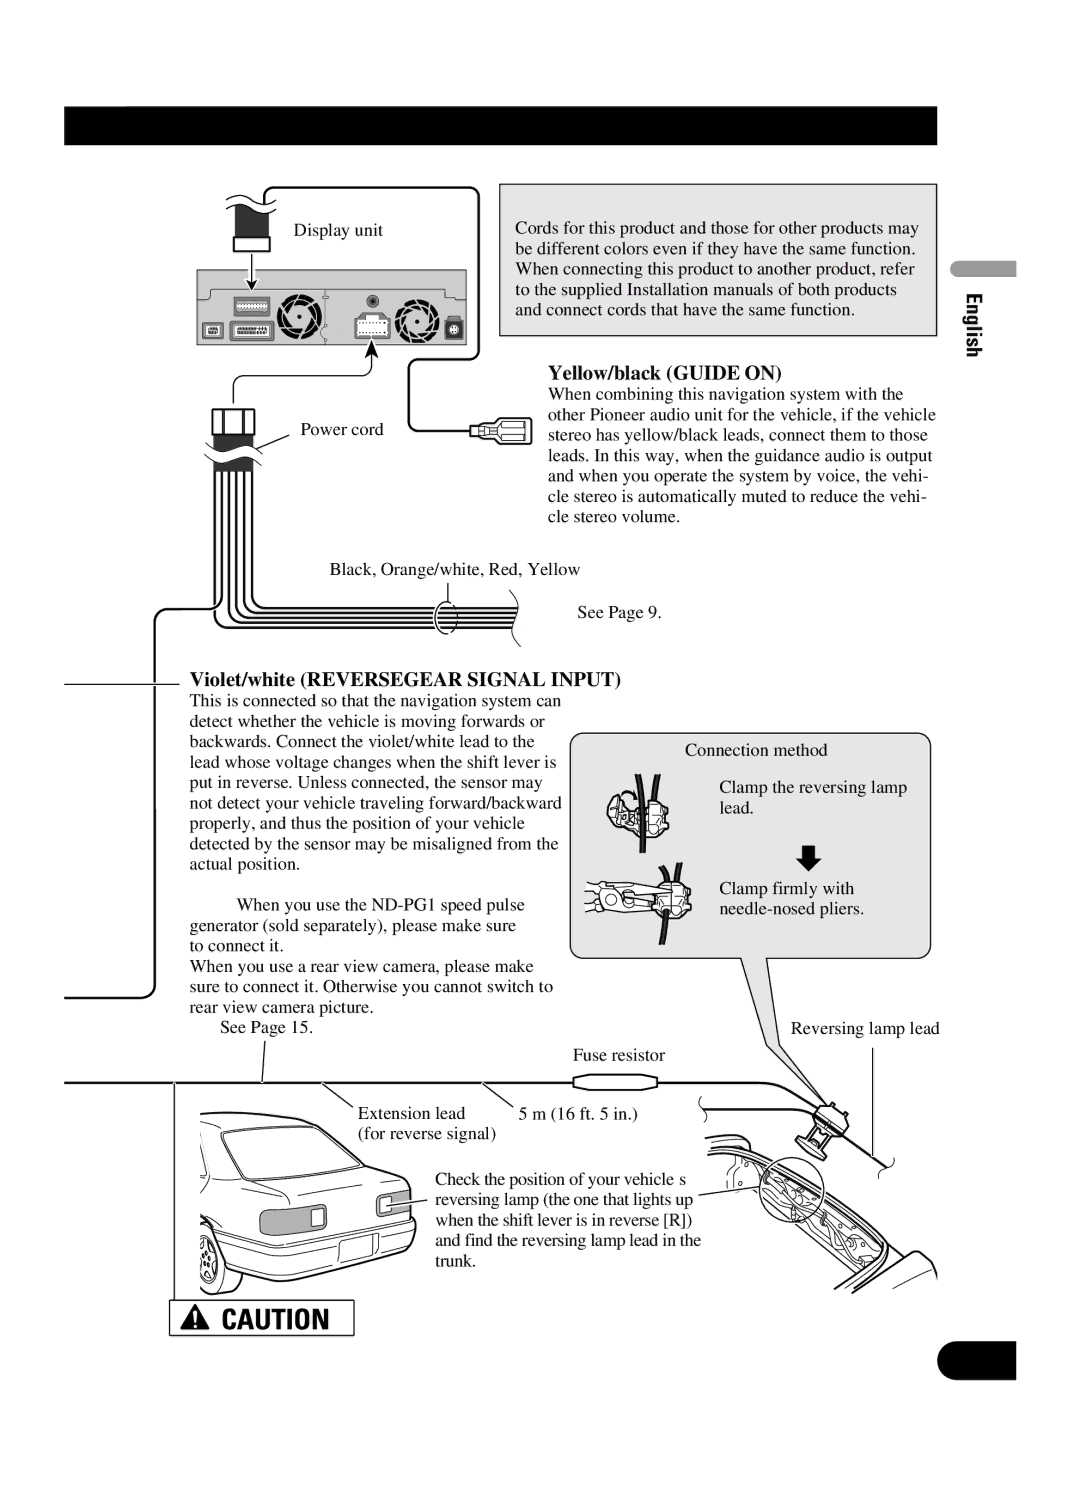
Display unit | Cords for this product and those for other products may |
| be different colors even if they have the same function. |
| When connecting this product to another product, refer |
| to the supplied Installation manuals of both products |
| and connect cords that have the same function. |
Yellow/black (GUIDE ON)
When combining this navigation system with the other Pioneer audio unit for the vehicle, if the vehicle
Power cord![]() stereo has yellow/black leads, connect them to those leads. In this way, when the guidance audio is output and when you operate the system by voice, the vehi- cle stereo is automatically muted to reduce the vehi- cle stereo volume.
stereo has yellow/black leads, connect them to those leads. In this way, when the guidance audio is output and when you operate the system by voice, the vehi- cle stereo is automatically muted to reduce the vehi- cle stereo volume.
Black, Orange/white, Red, Yellow
English
Español
☞ See Page 9.
Violet/white (REVERSEGEAR SIGNAL INPUT)
This is connected so that the navigation system can detect whether the vehicle is moving forwards or backwards. Connect the violet/white lead to the lead whose voltage changes when the shift lever is put in reverse. Unless connected, the sensor may not detect your vehicle traveling forward/backward properly, and thus the position of your vehicle detected by the sensor may be misaligned from the actual position.
Note: When you use the
When you use a rear view camera, please make sure to connect it. Otherwise you cannot switch to rear view camera picture.
☞See Page 15.
Fuse resistor
Connection method
Clamp the reversing lamp lead.
Clamp firmly with
Reversing lamp lead
Deutsch Français Italiano
Extension lead | 5 m (16 ft. 5 in.) |
(for reverse signal) |
|
Check the position of your vehicle’s reversing lamp (the one that lights up when the shift lever is in reverse [R]) and find the reversing lamp lead in the trunk.
Be sure to use only the supplied extension lead. Use of another lead could cause fire, smoke and/or damage this product.
Nederlands
12