20
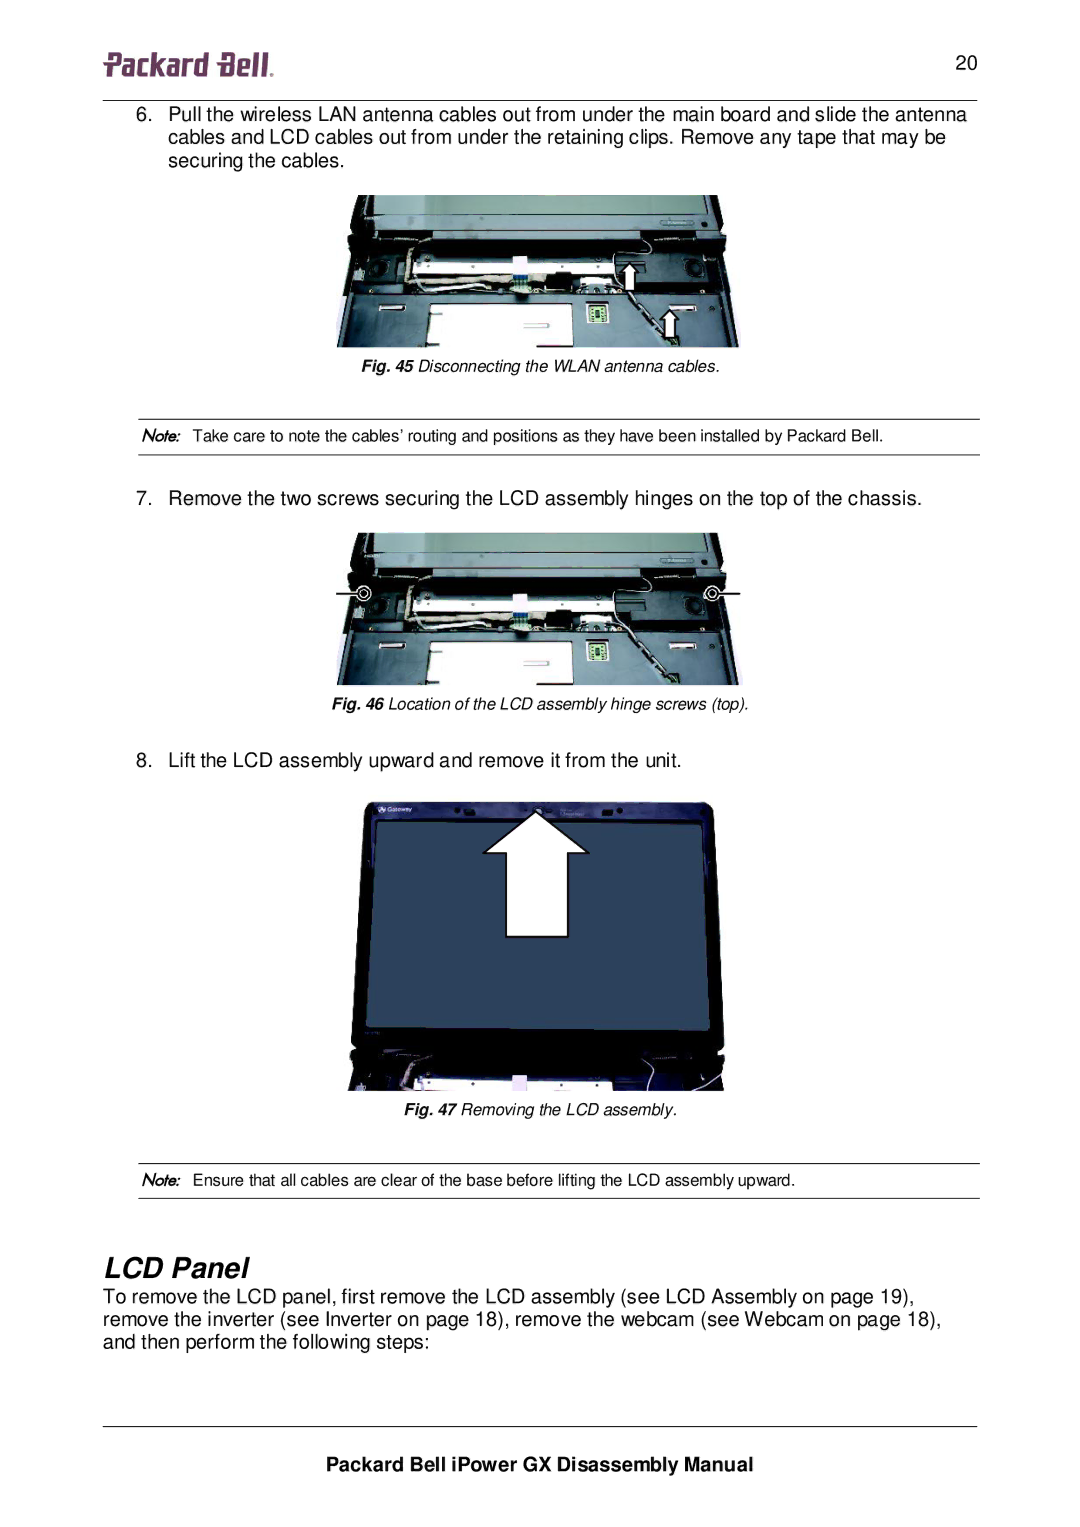
6.Pull the wireless LAN antenna cables out from under the main board and slide the antenna cables and LCD cables out from under the retaining clips. Remove any tape that may be securing the cables.
Fig. 45 Disconnecting the WLAN antenna cables.
Note: Take care to note the cables’ routing and positions as they have been installed by Packard Bell.
7. Remove the two screws securing the LCD assembly hinges on the top of the chassis.
Fig. 46 Location of the LCD assembly hinge screws (top).
8. Lift the LCD assembly upward and remove it from the unit.
Fig. 47 Removing the LCD assembly.
Note: Ensure that all cables are clear of the base before lifting the LCD assembly upward.
LCD Panel
To remove the LCD panel, first remove the LCD assembly (see LCD Assembly on page 19), remove the inverter (see Inverter on page 18), remove the webcam (see Webcam on page 18), and then perform the following steps:
Packard Bell iPower GX Disassembly Manual