Pioneer CDJ-800MK2 Loading and Removing Discs, Carga y extracción de discos, Nota

Models: CDJ-800MK2

1 60
Download 60 pages 36.91 Kb
Page 20
Image 20

Loading and Removing Discs/Carga y extracción de discos

Loading and Removing Discs

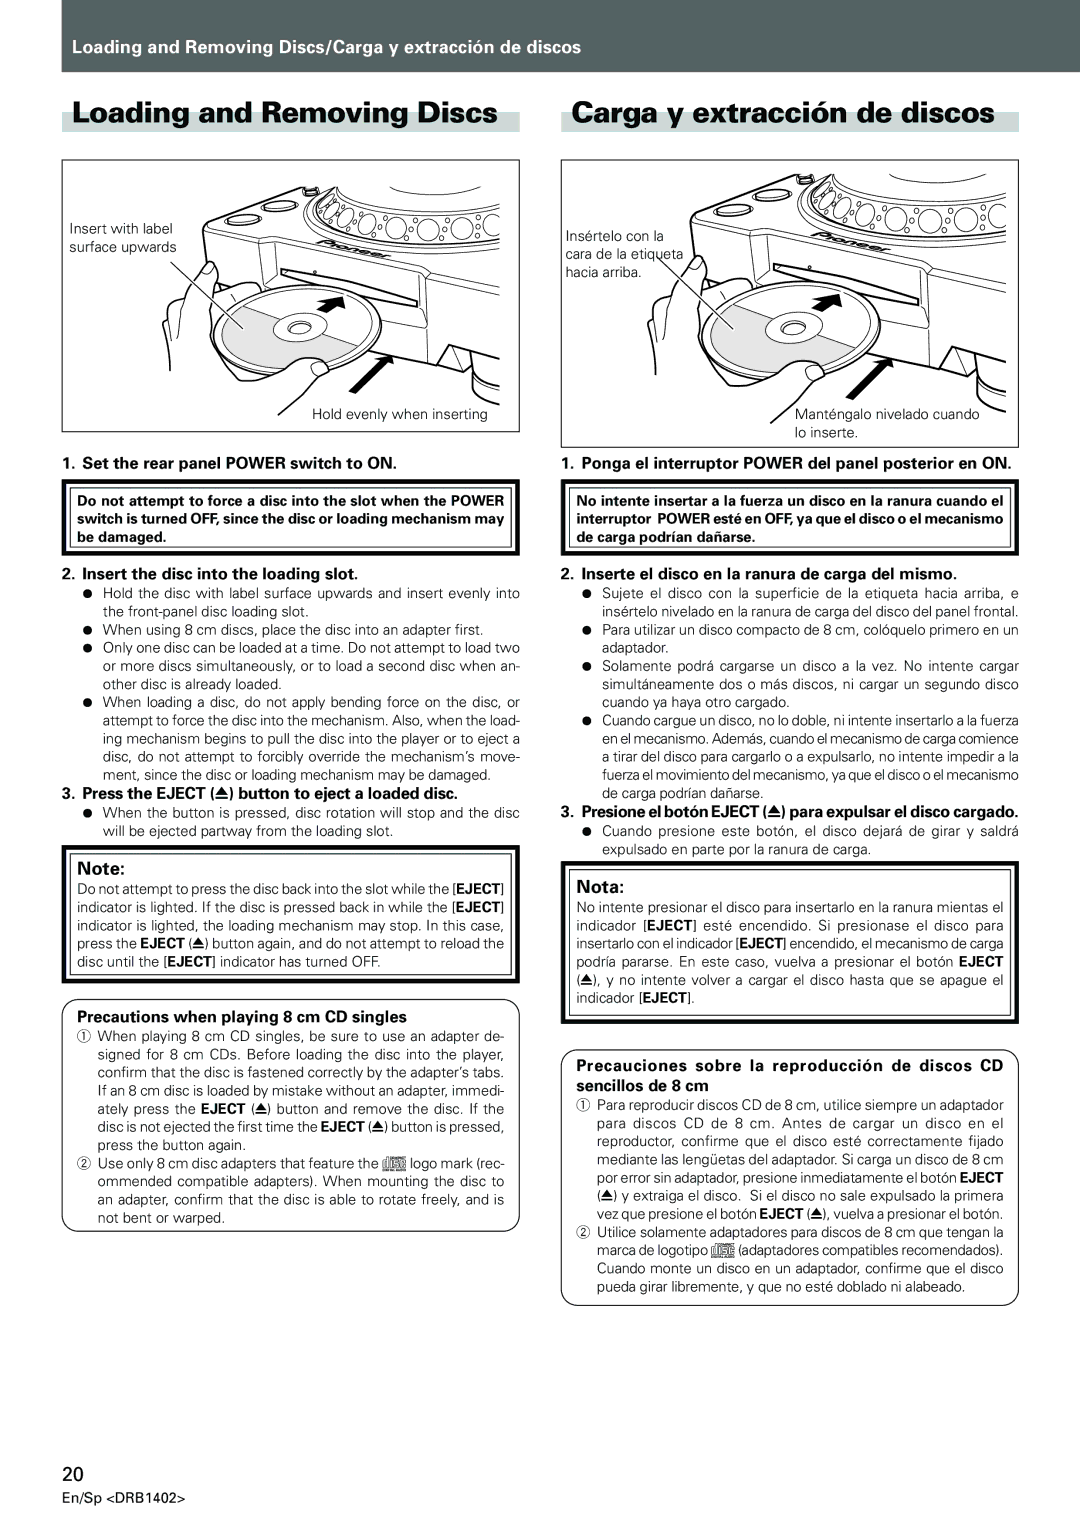
Insert with label surface upwards

Hold evenly when inserting

1. Set the rear panel POWER switch to ON.

Do not attempt to force a disc into the slot when the POWER switch is turned OFF, since the disc or loading mechanism may be damaged.

Carga y extracción de discos

Insértelo con la

cara de la etiqueta

hacia arriba.

Manténgalo nivelado cuando

lo inserte.

1. Ponga el interruptor POWER del panel posterior en ON.

No intente insertar a la fuerza un disco en la ranura cuando el interruptor POWER esté en OFF, ya que el disco o el mecanismo de carga podrían dañarse.

2.Insert the disc into the loading slot.

Hold the disc with label surface upwards and insert evenly into the front-panel disc loading slot.

When using 8 cm discs, place the disc into an adapter first.

Only one disc can be loaded at a time. Do not attempt to load two or more discs simultaneously, or to load a second disc when an- other disc is already loaded.

When loading a disc, do not apply bending force on the disc, or attempt to force the disc into the mechanism. Also, when the load- ing mechanism begins to pull the disc into the player or to eject a disc, do not attempt to forcibly override the mechanism’s move- ment, since the disc or loading mechanism may be damaged.

3.Press the EJECT (0) button to eject a loaded disc.

When the button is pressed, disc rotation will stop and the disc will be ejected partway from the loading slot.

Note:

Do not attempt to press the disc back into the slot while the [EJECT] indicator is lighted. If the disc is pressed back in while the [EJECT] indicator is lighted, the loading mechanism may stop. In this case, press the EJECT (0) button again, and do not attempt to reload the disc until the [EJECT] indicator has turned OFF.

Precautions when playing 8 cm CD singles

1When playing 8 cm CD singles, be sure to use an adapter de- signed for 8 cm CDs. Before loading the disc into the player, confirm that the disc is fastened correctly by the adapter’s tabs. If an 8 cm disc is loaded by mistake without an adapter, immedi-

ately press the EJECT (0) button and remove the disc. If the disc is not ejected the first time the EJECT (0) button is pressed, press the button again.

2Use only 8 cm disc adapters that feature the 'logo mark (rec- ommended compatible adapters). When mounting the disc to an adapter, confirm that the disc is able to rotate freely, and is not bent or warped.

2.Inserte el disco en la ranura de carga del mismo.

Sujete el disco con la superficie de la etiqueta hacia arriba, e insértelo nivelado en la ranura de carga del disco del panel frontal.

Para utilizar un disco compacto de 8 cm, colóquelo primero en un adaptador.

Solamente podrá cargarse un disco a la vez. No intente cargar simultáneamente dos o más discos, ni cargar un segundo disco cuando ya haya otro cargado.

Cuando cargue un disco, no lo doble, ni intente insertarlo a la fuerza en el mecanismo. Además, cuando el mecanismo de carga comience a tirar del disco para cargarlo o a expulsarlo, no intente impedir a la fuerza el movimiento del mecanismo, ya que el disco o el mecanismo de carga podrían dañarse.

3.Presione el botón EJECT (0) para expulsar el disco cargado.

Cuando presione este botón, el disco dejará de girar y saldrá expulsado en parte por la ranura de carga.

Nota:

No intente presionar el disco para insertarlo en la ranura mientas el indicador [EJECT] esté encendido. Si presionase el disco para insertarlo con el indicador [EJECT] encendido, el mecanismo de carga podría pararse. En este caso, vuelva a presionar el botón EJECT (0), y no intente volver a cargar el disco hasta que se apague el indicador [EJECT].

Precauciones sobre la reproducción de discos CD sencillos de 8 cm

1Para reproducir discos CD de 8 cm, utilice siempre un adaptador para discos CD de 8 cm. Antes de cargar un disco en el reproductor, confirme que el disco esté correctamente fijado mediante las lengüetas del adaptador. Si carga un disco de 8 cm

por error sin adaptador, presione inmediatamente el botón EJECT (0) y extraiga el disco. Si el disco no sale expulsado la primera vez que presione el botón EJECT (0), vuelva a presionar el botón.

2Utilice solamente adaptadores para discos de 8 cm que tengan la marca de logotipo '(adaptadores compatibles recomendados). Cuando monte un disco en un adaptador, confirme que el disco pueda girar libremente, y que no esté doblado ni alabeado.

20

En/Sp <DRB1402>

Page 20
Image 20
Pioneer CDJ-800MK2 operating instructions Loading and Removing Discs, Carga y extracción de discos, Nota

CDJ-800MK2 specifications

The Pioneer CDJ-800MK2 is a professional DJ audio player that has gained popularity among both amateur and experienced DJs since its release. This innovative device is known for its reliability, versatility, and a range of features that cater to the needs of modern DJs.

One of the standout characteristics of the CDJ-800MK2 is its ability to read various media formats. DJs can play their music from CDs, as well as read data from USB drives, offering immense flexibility when it comes to music source. The device supports various audio file formats, including MP3, AAC, and WAV, making it compatible with a wide range of music libraries.

The CDJ-800MK2 features a high-resolution 24-bit digital-to-analog converter, which ensures superior sound quality. This is complemented by an adjustable tempo range of ± 100% or 16%, which allows DJs to seamlessly mix various tracks and create a unique sound. The unit is also equipped with a large, high-contrast LCD screen that provides vital information at a glance, including track time, BPM, and waveforms, enhancing the DJ’s ability to monitor their mixes effectively.

In terms of performance features, the CDJ-800MK2 supports Beat Display and Master Tempo functions. The Beat Display helps DJs align beats more accurately, improving the overall mixing experience. The Master Tempo feature allows DJs to change the pitch of the track while keeping the tempo intact, enabling creative mixing options without altering the track’s speed.

Additionally, the CDJ-800MK2 introduces a loop function with seamless looping capabilities. DJs can easily create loops of varying lengths, enabling them to build upon their tracks and generate new transitions smoothly. This model also supports hot cues that allow DJs to jump to specific points in a track instantly, making it a powerful tool for live performances.

Another key feature is the sturdy build of the CDJ-800MK2, designed to withstand the rigors of regular use in various environments, such as nightclubs, events, and parties. Pioneer's commitment to quality design ensures that this model is both durable and user-friendly.

In summary, the Pioneer CDJ-800MK2 stands out with its versatile media capabilities, superior sound quality, intuitive controls, and robust features. It has established itself as an essential instrument for DJs looking to enhance their performance and creativity in a dynamic music landscape. Whether for live shows or practice sessions, the CDJ-800MK2 remains a dependable choice in the realm of DJ equipment.