Preparations (Setup)
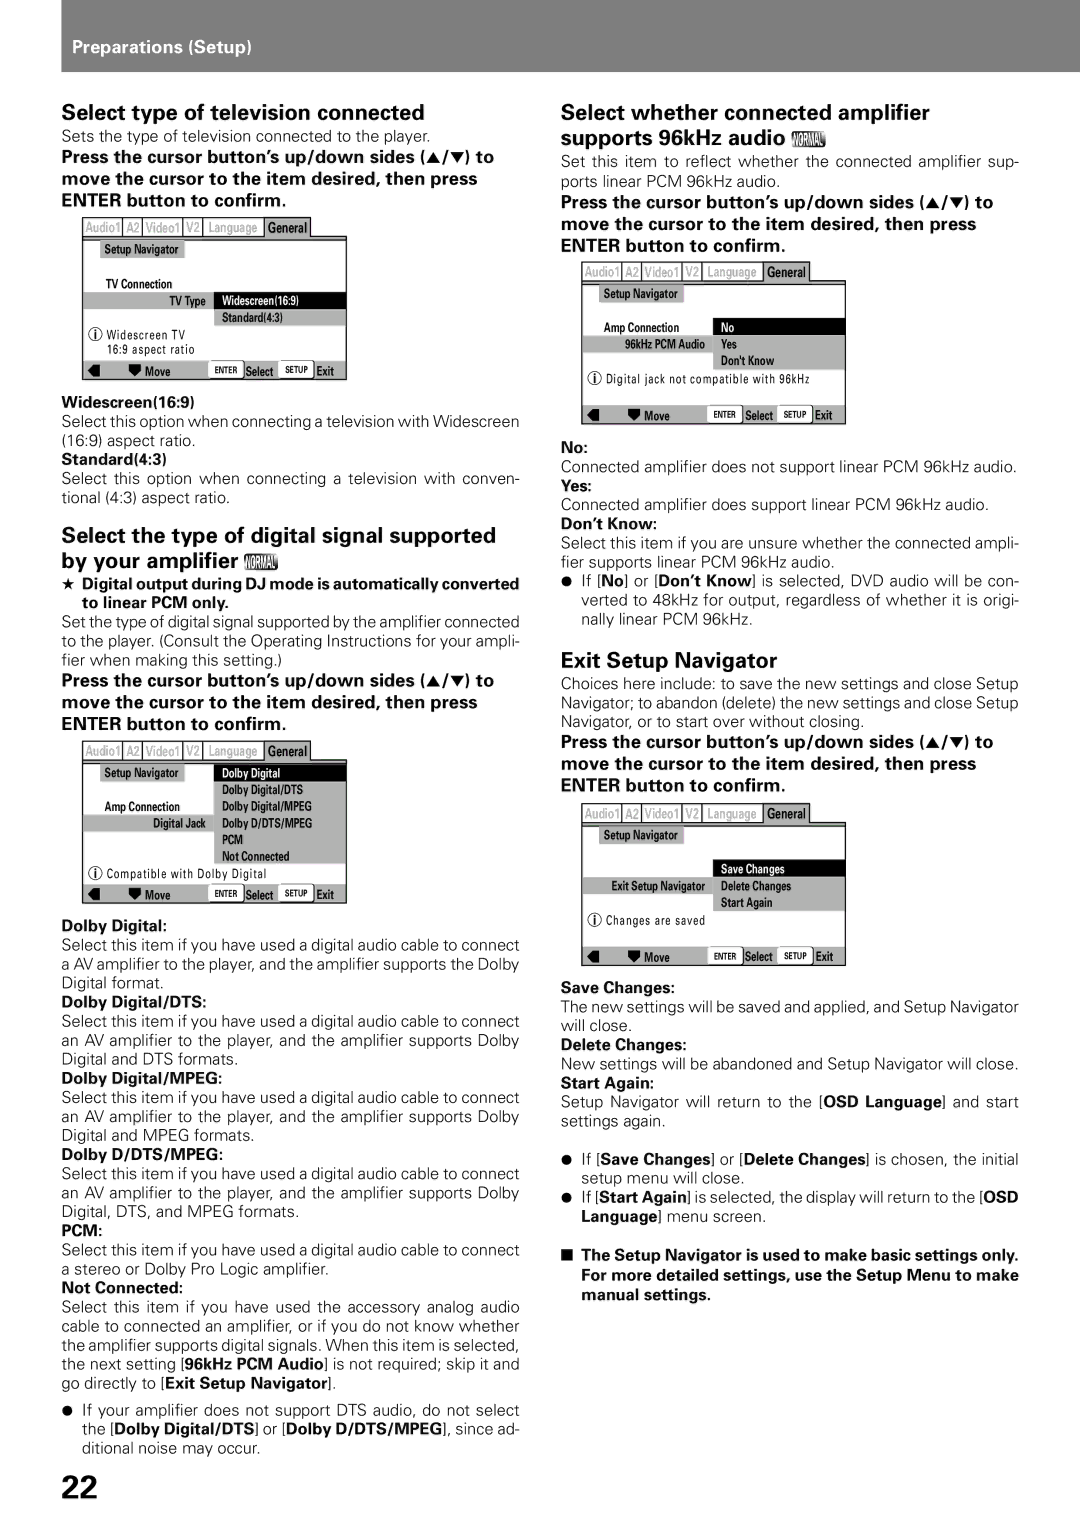
Select type of television connected
Sets the type of television connected to the player.
Press the cursor button’s up/down sides (5/∞) to move the cursor to the item desired, then press ENTER button to confirm.
Audio1 A2 Video1 V2 | Language | General |
| |
Setup Navigator |
|
|
|
|
TV Connection |
|
|
|
|
TV Type | Widescreen(16:9) |
| ||
| Standard(4:3) |
|
| |
Widescreen TV |
|
|
|
|
16:9 aspect ratio |
|
|
|
|
Move | ENTER Select | SETUP | Exit | |
Widescreen(16:9)
Select this option when connecting a television with Widescreen (16:9) aspect ratio.
Standard(4:3)
Select this option when connecting a television with conven- tional (4:3) aspect ratio.
Select the type of digital signal supported by your amplifier ![]()
★Digital output during DJ mode is automatically converted to linear PCM only.
Set the type of digital signal supported by the amplifier connected to the player. (Consult the Operating Instructions for your ampli- fier when making this setting.)
Press the cursor button’s up/down sides (5/∞) to move the cursor to the item desired, then press ENTER button to confirm.
Audio1 A2 Video1 V2 | Language | General |
| |
Setup Navigator | Dolby Digital |
|
| |
| Dolby Digital/DTS |
| ||
Amp Connection | Dolby Digital/MPEG |
| ||
Digital Jack | Dolby D/DTS/MPEG |
| ||
| PCM |
|
|
|
| Not Connected |
| ||
Compatible with Dolby Digital |
|
|
| |
Move | ENTER Select | SETUP | Exit | |
Dolby Digital:
Select this item if you have used a digital audio cable to connect a AV amplifier to the player, and the amplifier supports the Dolby Digital format.
Dolby Digital/DTS:
Select this item if you have used a digital audio cable to connect an AV amplifier to the player, and the amplifier supports Dolby Digital and DTS formats.
Dolby Digital/MPEG:
Select this item if you have used a digital audio cable to connect an AV amplifier to the player, and the amplifier supports Dolby Digital and MPEG formats.
Dolby D/DTS/MPEG:
Select this item if you have used a digital audio cable to connect an AV amplifier to the player, and the amplifier supports Dolby Digital, DTS, and MPEG formats.
PCM:
Select this item if you have used a digital audio cable to connect a stereo or Dolby Pro Logic amplifier.
Not Connected:
Select this item if you have used the accessory analog audio cable to connected an amplifier, or if you do not know whether the amplifier supports digital signals. When this item is selected, the next setting [96kHz PCM Audio] is not required; skip it and go directly to [Exit Setup Navigator].
¶If your amplifier does not support DTS audio, do not select the [Dolby Digital/DTS] or [Dolby D/DTS/MPEG], since ad- ditional noise may occur.
Select whether connected amplifier supports 96kHz audio 
Set this item to reflect whether the connected amplifier sup- ports linear PCM 96kHz audio.
Press the cursor button’s up/down sides (5/∞) to move the cursor to the item desired, then press ENTER button to confirm.
Audio1 A2 Video1 V2 | Language | General |
| |
Setup Navigator |
|
|
|
|
Amp Connection | No |
|
|
|
96kHz PCM Audio | Yes |
|
|
|
| Don't Know |
|
| |
Digital jack not compatible with 96kHz |
| |||
Move | ENTER Select | SETUP | Exit | |
No:
Connected amplifier does not support linear PCM 96kHz audio.
Yes:
Connected amplifier does support linear PCM 96kHz audio.
Don’t Know:
Select this item if you are unsure whether the connected ampli- fier supports linear PCM 96kHz audio.
¶If [No] or [Don’t Know] is selected, DVD audio will be con- verted to 48kHz for output, regardless of whether it is origi- nally linear PCM 96kHz.
Exit Setup Navigator
Choices here include: to save the new settings and close Setup Navigator; to abandon (delete) the new settings and close Setup Navigator, or to start over without closing.
Press the cursor button’s up/down sides (5/∞) to move the cursor to the item desired, then press ENTER button to confirm.
Audio1 A2 Video1 V2 | Language | General |
| |
Setup Navigator |
|
|
|
|
| Save Changes |
| ||
Exit Setup Navigator | Delete Changes |
| ||
| Start Again |
|
| |
Changes are saved |
|
|
|
|
Move | ENTER Select | SETUP | Exit | |
Save Changes:
The new settings will be saved and applied, and Setup Navigator will close.
Delete Changes:
New settings will be abandoned and Setup Navigator will close.
Start Again:
Setup Navigator will return to the [OSD Language] and start settings again.
¶If [Save Changes] or [Delete Changes] is chosen, the initial setup menu will close.
¶If [Start Again] is selected, the display will return to the [OSD Language] menu screen.
■The Setup Navigator is used to make basic settings only. For more detailed settings, use the Setup Menu to make manual settings.
22
