
VSX-1015TX specifications
The Pioneer VSX-1015TX is a distinguished piece of audio equipment that caters to enthusiasts seeking an all-encompassing home theater experience. Launched in the mid-2000s, this receiver combines advanced technology with usability, making it a popular choice among music and movie aficionados.One of the defining features of the VSX-1015TX is its robust multi-channel surround sound system. It supports up to 7.1 channels, allowing users to fully immerse themselves in their favorite films, games, and music. With a power output of 110 watts per channel, it delivers rich sound quality across various formats, enhancing the auditory experience.
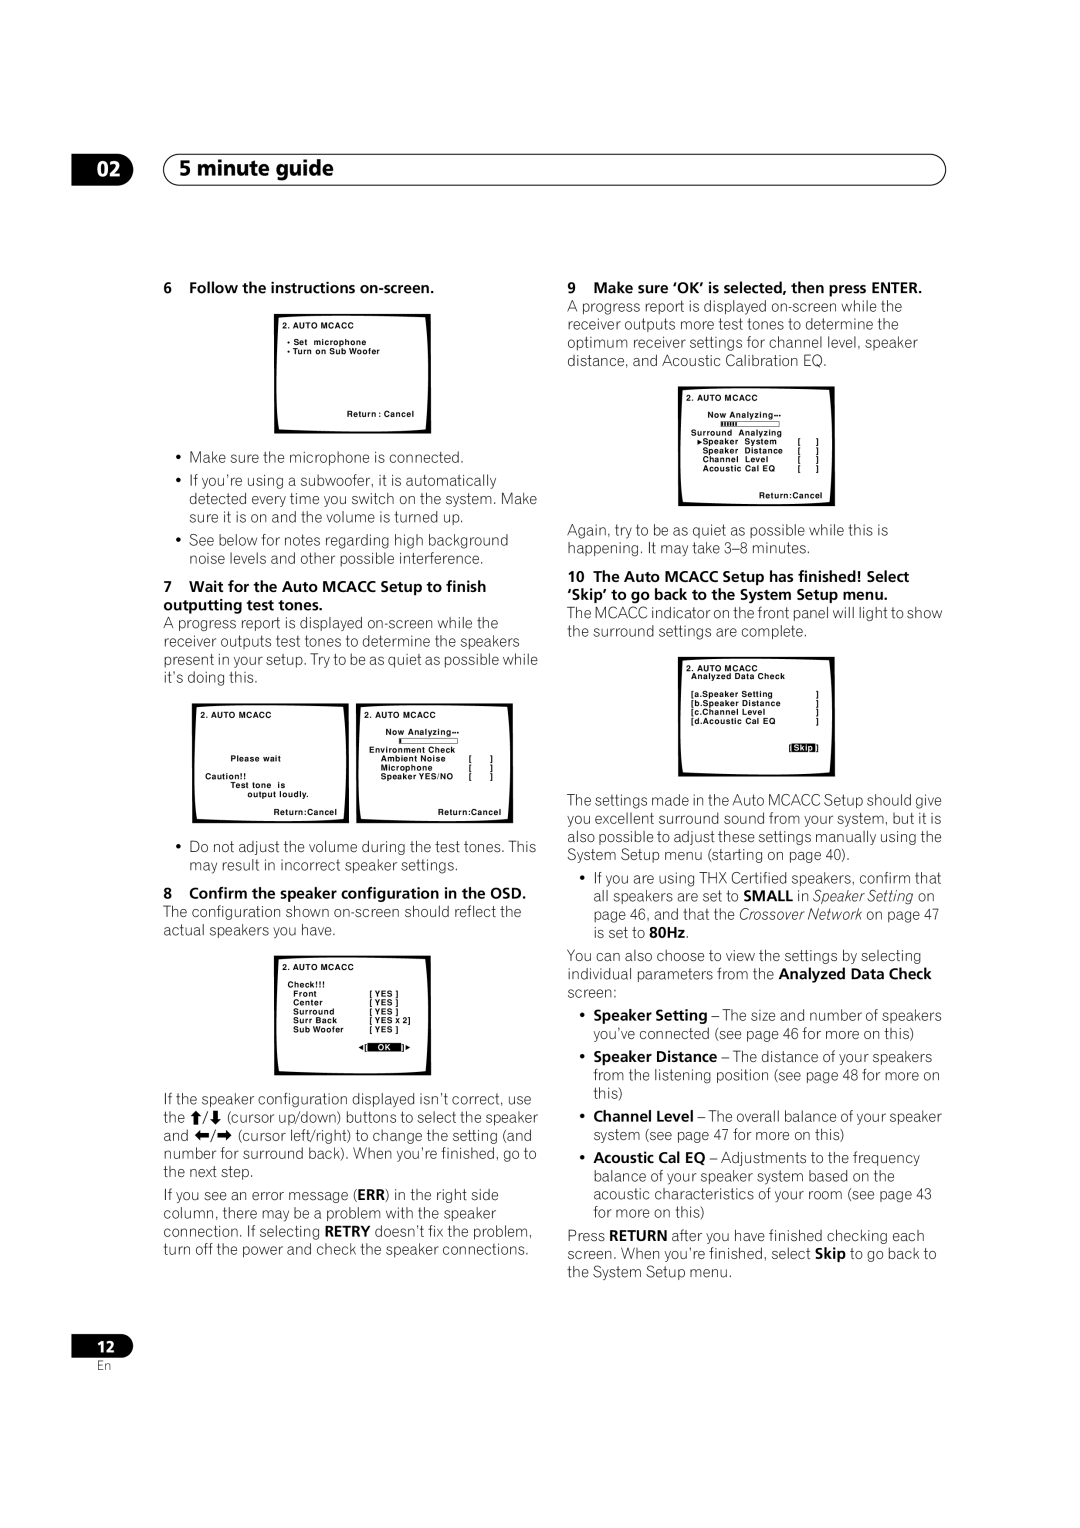
The VSX-1015TX is equipped with Dolby Digital and DTS decoding, providing a comprehensive sound stage that captures every detail. Its Multi-Channel Acoustic Calibration System (MCACC) optimizes audio output based on the physical characteristics of your room. This feature intelligently analyzes the acoustics and adjusts the speakers to achieve balanced sound, ensuring that listeners receive the best audio experience possible.
Furthermore, the receiver supports many audio and video formats, including MPEG, WMA, and MP3, making it versatile for different media sources. The inclusion of HDMI inputs allows for high-definition video and audio transmission, simplifying connectivity with modern devices like Blu-ray players and gaming consoles.
Another notable characteristic of the VSX-1015TX is its user-friendly interface. The on-screen display and remote control make navigating through settings and configurations straightforward. Users can easily switch between different audio sources and adjust sound parameters to suit their preferences.
Additionally, this model is designed with several speaker configurations in mind, allowing for flexible setups. Whether you are using conventional speakers or opting for surround sound systems, the VSX-1015TX caters to various configurations, making it suitable for different home theater environments.
The Pioneer VSX-1015TX also emphasizes build quality and durability, ensuring that it can withstand the rigors of regular use while maintaining performance levels. With its blend of advanced features, streamlined usability, and robust sound performance, the VSX-1015TX remains a cherished option for those looking to enhance their audio-visual experiences at home.