Cleaning and Maintenance
2.Remove oven racks. If oven racks are left in the oven during the
3.Wipe up excessive soil, spills and grease before
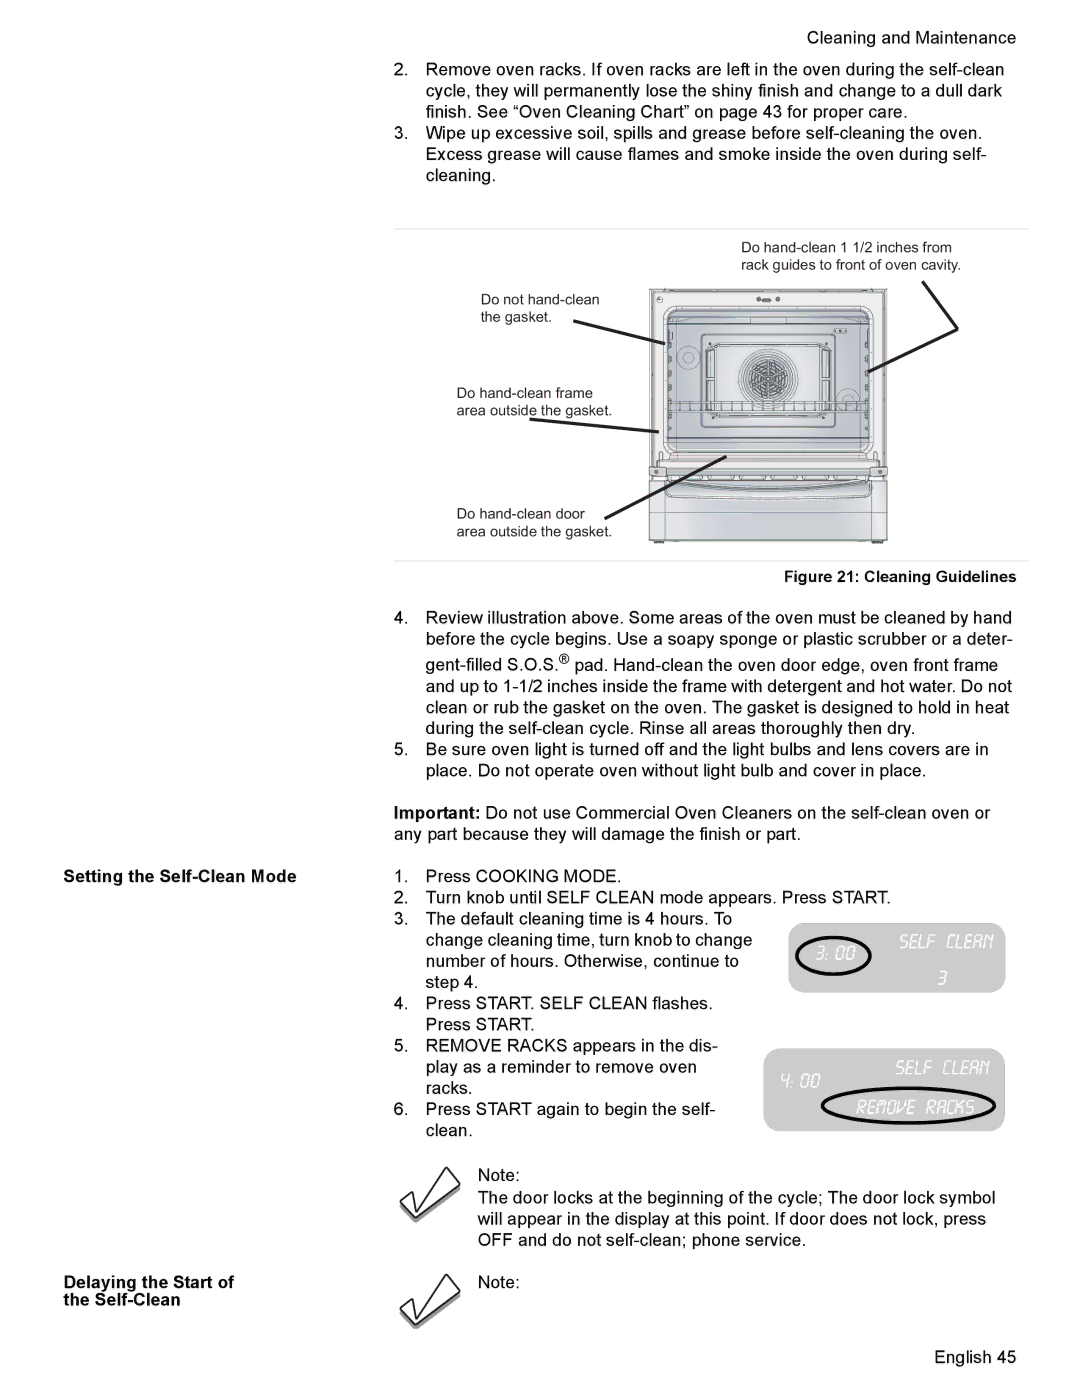
Do
Do not
Do
|
| Do |
|
| area outside the gasket. |
|
| Figure 21: Cleaning Guidelines |
| 4. | Review illustration above. Some areas of the oven must be cleaned by hand |
|
| before the cycle begins. Use a soapy sponge or plastic scrubber or a deter- |
|
| |
|
| and up to |
|
| clean or rub the gasket on the oven. The gasket is designed to hold in heat |
|
| during the |
| 5. | Be sure oven light is turned off and the light bulbs and lens covers are in |
|
| place. Do not operate oven without light bulb and cover in place. |
| Important: Do not use Commercial Oven Cleaners on the | |
| any part because they will damage the finish or part. | |
Setting the | 1. | Press COOKING MODE. |
| 2. | Turn knob until SELF CLEAN mode appears. Press START. |
| 3. | The default cleaning time is 4 hours. To |
change cleaning time, turn knob to change | 3: 00 | SELF CLEAN |
number of hours. Otherwise, continue to |
| |
|
|
step 4. | 3 |
|
4.Press START. SELF CLEAN flashes. Press START.
5.REMOVE RACKS appears in the dis-
play as a reminder to remove oven | SELF CLEAN |
racks. | 4: 00 |
| |
6. Press START again to begin the self- | REMOVE RACKS |
clean. |
|
Note:
The door locks at the beginning of the cycle; The door lock symbol will appear in the display at this point. If door does not lock, press OFF and do not
Delaying the Start of | Note: |
the |
|
English 45
