|
|
|
| Getting Started |
Table 1: Parts and Accessories Key |
|
|
| |
|
|
|
|
|
# | Part |
| # | Part |
|
|
|
|
|
10 | Warming Drawer (some models) | a | 22 | Broil Element (top of oven interior) (not shown) |
|
|
|
| |
|
|
|
|
|
11 | Model # and Serial # Plate |
| 23 | Oven Door Lock (not visible) (not shown) |
|
|
|
|
|
12 | Oven Vent |
|
|
|
|
|
|
|
|
a. Depending on the model, your appliance has either a storage drawer or a warming drawer.
NOTE: To order additional accessories (i.e. broil pan, extension racks), contact Service or a dealer near you.
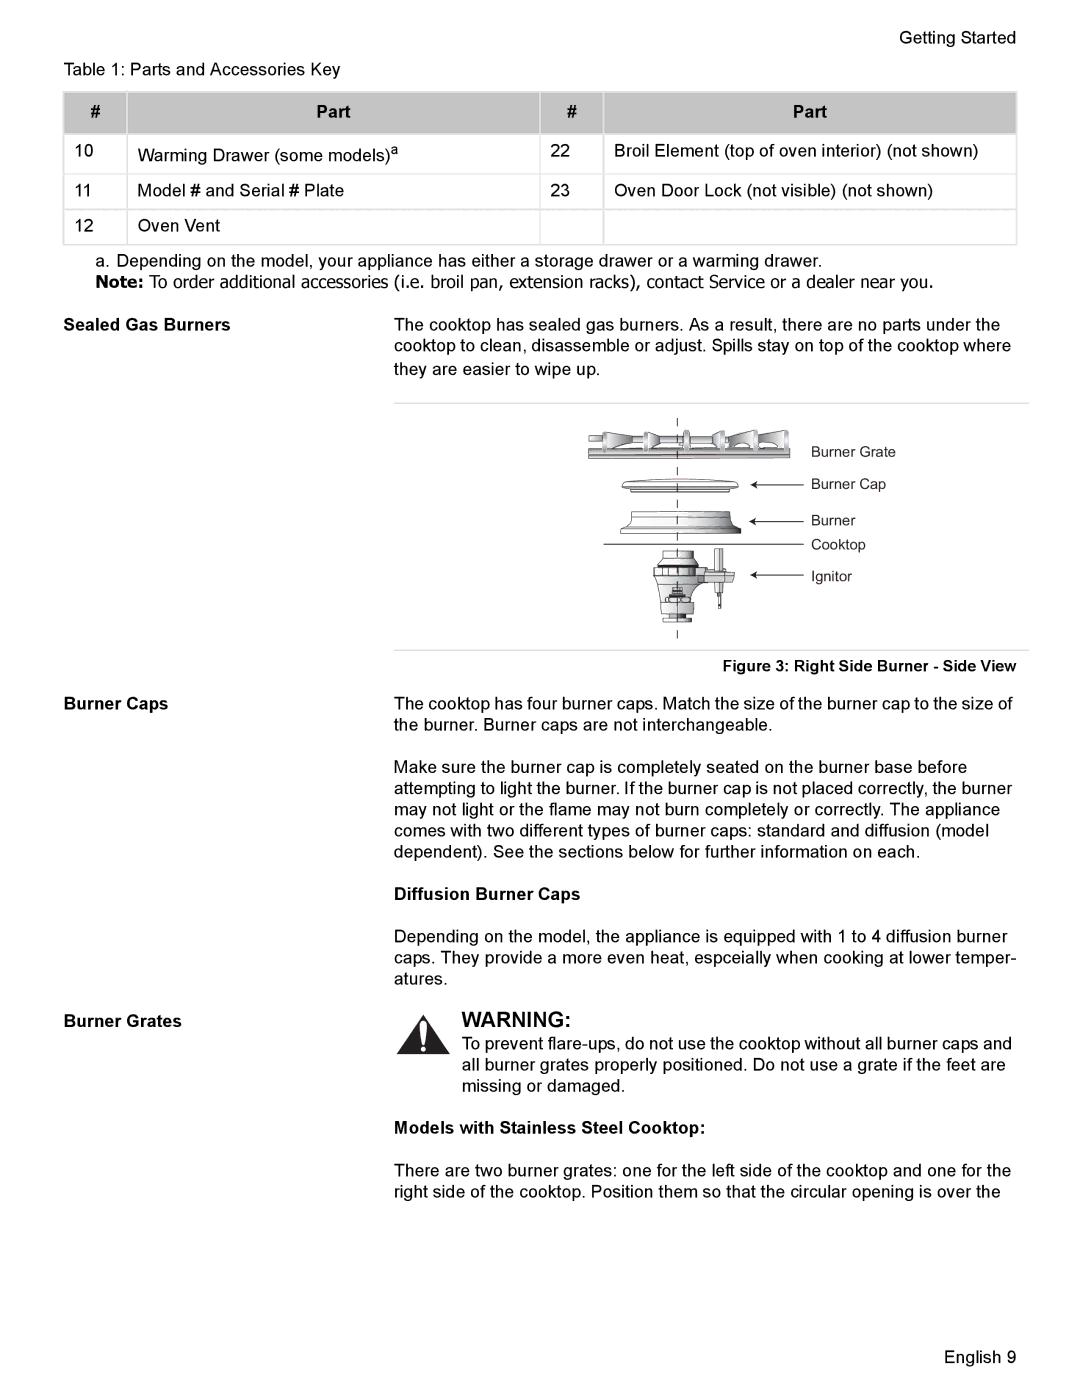
Sealed Gas Burners | The cooktop has sealed gas burners. As a result, there are no parts under the |
| cooktop to clean, disassemble or adjust. Spills stay on top of the cooktop where |
| they are easier to wipe up. |
|
|
Burner Grate
![]() Burner Cap
Burner Cap
Burner
Cooktop
Ignitor
| Figure 3: Right Side Burner - Side View |
Burner Caps | The cooktop has four burner caps. Match the size of the burner cap to the size of |
| the burner. Burner caps are not interchangeable. |
| Make sure the burner cap is completely seated on the burner base before |
| attempting to light the burner. If the burner cap is not placed correctly, the burner |
| may not light or the flame may not burn completely or correctly. The appliance |
| comes with two different types of burner caps: standard and diffusion (model |
| dependent). See the sections below for further information on each. |
| Diffusion Burner Caps |
| Depending on the model, the appliance is equipped with 1 to 4 diffusion burner |
| caps. They provide a more even heat, espceially when cooking at lower temper- |
| atures. |
Burner Grates | WARNING: |
| To prevent |
| all burner grates properly positioned. Do not use a grate if the feet are |
| missing or damaged. |
| Models with Stainless Steel Cooktop: |
| There are two burner grates: one for the left side of the cooktop and one for the |
| right side of the cooktop. Position them so that the circular opening is over the |
English 9
