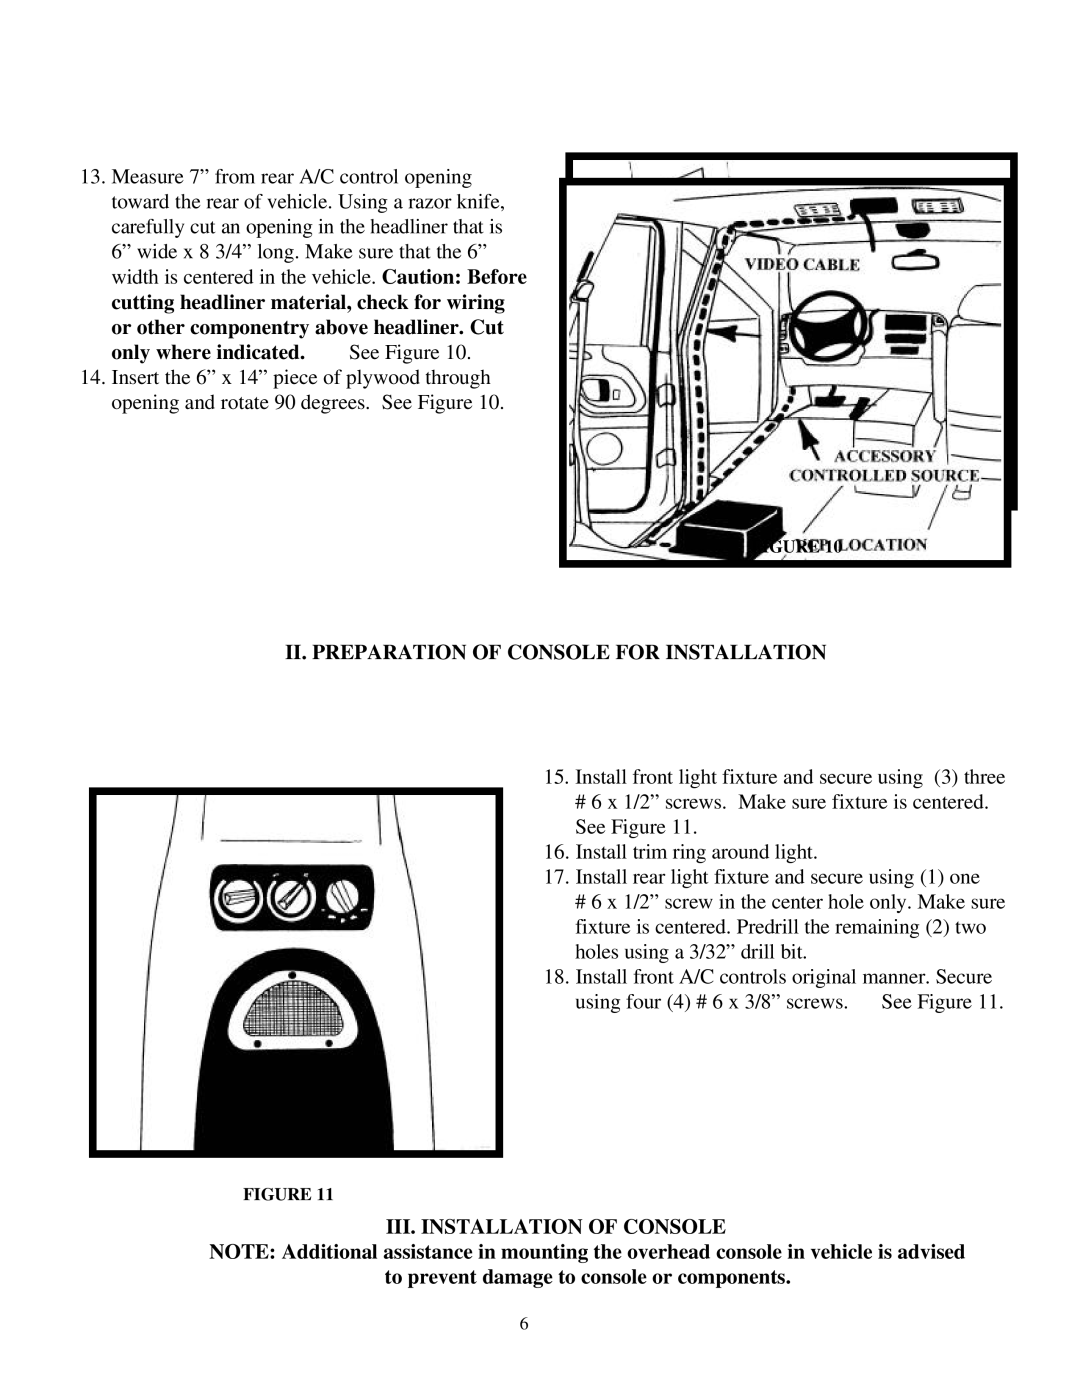
13.Measure 7” from rear A/C control opening toward the rear of vehicle. Using a razor knife, carefully cut an opening in the headliner that is 6” wide x 8 3/4” long. Make sure that the 6” width is centered in the vehicle. Caution: Before
cutting headliner material, check for wiring or other componentry above headliner. Cut
only where indicated. | See Figure 10. |
14.Insert the 6” x 14” piece of plywood through opening and rotate 90 degrees. See Figure 10.
FIGURE 10
II.PREPARATION OF CONSOLE FOR INSTALLATION
15.Install front light fixture and secure using (3) three
#6 x 1/2” screws. Make sure fixture is centered. See Figure 11.
16.Install trim ring around light.
17.Install rear light fixture and secure using (1) one
#6 x 1/2” screw in the center hole only. Make sure fixture is centered. Predrill the remaining (2) two holes using a 3/32” drill bit.
18.Install front A/C controls original manner. Secure
using four (4) # 6 x 3/8” screws. See Figure 11.
FIGURE 11
III. INSTALLATION OF CONSOLE
NOTE: Additional assistance in mounting the overhead console in vehicle is advised
to prevent damage to console or components.
6