1 | 2 | 3 | DMS S e r ve r | |||||
|
|
|
|
| ||||
A m p l i f i e r | DMR P l i n i u s Ti k i | N e t w o r k Wi - Fi R o u te r |
|
|
|
| ||
|
|
|
| |||||
|
|
|
|
|
|
|
|
|
|
|
|
|
|
|
|
|
|
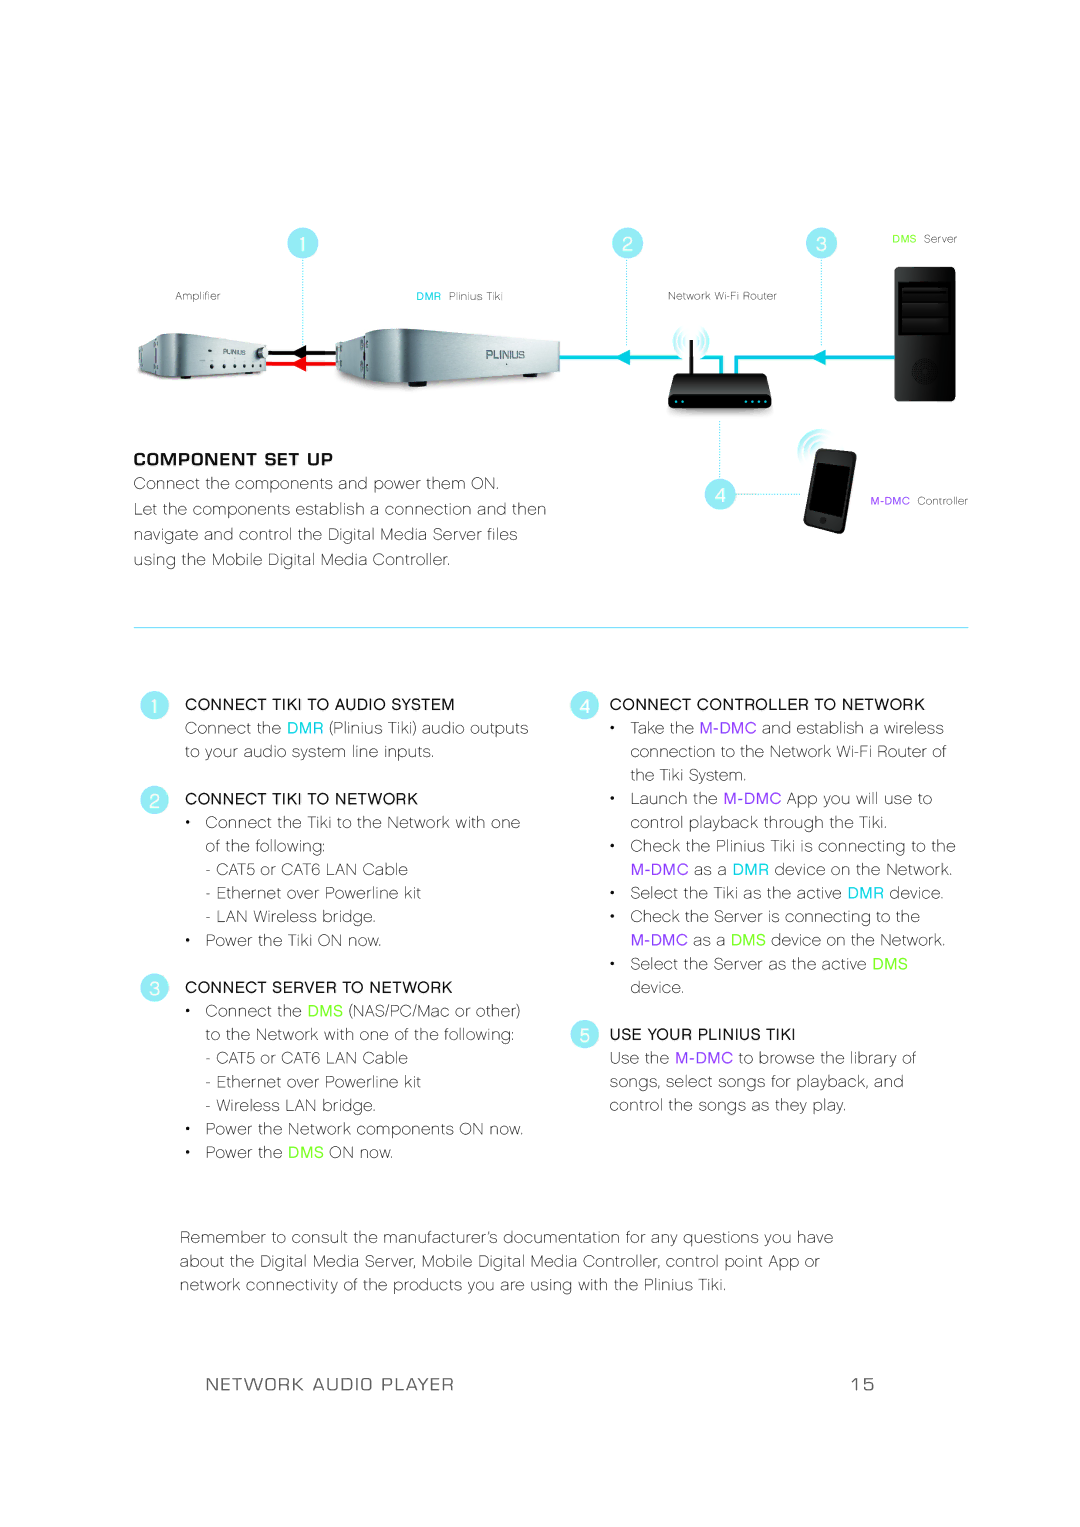
COMPONENT SET UP |
|
|
Connect the components and power them ON. | 4 |
|
Let the components establish a connection and then | ||
|
|
navigate and cont rol the Digital Media Ser ver files using the Mobile Digital Media Cont roller.
1 CONNECT TIKI TO AUDIO SYSTEM | 4 |
Connect the DMR (Plinius Tiki) audio outputs to your audio system line inputs.
2CONNECT TIKI TO NETWORK
•Connect the Tiki to the Net work with one of the following:
-CAT5 or CAT6 LAN Cable
-Ethernet over Powerline kit
-LAN Wireless bridge.
•Power the Tiki ON now.
3CONNECT SERVER TO NETWORK
•Connect the DMS (NAS/PC/Mac or other)
to the Net work with one of the following: | 5 |
-CAT5 or CAT6 LAN Cable
-Ethernet over Powerline kit
-Wireless LAN bridge.
•Power the Net work components ON now.
•Power the DMS ON now.
CONNECT CONTROLLER TO NETWORK
•Take the
•Launch the
•Check the Plinius Tiki is connecting to the
•Select the Tiki as the active DMR device.
•Check the Ser ver is connecting to the
•Select the Ser ver as the active DMS device.
USE YOUR PLINIUS TIKI
Use the
Remember to consult the manufacturer ’s documentation for any questions you have about the Digital Media Ser ver, Mobile Digital Media Cont roller, cont rol point App or net work connectivit y of the products you are using with the Plinius Tiki.
NETWORK AUDIO PLAYER | 15 |
