GENERAL OPERATION
!CAUTION
Keep all bystanders a safe distance away from the tool and not in direct line, front or back of the grinder.
1.Your bench grinder has a medium wheel (60 grit) for medium material removal and general purpose grinding, and a coarse wheel (36 grit) for fast material removal.
2.To operate the bench grinder, always wear safety glasses and turn the tool on while standing at the side and not in front of the grinder. Allow it to reach full speed before grinding.
3.Hold the work piece firmly against the tool rest. Hold very small pieces with pliers or other suitable clamps.
4.Feed the work piece smoothly and evenly into the grinding wheel.
5.Move the work piece slowly and avoid jamming the work piece against the wheel. If the wheel tends to slow down from excessive force, you should occasionally release the pressure to let the wheel return to full speed.
6.Grind only on the face of the grinding wheel and never the side of it. (Some wheels are designed for side grinding and will say so on their blotters/ cardboard disc.)
!CAUTION
Prolonged grinding will cause most materials to become hot. Use care when handling such materials.
SCISSORS
If possible, take the scissors apart to make the sharpening operation easier and safer. Remove material only from the outside surface and work from the heavy end of the blade toward the tip.
KNIVES
Remove metal from both faces of most knives, working from the heavy end of the blade toward the tip.
SCREWDRIVERS
The end of a properly sharpened screwdriver will be a perfect rectangle, absolutely flat and perpendicular to the center line of the shank. The two sides and two faces will taper outward from the edge of the shoulder or shank. They should be flat with intersecting faces perpendicular. Hold each face of the screwdriver against the wheel to true it up, then ease the end straight into the stone to grind it true.
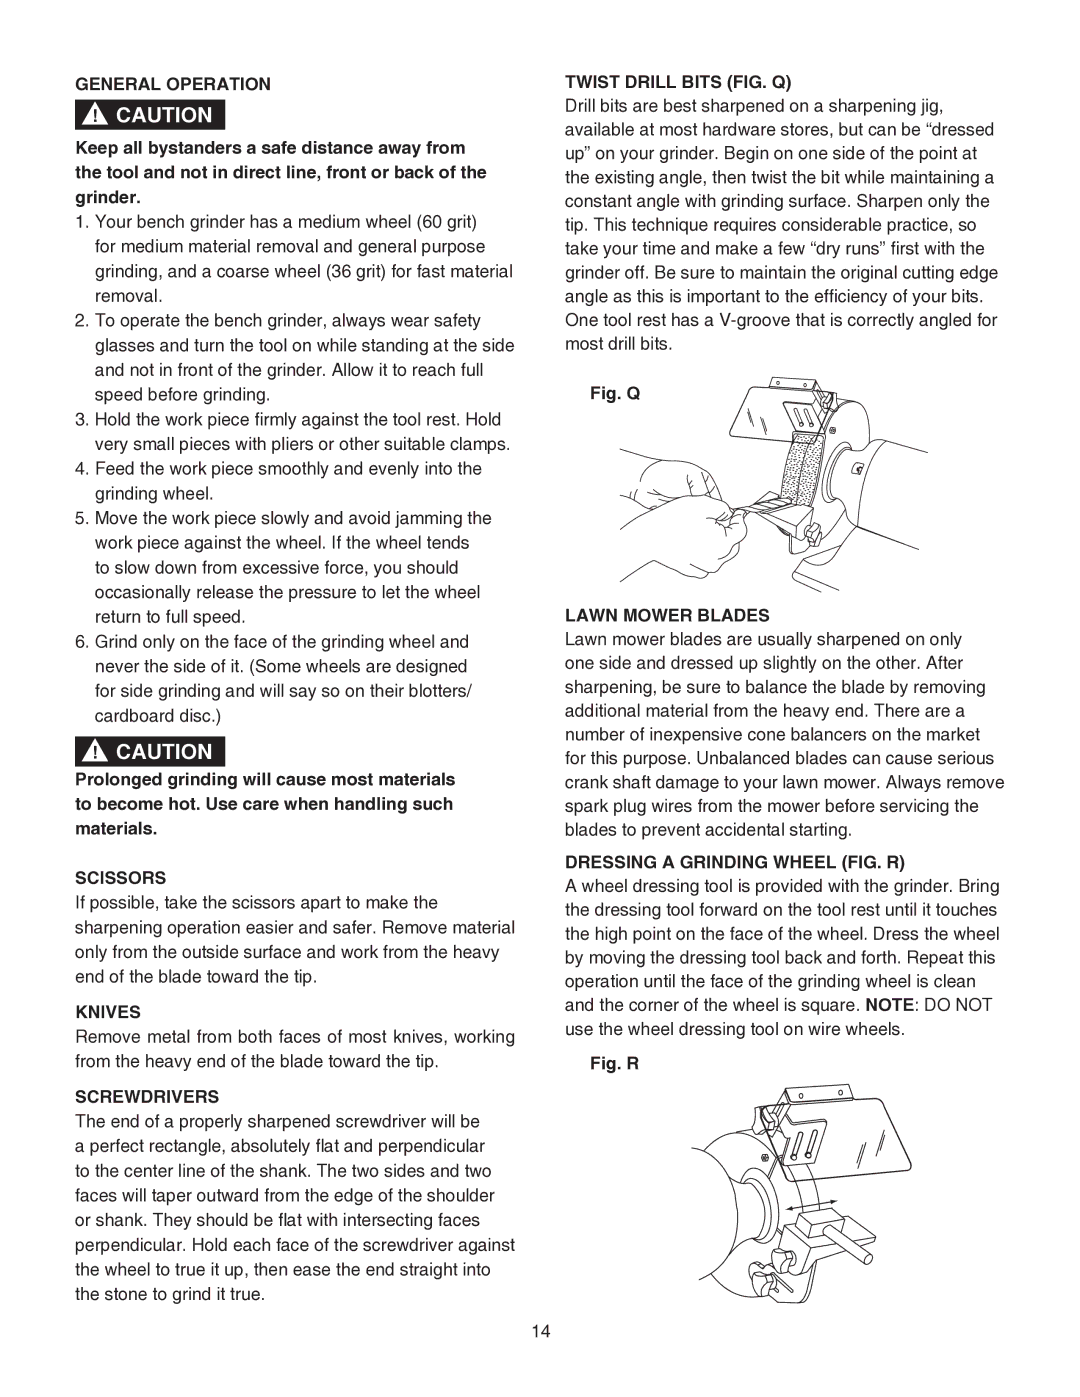
TWIST DRILL BITS (FIG. Q)
Drill bits are best sharpened on a sharpening jig, available at most hardware stores, but can be “dressed up” on your grinder. Begin on one side of the point at the existing angle, then twist the bit while maintaining a constant angle with grinding surface. Sharpen only the tip. This technique requires considerable practice, so take your time and make a few “dry runs” first with the grinder off. Be sure to maintain the original cutting edge angle as this is important to the efficiency of your bits. One tool rest has a
Fig. Q
LAWN MOWER BLADES
Lawn mower blades are usually sharpened on only one side and dressed up slightly on the other. After sharpening, be sure to balance the blade by removing additional material from the heavy end. There are a number of inexpensive cone balancers on the market for this purpose. Unbalanced blades can cause serious crank shaft damage to your lawn mower. Always remove spark plug wires from the mower before servicing the blades to prevent accidental starting.
DRESSING A GRINDING WHEEL (FIG. R)
A wheel dressing tool is provided with the grinder. Bring the dressing tool forward on the tool rest until it touches the high point on the face of the wheel. Dress the wheel by moving the dressing tool back and forth. Repeat this operation until the face of the grinding wheel is clean and the corner of the wheel is square. NOTE: DO NOT use the wheel dressing tool on wire wheels.
Fig. R
14