resolve the auto cutter problems per description in next item and then come back to deal with the paper jam. Never force open the top hood. Please also clear away any contaminants accumulated in the cutter track above the thermal elements.
Auto Cutter Track![]()
Thermal Elements ![]()
![]()
Auto Cutter Problems
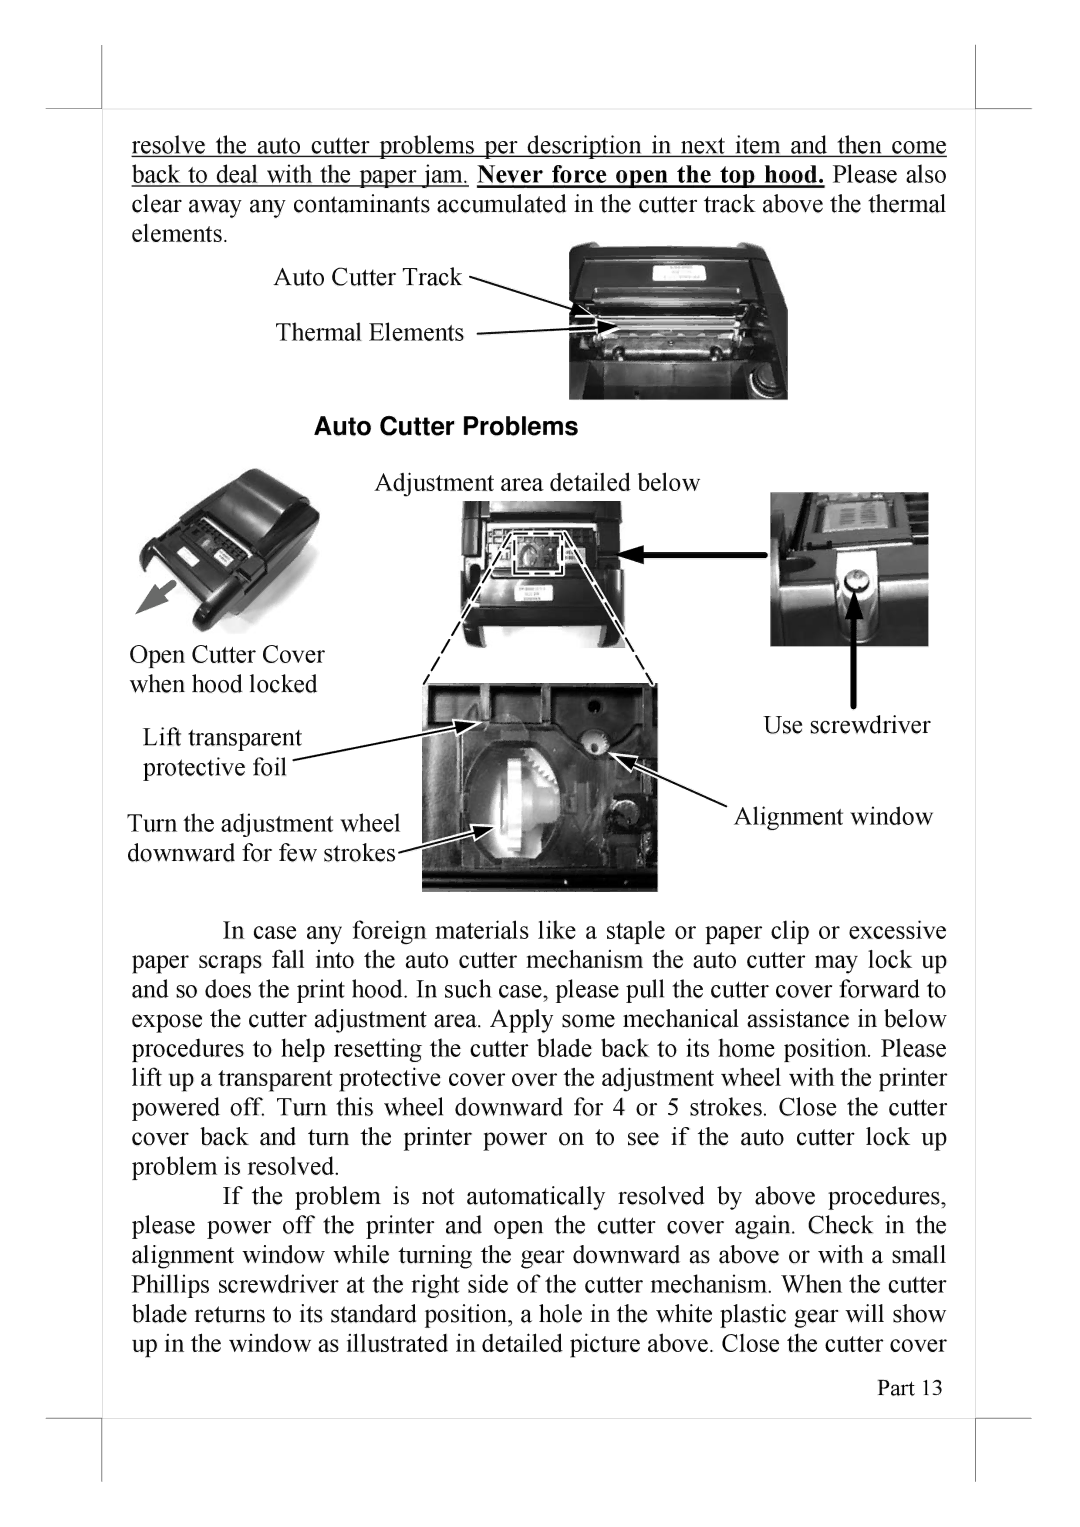
Adjustment area detailed below
Open Cutter Cover when hood locked
Lift transparent | Use screwdriver |
| |
protective foil |
|
Turn the adjustment wheel | Alignment window |
downward for few strokes |
|
In case any foreign materials like a staple or paper clip or excessive paper scraps fall into the auto cutter mechanism the auto cutter may lock up and so does the print hood. In such case, please pull the cutter cover forward to expose the cutter adjustment area. Apply some mechanical assistance in below procedures to help resetting the cutter blade back to its home position. Please lift up a transparent protective cover over the adjustment wheel with the printer powered off. Turn this wheel downward for 4 or 5 strokes. Close the cutter cover back and turn the printer power on to see if the auto cutter lock up problem is resolved.
If the problem is not automatically resolved by above procedures, please power off the printer and open the cutter cover again. Check in the alignment window while turning the gear downward as above or with a small Phillips screwdriver at the right side of the cutter mechanism. When the cutter blade returns to its standard position, a hole in the white plastic gear will show up in the window as illustrated in detailed picture above. Close the cutter cover
Part 13
