Installation and Assembly
Tools required:
Arbor wrench (supplied)
12mm combination wrench (supplied) 3mm and 4mm hex wrenches (supplied)
8, 10, 14, 15, and 19 mm
Some assembly tips:
1.A bowl should be used to hold hardware.
2.To avoid harming the table saw top, a cloth should be placed on the floor first.
3.Do not remove wax coating from table until saw is assembled.
4.Start assembly in the area where saw will be used. This area should be clean and tidy in order to make it easy to find any dropped fasteners and tools.
5.Unwrap only the hardware packages that one is working on.
6.A mobile light should be used to illuminate obscure areas.
7.The use of a ratchet wrench with sockets and extensions will greatly reduce assembly time.
Remove the protective coating from the saw table surface with a soft cloth moistened with a good commercial solvent. NOTE: Do not use acetone, gasoline, or lacquer thinner to remove the protective coating, as it can damage plastic parts and painted areas. Do not use an abrasive pad on the table top.
Stand Assembly
Note: Except for the rubber feet, only finger tighten all nuts. Stand assembly nuts should be fully tightened only after the saw has been attached to the stand. If you are using a mobile base, the stand should be tightened only after placing the saw in the mobile base.
TIP: It may be easier to assemble stand in an
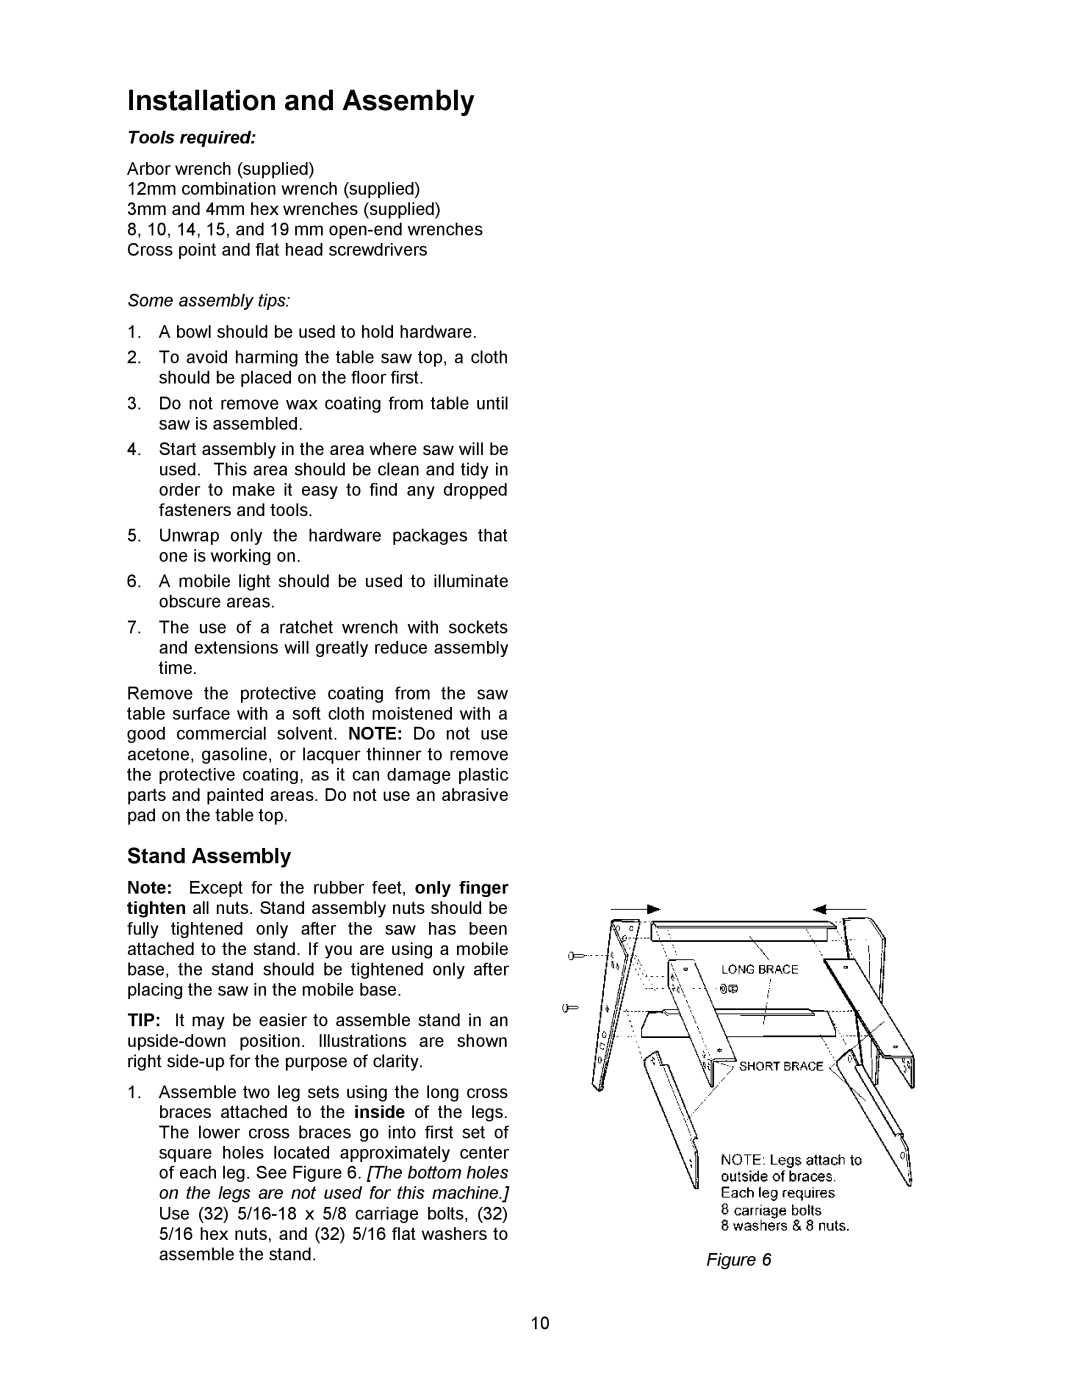
1.Assemble two leg sets using the long cross braces attached to the inside of the legs. The lower cross braces go into first set of square holes located approximately center of each leg. See Figure 6. [The bottom holes on the legs are not used for this machine.] Use (32)
assemble the stand. | Figure 6 |
10