7.Provide auxiliary support for any workpiece which tends to sag and lift up off the table when it extends beyond the table top.
8.Have the blade extend about 1/8" above the top of the workpiece. Exposing the blade above this point can be hazardous.
Bevel and Miter Operations
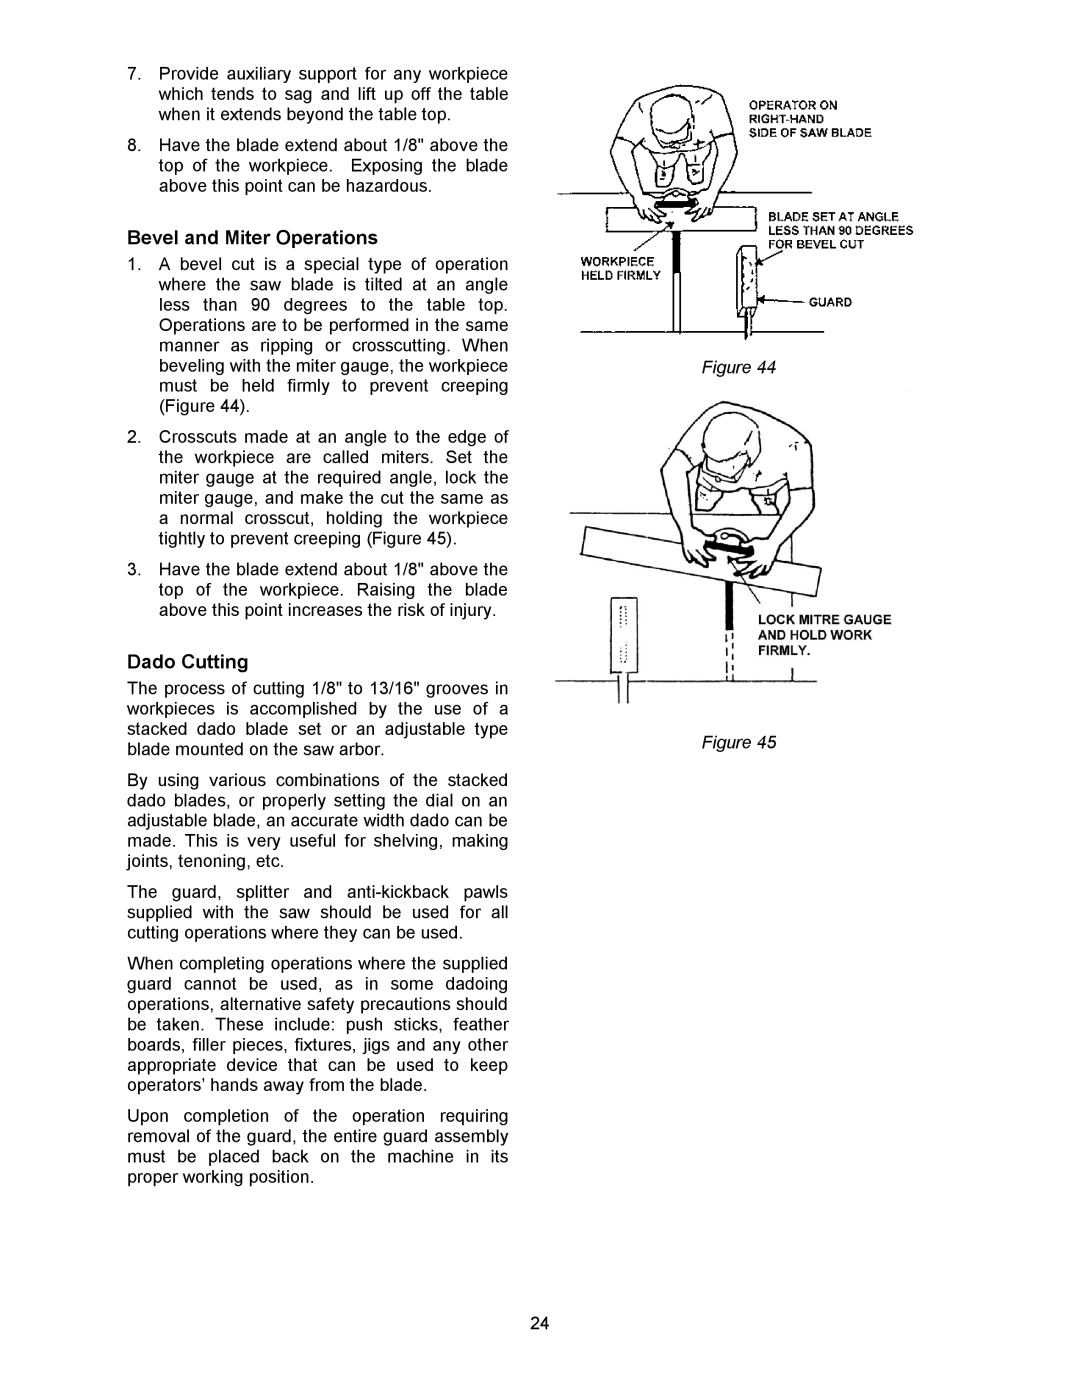
1.A bevel cut is a special type of operation where the saw blade is tilted at an angle less than 90 degrees to the table top. Operations are to be performed in the same manner as ripping or crosscutting. When beveling with the miter gauge, the workpiece must be held firmly to prevent creeping (Figure 44).
2.Crosscuts made at an angle to the edge of the workpiece are called miters. Set the miter gauge at the required angle, lock the miter gauge, and make the cut the same as a normal crosscut, holding the workpiece tightly to prevent creeping (Figure 45).
3.Have the blade extend about 1/8" above the top of the workpiece. Raising the blade above this point increases the risk of injury.
Dado Cutting
The process of cutting 1/8" to 13/16" grooves in workpieces is accomplished by the use of a stacked dado blade set or an adjustable type blade mounted on the saw arbor.
By using various combinations of the stacked dado blades, or properly setting the dial on an adjustable blade, an accurate width dado can be made. This is very useful for shelving, making joints, tenoning, etc.
The guard, splitter and
When completing operations where the supplied guard cannot be used, as in some dadoing operations, alternative safety precautions should be taken. These include: push sticks, feather boards, filler pieces, fixtures, jigs and any other appropriate device that can be used to keep operators’ hands away from the blade.
Upon completion of the operation requiring removal of the guard, the entire guard assembly must be placed back on the machine in its proper working position.
Figure 44
Figure 45
24