One revolution of the handwheel equals 1/32” change in table height. Use the scale or digital readout to determine distance from the cutterhead.
Feed Rate
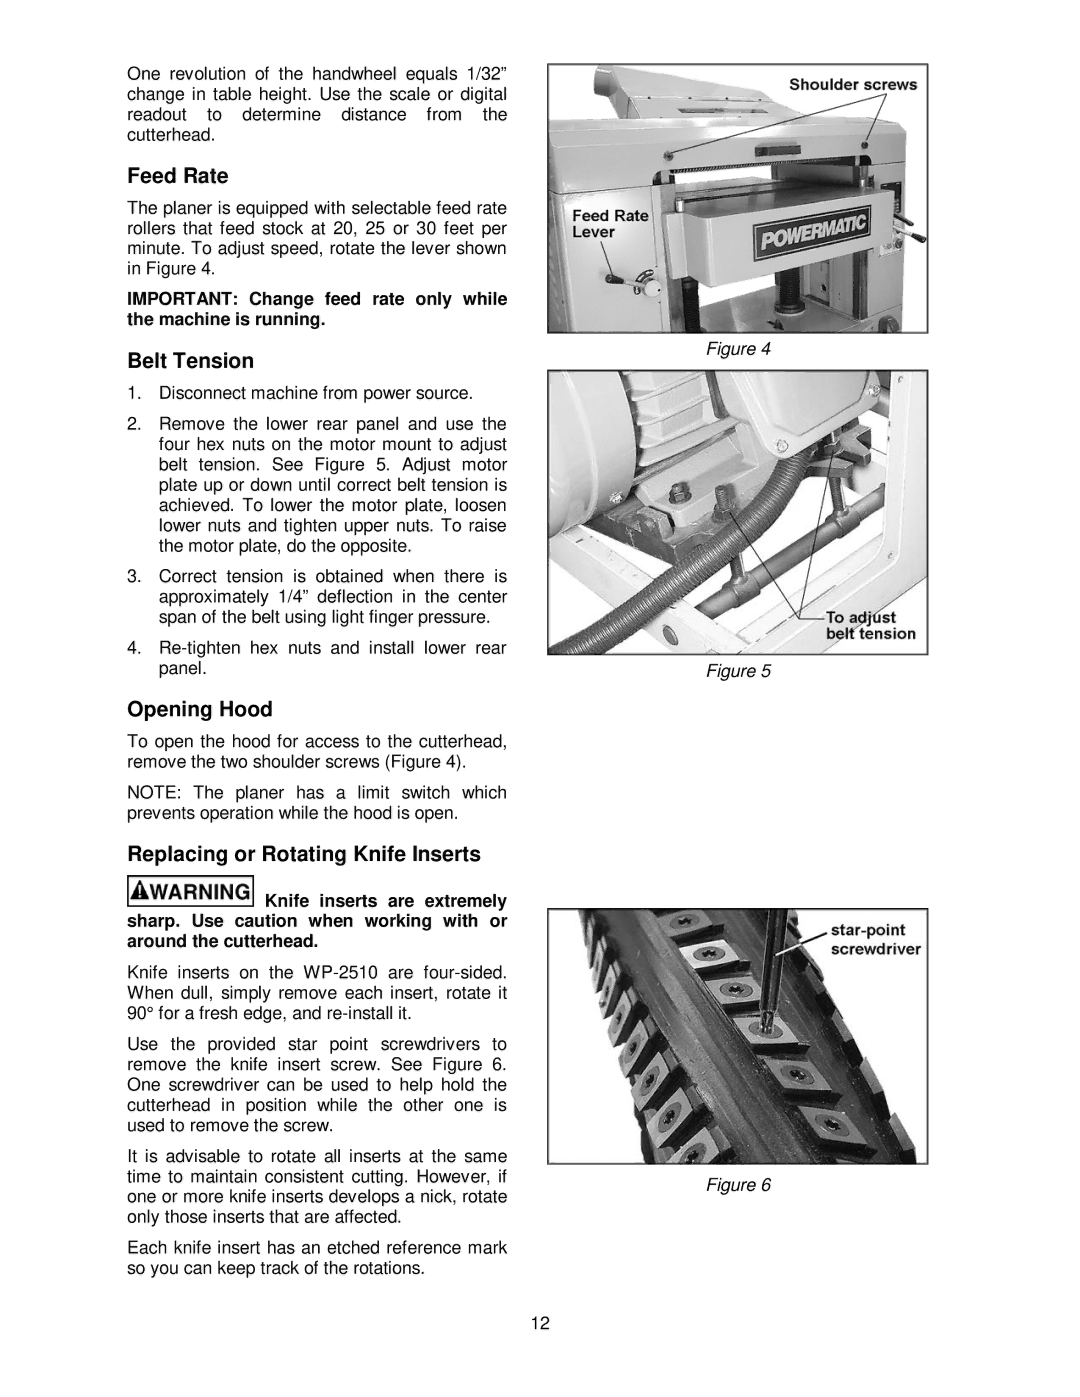
The planer is equipped with selectable feed rate rollers that feed stock at 20, 25 or 30 feet per minute. To adjust speed, rotate the lever shown in Figure 4.
IMPORTANT: Change feed rate only while the machine is running.
Belt Tension
1.Disconnect machine from power source.
2.Remove the lower rear panel and use the four hex nuts on the motor mount to adjust belt tension. See Figure 5. Adjust motor plate up or down until correct belt tension is achieved. To lower the motor plate, loosen lower nuts and tighten upper nuts. To raise the motor plate, do the opposite.
3.Correct tension is obtained when there is approximately 1/4” deflection in the center span of the belt using light finger pressure.
4.
Opening Hood
To open the hood for access to the cutterhead, remove the two shoulder screws (Figure 4).
NOTE: The planer has a limit switch which prevents operation while the hood is open.
Replacing or Rotating Knife Inserts
![]() Knife inserts are extremely sharp. Use caution when working with or around the cutterhead.
Knife inserts are extremely sharp. Use caution when working with or around the cutterhead.
Knife inserts on the
Use the provided star point screwdrivers to remove the knife insert screw. See Figure 6. One screwdriver can be used to help hold the cutterhead in position while the other one is used to remove the screw.
It is advisable to rotate all inserts at the same time to maintain consistent cutting. However, if one or more knife inserts develops a nick, rotate only those inserts that are affected.
Each knife insert has an etched reference mark so you can keep track of the rotations.
Figure 4
Figure 5
Figure 6
12