IMPORTANT: When removing or rotating inserts, clean saw dust from the screw, the insert, and the cutterhead platform. Dust accumulation between these elements can prevent the insert from seating properly, and may affect the quality of the cut.
Before installing each screw, lightly coat the screw threads with machine oil and wipe off any excess.
Securely tighten each screw which holds the knife inserts before operating the planer!
![]() Make sure all knife insert screws are tightened securely. Loose inserts can be propelled at high speed from a rotating cutterhead, causing injury.
Make sure all knife insert screws are tightened securely. Loose inserts can be propelled at high speed from a rotating cutterhead, causing injury.
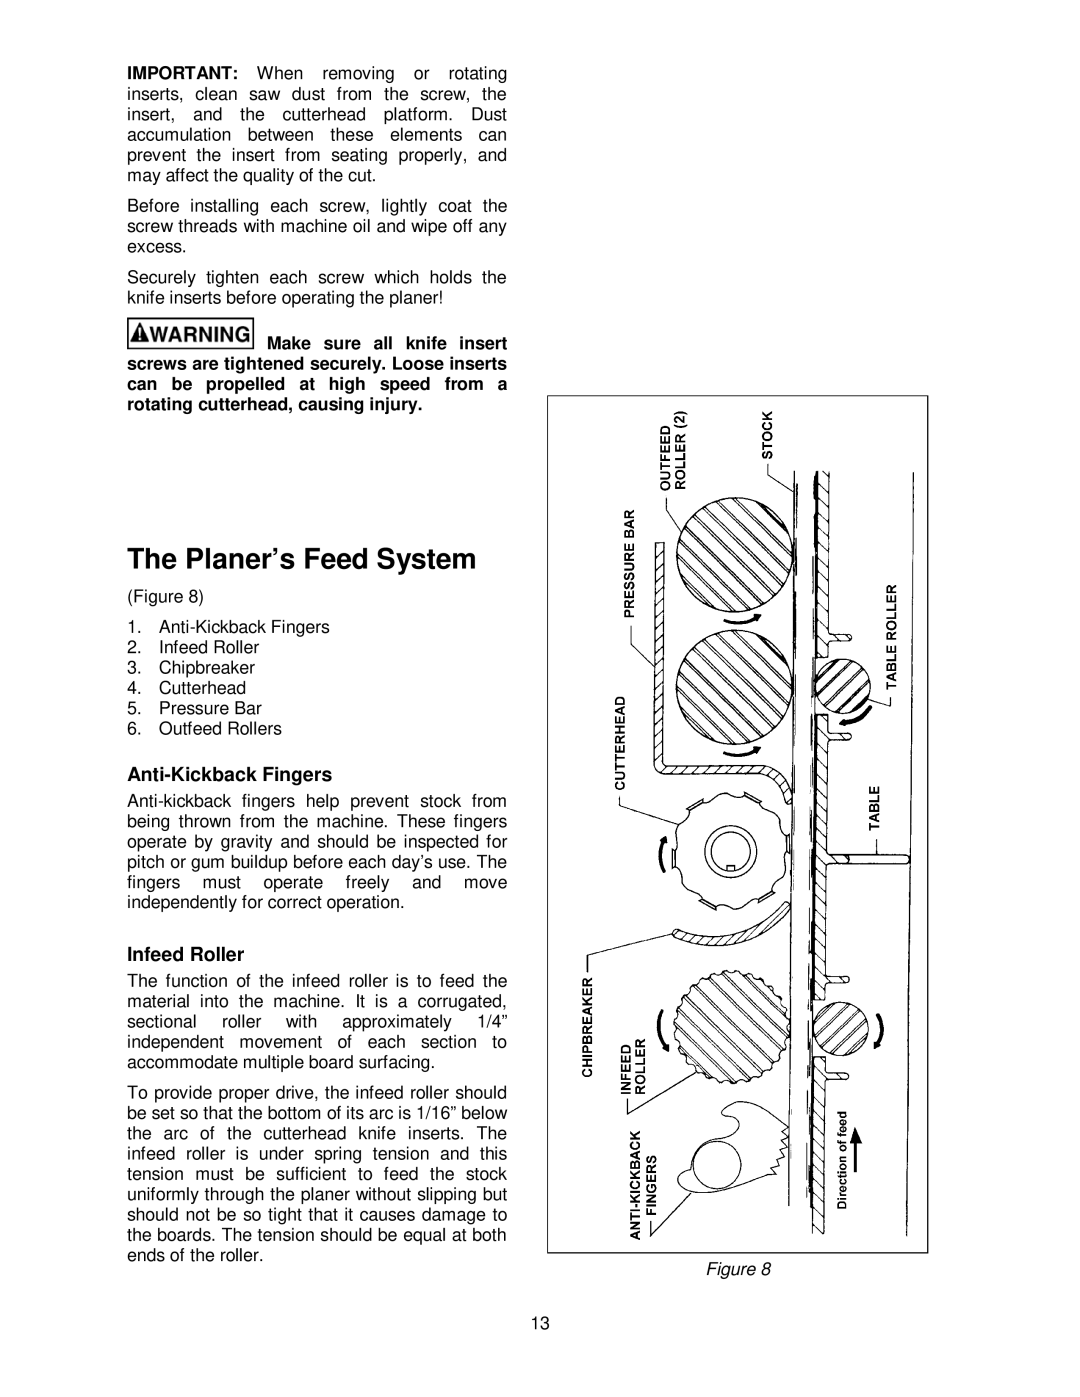
The Planer’s Feed System
(Figure 8)
1.
2.Infeed Roller
3.Chipbreaker
4.Cutterhead
5.Pressure Bar
6.Outfeed Rollers
Anti-Kickback Fingers
Infeed Roller
The function of the infeed roller is to feed the material into the machine. It is a corrugated, sectional roller with approximately 1/4” independent movement of each section to accommodate multiple board surfacing.
To provide proper drive, the infeed roller should be set so that the bottom of its arc is 1/16” below the arc of the cutterhead knife inserts. The infeed roller is under spring tension and this tension must be sufficient to feed the stock uniformly through the planer without slipping but should not be so tight that it causes damage to the boards. The tension should be equal at both ends of the roller.
Figure 8
13