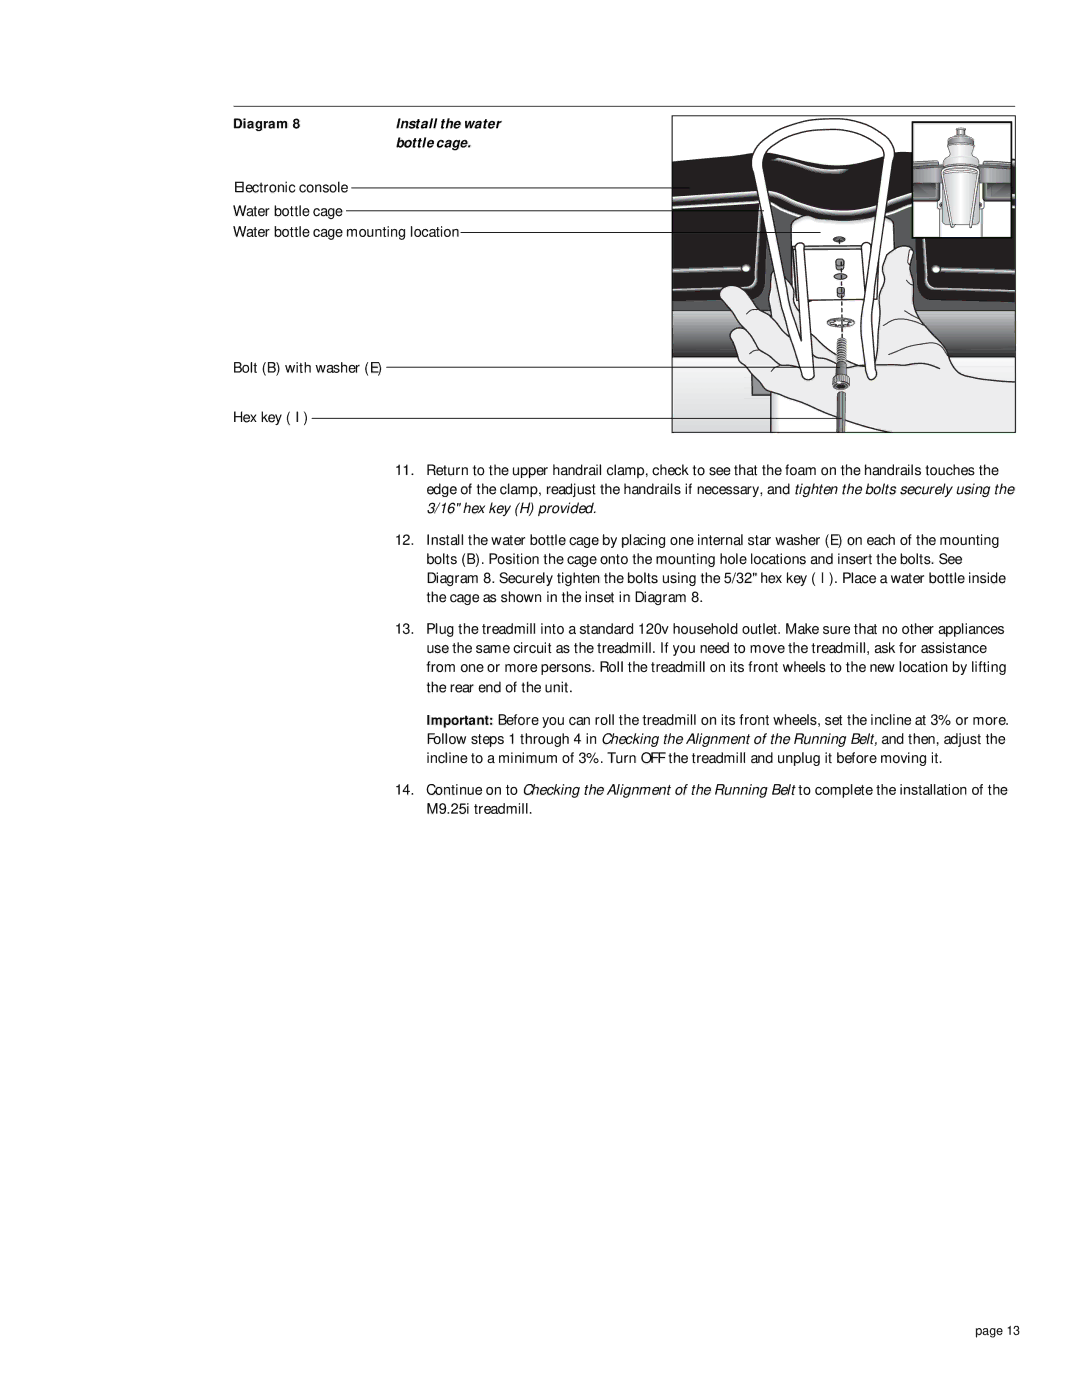
Diagram 8 | Install the water |
| bottle cage. |
Electronic console
Water bottle cage
Water bottle cage mounting location
Bolt (B) with washer (E)
Hex key ( I )
11.Return to the upper handrail clamp, check to see that the foam on the handrails touches the edge of the clamp, readjust the handrails if necessary, and tighten the bolts securely using the 3/16" hex key (H) provided.
12.Install the water bottle cage by placing one internal star washer (E) on each of the mounting bolts (B). Position the cage onto the mounting hole locations and insert the bolts. See Diagram 8. Securely tighten the bolts using the 5/32" hex key ( I ). Place a water bottle inside the cage as shown in the inset in Diagram 8.
13.Plug the treadmill into a standard 120v household outlet. Make sure that no other appliances use the same circuit as the treadmill. If you need to move the treadmill, ask for assistance from one or more persons. Roll the treadmill on its front wheels to the new location by lifting the rear end of the unit.
Important: Before you can roll the treadmill on its front wheels, set the incline at 3% or more. Follow steps 1 through 4 in Checking the Alignment of the Running Belt, and then, adjust the incline to a minimum of 3%. Turn OFF the treadmill and unplug it before moving it.
14.Continue on to Checking the Alignment of the Running Belt to complete the installation of the M9.25i treadmill.
page 13
