•A validation tone is emitted.
•The unit is reset to its default settings (see “Default settings” on page 35).
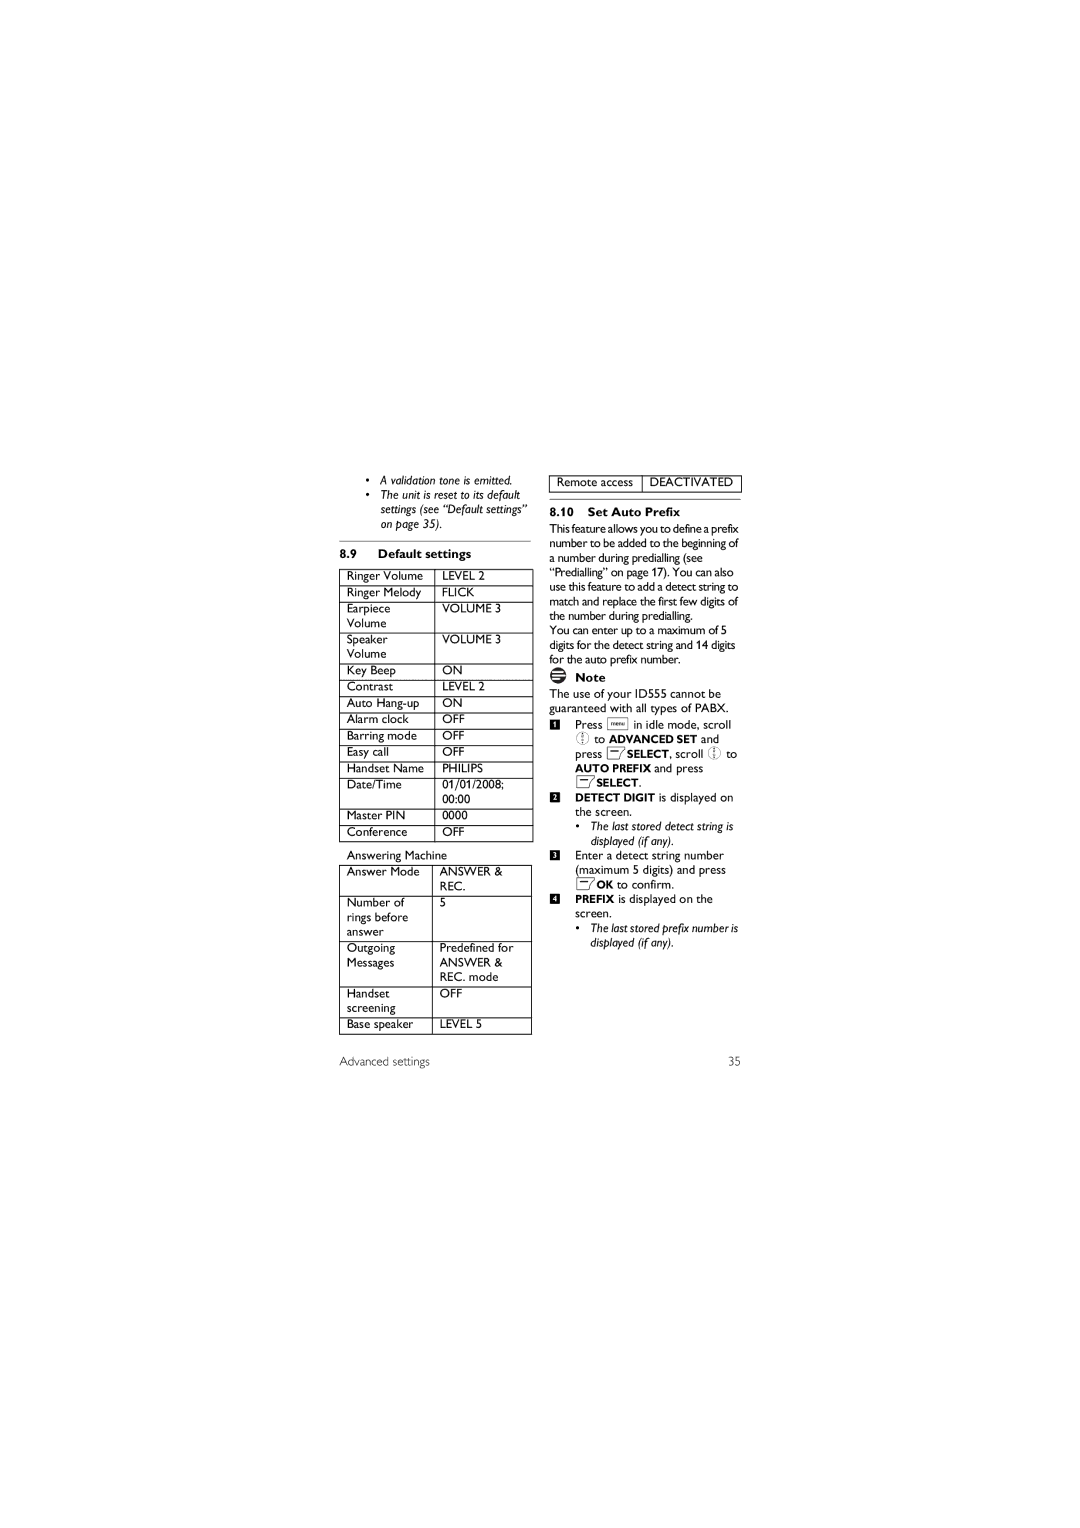
8.9Default settings
Ringer Volume | LEVEL 2 | |
Ringer Melody | FLICK | |
Earpiece | VOLUME 3 | |
Volume |
|
|
|
|
|
Speaker | VOLUME 3 | |
Volume |
|
|
|
|
|
Key Beep | ON | |
Contrast | LEVEL 2 | |
Auto | ON | |
Alarm clock | OFF | |
Barring mode | OFF | |
Easy call | OFF | |
Handset Name | PHILIPS | |
Date/Time | 01/01/2008; |
|
| 00:00 |
|
|
|
|
Master PIN | 0000 |
|
Conference | OFF | |
Answering Machine | ||
|
|
|
Answer Mode | ANSWER & |
|
| REC. |
|
|
|
|
Number of | 5 |
|
rings before |
|
|
answer |
|
|
|
|
|
Outgoing | Predefined for |
|
Messages | ANSWER & |
|
| REC. mode |
|
|
|
|
Handset | OFF |
|
screening |
|
|
|
|
|
Base speaker | LEVEL 5 |
|
Remote access DEACTIVATED
8.10Set Auto Prefix
This feature allows you to define a prefix number to be added to the beginning of a number during predialling (see “Predialling” on page 17). You can also use this feature to add a detect string to match and replace the first few digits of the number during predialling.
You can enter up to a maximum of 5 digits for the detect string and 14 digits for the auto prefix number.
Note
The use of your ID555 cannot be guaranteed with all types of PABX.
1Press Min idle mode, scroll
:to ADVANCED SET and
press mSELECT, scroll :to AUTO PREFIX and press
mSELECT.
2DETECT DIGIT is displayed on the screen.
• The last stored detect string is
displayed (if any).
3Enter a detect string number (maximum 5 digits) and press
mOK to confirm.
4PREFIX is displayed on the screen.
•The last stored prefix number is displayed (if any).
Advanced settings | 35 |
