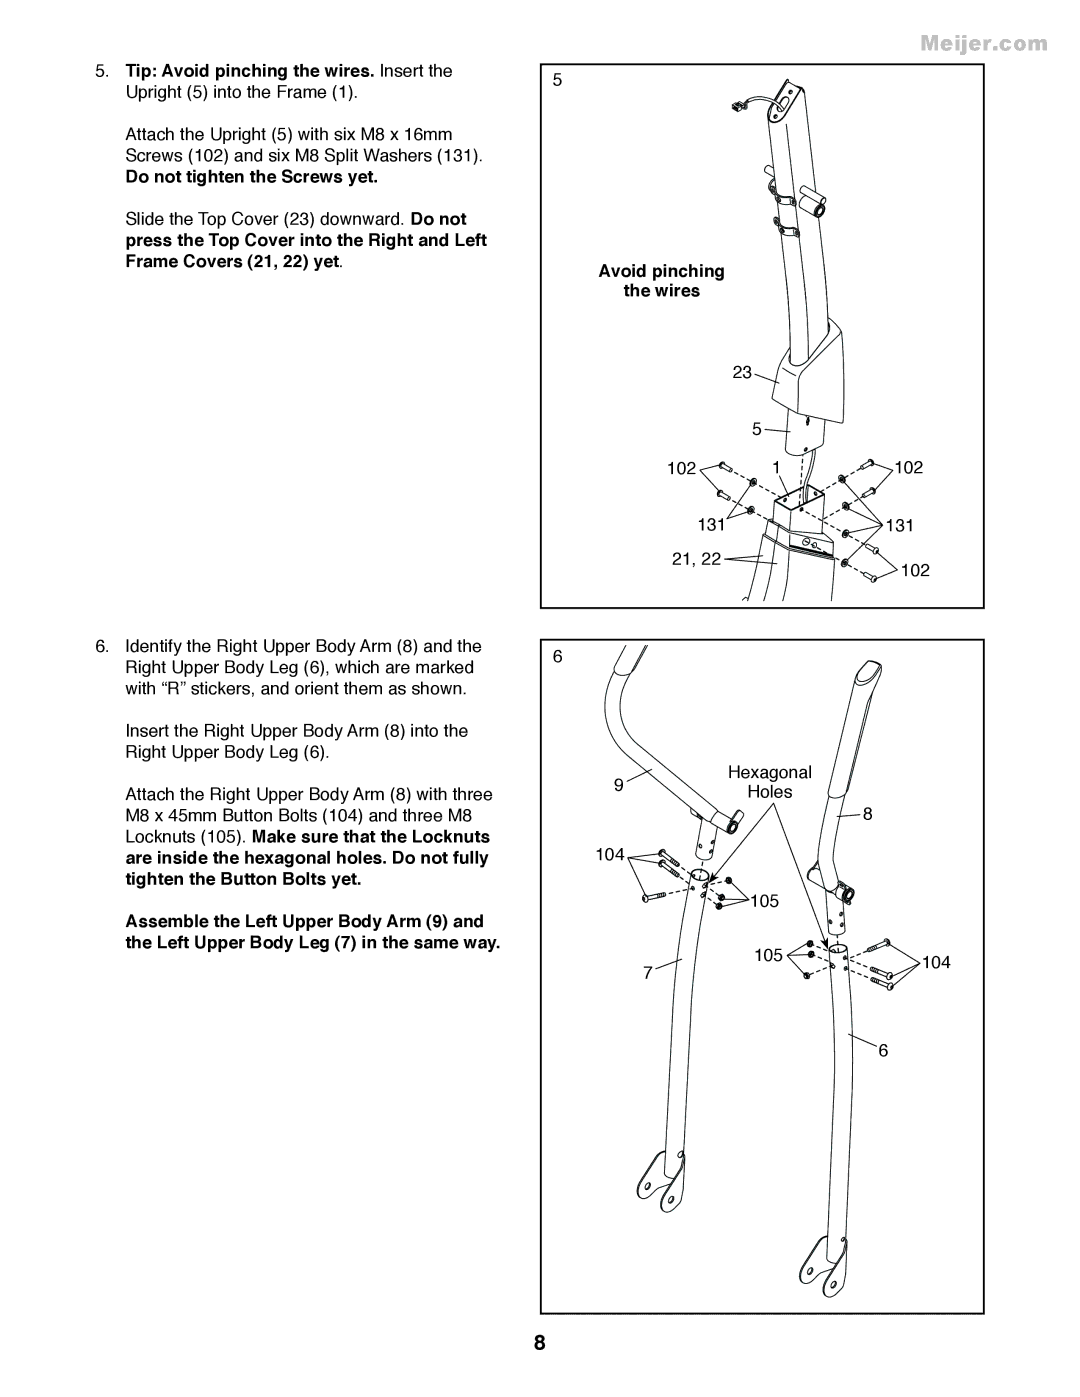
5.Tip: Avoid pinching the wires. Insert the Upright (5) into the Frame (1).
Attach the Upright (5) with six M8 x 16mm Screws (102) and six M8 Split Washers (131).
Do not tighten the Screws yet.
Slide the Top Cover (23) downward. Do not press the Top Cover into the Right and Left Frame Covers (21, 22) yet.
6.Identify the Right Upper Body Arm (8) and the Right Upper Body Leg (6), which are marked with “R” stickers, and orient them as shown.
Insert the Right Upper Body Arm (8) into the Right Upper Body Leg (6).
Attach the Right Upper Body Arm (8) with three M8 x 45mm Button Bolts (104) and three M8 Locknuts (105). Make sure that the Locknuts are inside the hexagonal holes. Do not fully tighten the Button Bolts yet.
Assemble the Left Upper Body Arm (9) and the Left Upper Body Leg (7) in the same way.
5
Avoid pinching
the wires
23
5
102 1
131
21, 22
6
9 | Hexagonal |
Holes |
104
105
105
7
Meijer.com
102
131
102
8
104
6
8