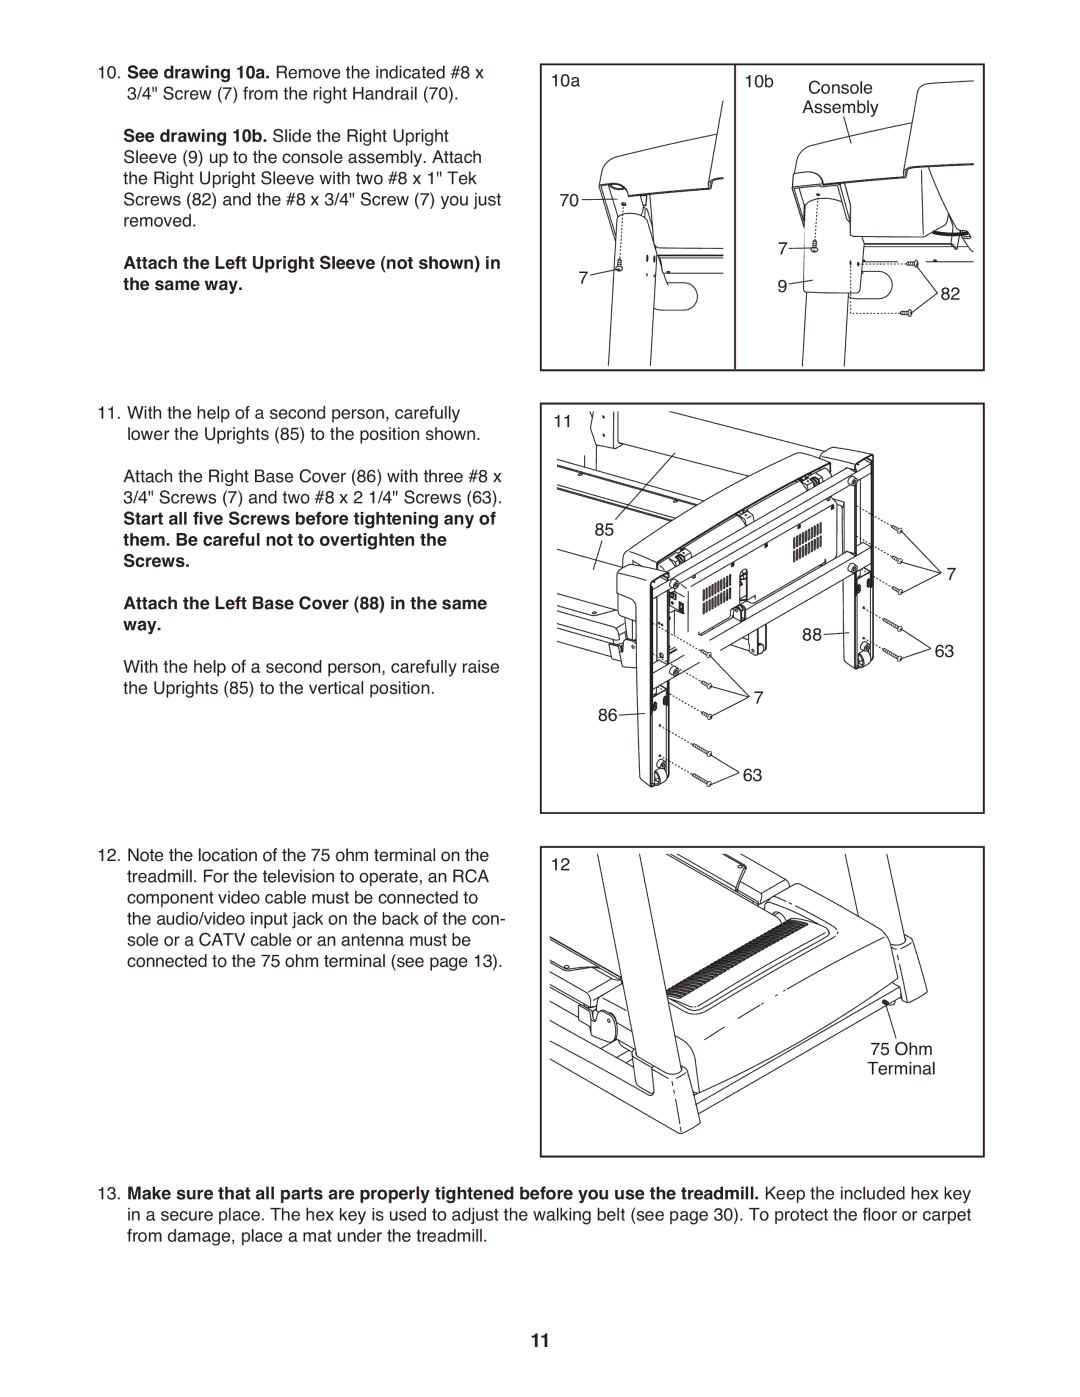
10.See drawing 10a. Remove the indicated #8 x 3/4" Screw (7) from the right Handrail (70).
See drawing 10b. Slide the Right Upright Sleeve (9) up to the console assembly. Attach the Right Upright Sleeve with two #8 x 1" Tek Screws (82) and the #8 x 3/4" Screw (7) you just removed.
Attach the Left Upright Sleeve (not shown) in the same way.
10a
70 ![]()
![]()
![]()
![]() 7
7 ![]()
![]()
![]()
![]()
![]()
![]()
![]()
![]()
![]()
![]()
10b Console
Assembly
7![]()
9![]()
![]()
![]()
![]()
![]()
![]()
![]()
![]()
![]()
![]()
![]() 82
82
11. With the help of a second person, carefully | 11 |
|
|
lower the Uprights (85) to the position shown. |
|
| |
Attach the Right Base Cover (86) with three #8 x |
|
|
|
3/4" Screws (7) and two #8 x 2 1/4" Screws (63). |
|
|
|
Start all five Screws before tightening any of | 85 |
|
|
them. Be careful not to overtighten the |
| 7 | |
Screws. |
|
| |
Attach the Left Base Cover (88) in the same |
| 88 |
|
way. |
| 63 | |
With the help of a second person, carefully raise |
| 7 | |
the Uprights (85) to the vertical position. | 86 |
| |
|
|
| |
|
| 63 |
|
12. Note the location of the 75 ohm terminal on the | 12 |
|
|
treadmill. For the television to operate, an RCA |
|
| |
component video cable must be connected to |
|
|
|
the audio/video input jack on the back of the con- |
|
|
|
sole or a CATV cable or an antenna must be |
|
|
|
connected to the 75 ohm terminal (see page 13). |
|
|
|
|
|
| 75 Ohm |
|
|
| Terminal |
13.Make sure that all parts are properly tightened before you use the treadmill. Keep the included hex key in a secure place. The hex key is used to adjust the walking belt (see page 30). To protect the floor or carpet from damage, place a mat under the treadmill.
11