Steps For Installing Sun-visor with Shroud
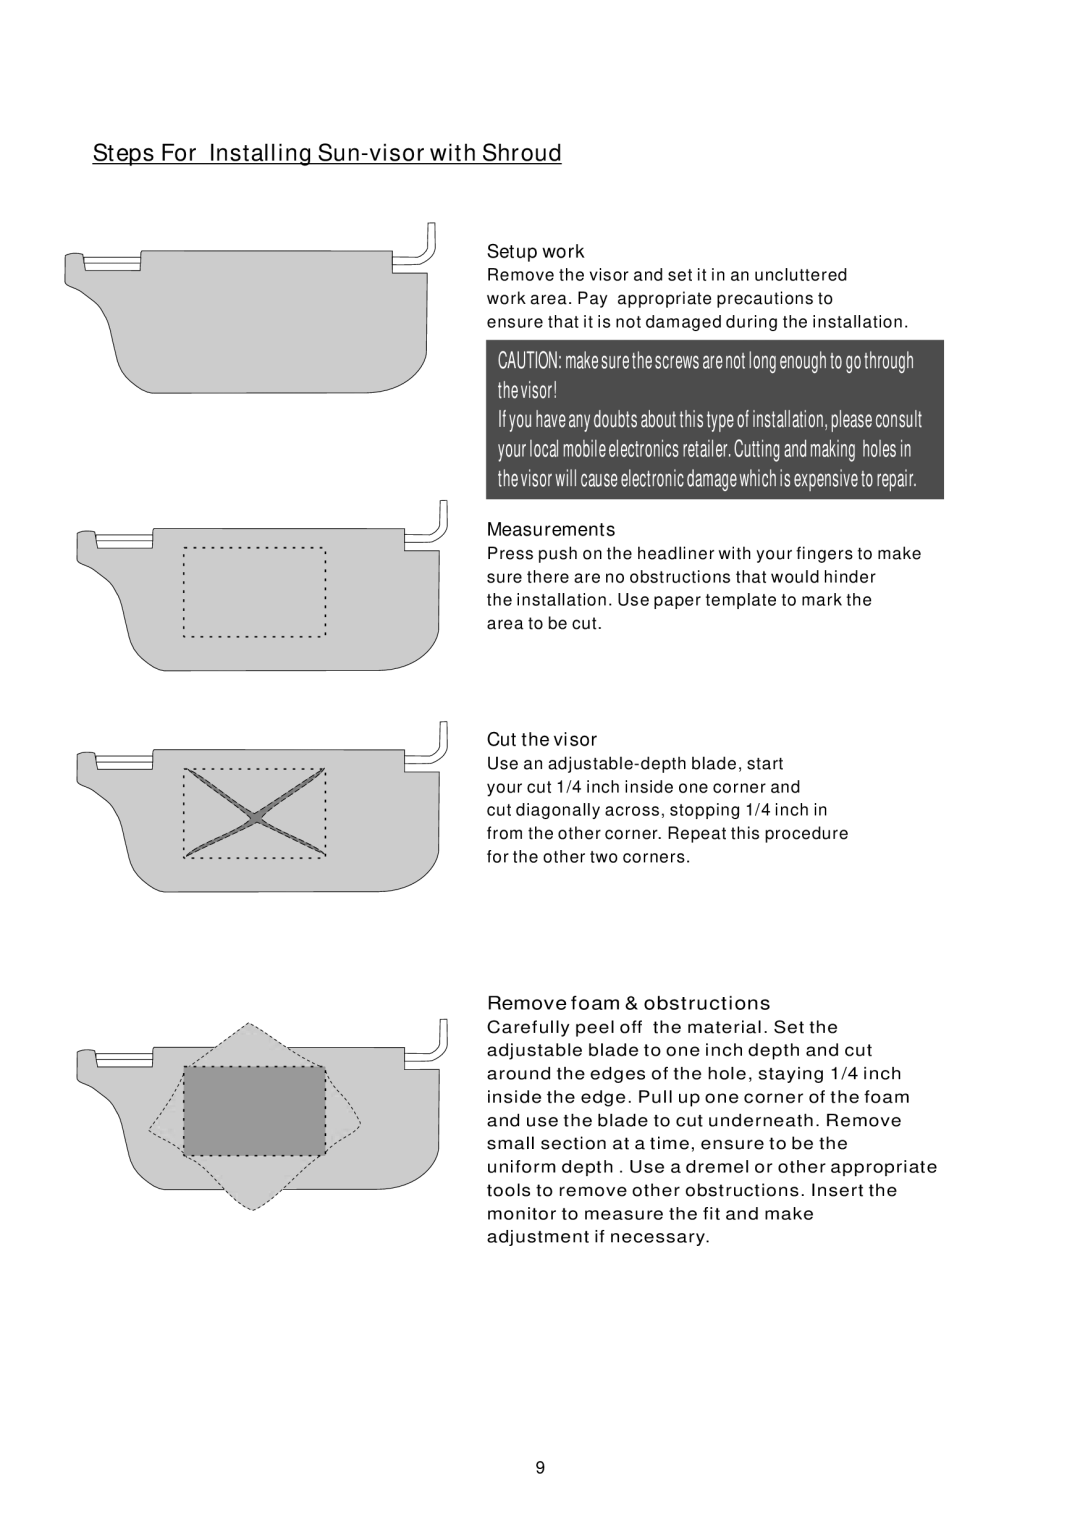
Setup work
Remove the visor and set it in an uncluttered work area. Pay appropriate precautions to ensure that it is not damaged during the installation.
CAUTION: make sure the screws are not long enough to go through the visor!
If you have any doubts about this type of installation, please consult your local mobile electronics retailer. Cutting and making holes in the visor will cause electronic damage which is expensive to repair.
Measurements
Press push on the headliner with your fingers to make sure there are no obstructions that would hinder
the installation. Use paper template to mark the area to be cut.
Cut the visor
Use an
Remove foam & obstructions
Carefully peel off the material. Set the adjustable blade to one inch depth and cut around the edges of the hole, staying 1/4 inch inside the edge. Pull up one corner of the foam and use the blade to cut underneath. Remove small section at a time, ensure to be the uniform depth . Use a dremel or other appropriate tools to remove other obstructions. Insert the monitor to measure the fit and make adjustment if necessary.
9