RESTORING FACTORY SETTINGS
STEP 1. Click DEFAULT SETTINGS. This will restore the system to the original factory settings.
STEP 2. Click OK in the prompt.
IMPORTANT! Restoring factory settings will cause any settings you’ve made to the system to be removed! This includes recording and network setups along with passwords!
RESTARTING THE DVR (SOFT-RESET)
STEP 1. Click RESTART.
STEP 2. Click OK in the prompt. The system will perform a
UPGRADING THE FIRMWARE
STEP 1. Copy the firmware file to an empty USB flash drive. The firmware file should not be in a folder.
STEP 2. Connect the USB flash drive to the top USB port on the front panel of your system.
STEP 3. Open the System Menu. |
| |
STEP 4. Click FIRMWARE UPDATE. | PICTURE | |
The system will scan the USB | ||
| ||
flash drive and begin updating the |
| |
firmware. Do not remove the USB |
| |
flash drive while the upgrade is |
| |
taking place. |
| |
STEP 5. Click CLOSE in the confirmation |
| |
window. In the system prompt, click |
| |
OK. The system will restart. |
|
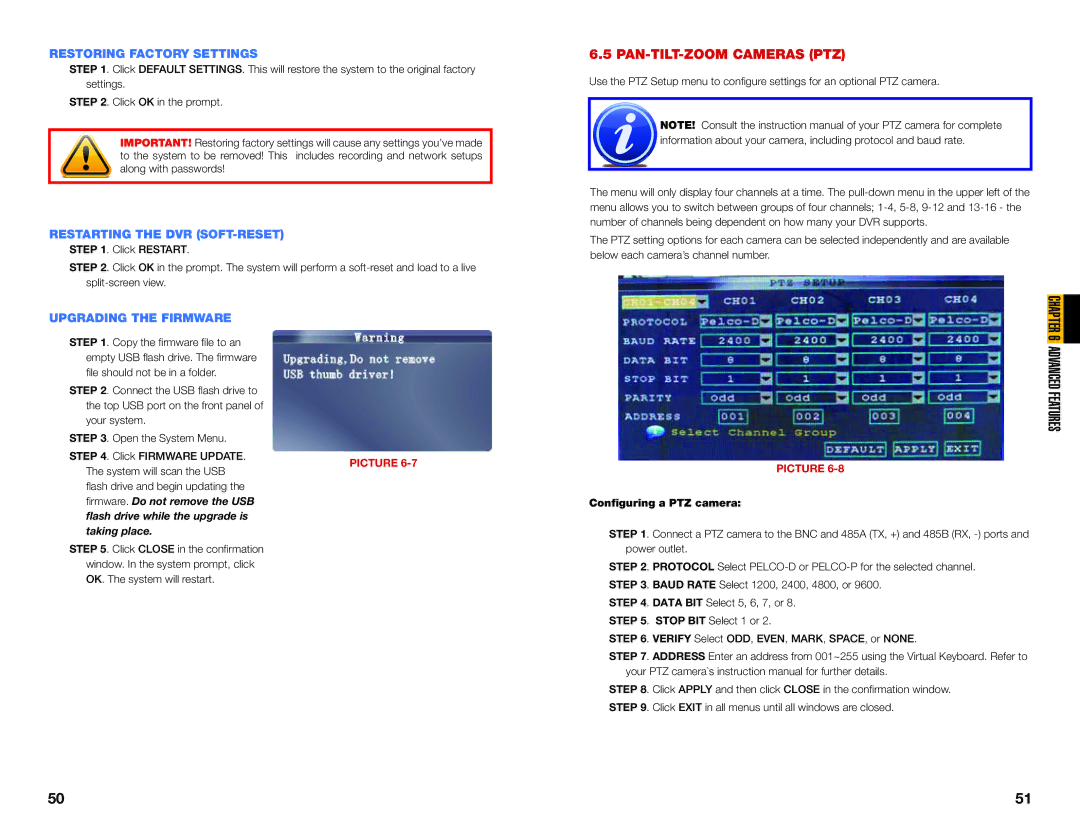
6.5 PAN-TILT-ZOOM CAMERAS (PTZ)
Use the PTZ Setup menu to configure settings for an optional PTZ camera.
![]() NOTE! Consult the instruction manual of your PTZ camera for complete information about your camera, including protocol and baud rate.
NOTE! Consult the instruction manual of your PTZ camera for complete information about your camera, including protocol and baud rate.
The menu will only display four channels at a time. The
The PTZ setting options for each camera can be selected independently and are available below each camera’s channel number.
CHAPTER 6 ADVANCED FEATURES
PICTURE
Configuring a PTZ camera:
STEP 1. Connect a PTZ camera to the BNC and 485A (TX, +) and 485B (RX,
STEP 2. PROTOCOL Select
STEP 4. DATA BIT Select 5, 6, 7, or 8.
STEP 5. STOP BIT Select 1 or 2.
STEP 6. VERIFY Select ODD, EVEN, MARK, SPACE, or NONE.
STEP 7. ADDRESS Enter an address from 001~255 using the Virtual Keyboard. Refer to your PTZ camera`s instruction manual for further details.
STEP 8. Click APPLY and then click CLOSE in the confirmation window. STEP 9. Click EXIT in all menus until all windows are closed.
50 | 51 |