5.3 MASK FIELD
The Mask Field lets you block a specific portion of a channel you do not want recorded or shown on the display screen. This can be useful if you need to conceal a sensitive area being captured by the installed camera.
5.4 MOTION DETECT
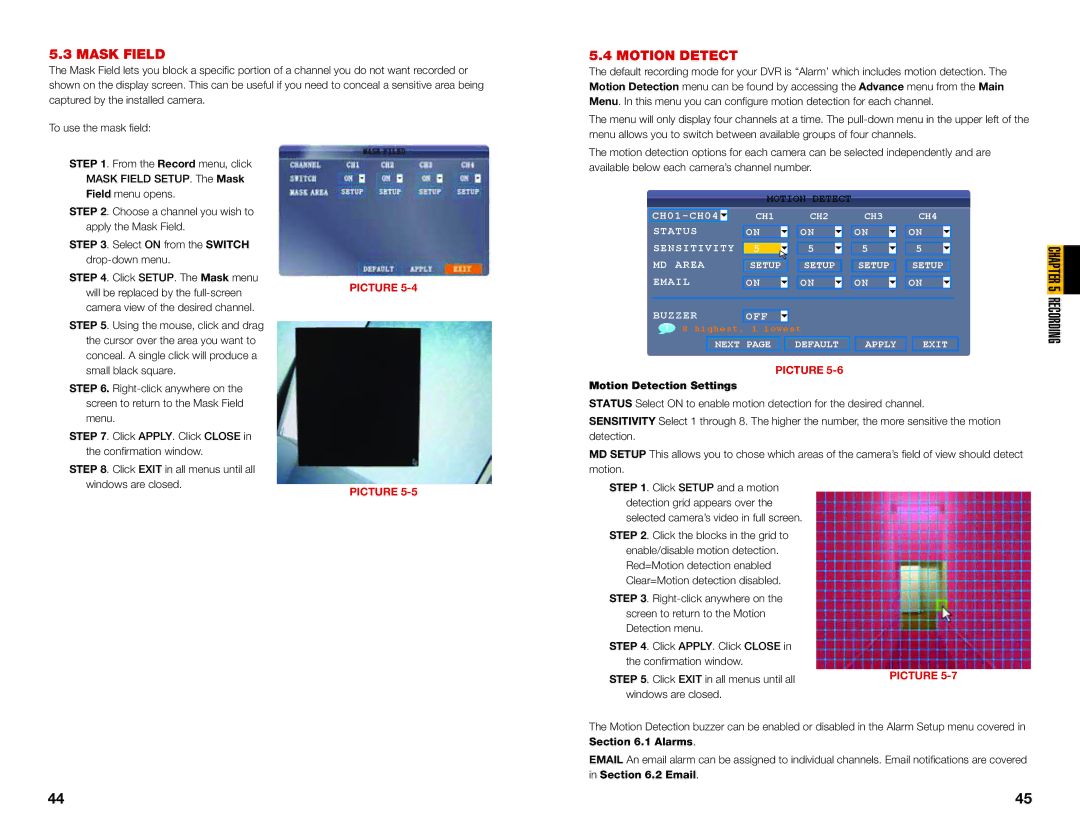
The default recording mode for your DVR is “Alarm’ which includes motion detection. The Motion Detection menu can be found by accessing the Advance menu from the Main Menu. In this menu you can configure motion detection for each channel.
To use the mask field:
STEP 1. From the Record menu, click MASK FIELD SETUP. The Mask Field menu opens.
The menu will only display four channels at a time. The
The motion detection options for each camera can be selected independently and are available below each camera’s channel number.
MOTION DETECT
STEP 2. Choose a channel you wish to apply the Mask Field.
STEP 3. Select ON from the SWITCH
STEP 4. Click SETUP. The Mask menu
will be replaced by the
PICTURE
![]()
STATUS SENSITIVITY MD AREA EMAIL
CH1
ON
5 |
SETUP
ON
CH2
ON
5![]()
SETUP
ON
CH3
ON
5![]()
SETUP
ON
CH4
ON
5![]()
SETUP
ON
CHAPTER 5![]()
camera view of the desired channel.
STEP 5. Using the mouse, click and drag the cursor over the area you want to conceal. A single click will produce a small black square.
STEP 6.
STEP 7. Click APPLY. Click CLOSE in the confirmation window.
STEP 8. Click EXIT in all menus until all windows are closed.
PICTURE
BUZZER OFF
i8 highest, 1 lowest
NEXT PAGE | DEFAULT | APPLY | EXIT |
PICTURE
Motion Detection Settings
STATUS Select ON to enable motion detection for the desired channel.
SENSITIVITY Select 1 through 8. The higher the number, the more sensitive the motion detection.
MD SETUP This allows you to chose which areas of the camera’s field of view should detect motion.
STEP 1. Click SETUP and a motion detection grid appears over the selected camera’s video in full screen.
STEP 2. Click the blocks in the grid to enable/disable motion detection. Red=Motion detection enabled Clear=Motion detection disabled.
STEP 3.
screen to return to the Motion
Detection menu. |
|
STEP 4. Click APPLY. Click CLOSE in |
|
the confirmation window. |
|
STEP 5. Click EXIT in all menus until all | PICTURE |
| |
windows are closed. |
|
The Motion Detection buzzer can be enabled or disabled in the Alarm Setup menu covered in Section 6.1 Alarms.
EMAIL An email alarm can be assigned to individual channels. Email notifications are covered in Section 6.2 Email.
RECORDING
44 | 45 |
