
SF350BEG specifications
The Whirlpool SF350BEG is an innovative solution designed to meet the evolving needs of modern homeowners. This versatile and efficient appliance stands out in the crowded market of household ovens, offering a multitude of features and technologies that enhance cooking performance and user experience.One of the key features of the Whirlpool SF350BEG is its advanced cooking modes, including conventional baking, grilling, and convection cooking. The convection option circulates hot air evenly throughout the oven, ensuring that food is cooked uniformly and speeds up cooking times. This feature is particularly beneficial for baking, as it helps achieve perfectly risen cakes and evenly browned pastries.
Another notable characteristic of the SF350BEG is its user-friendly digital interface. The intuitive control panel allows users to effortlessly select cooking functions, adjust temperatures, and set timers with just a few taps. This modern touch makes it easy for even novice cooks to navigate and utilize the oven's full capabilities.
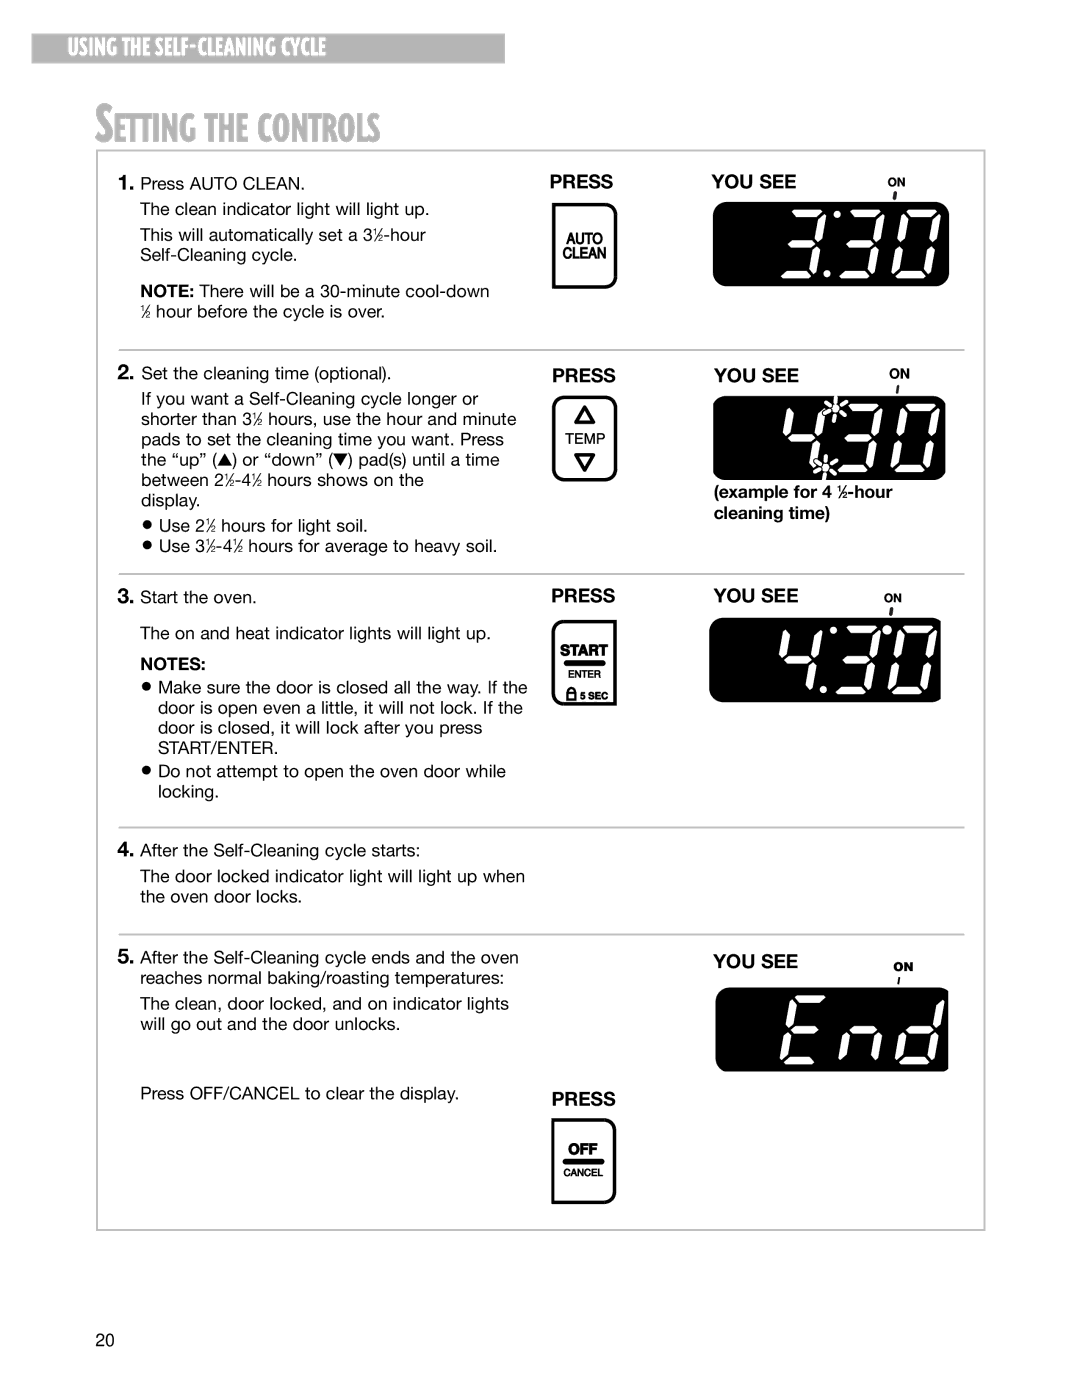
The Whirlpool SF350BEG also comes equipped with a self-cleaning function, which saves time and effort in maintaining the appliance. This feature simplifies the cleaning process, allowing users to focus on enjoying their culinary creations rather than worrying about post-cooking messes.
Energy efficiency is another highlight of this model. Designed to minimize energy consumption without compromising performance, the SF350BEG features innovative insulation and heating technology that keeps energy usage low. This makes it not only environmentally friendly but also cost-effective for homeowners looking to reduce utility bills.
In terms of design, the Whirlpool SF350BEG boasts a sleek, modern look that fits seamlessly into any kitchen aesthetic. Its stainless-steel finish is not only visually appealing but also durable and easy to clean. The spacious interior offers ample room for preparing multiple dishes at once, catering well to families or those who enjoy entertaining.
The oven also offers various safety features, including a child lock, to prevent accidental use. This is an essential consideration for families with young children, ensuring peace of mind while cooking.
In summary, the Whirlpool SF350BEG is a feature-rich oven that combines advanced technology with user-friendly design. Its cooking versatility, energy efficiency, ease of cleaning, and safety features make it a valuable addition to any kitchen, enhancing the overall cooking experience for users of all skill levels.