Pic 3 | Pic 4 |
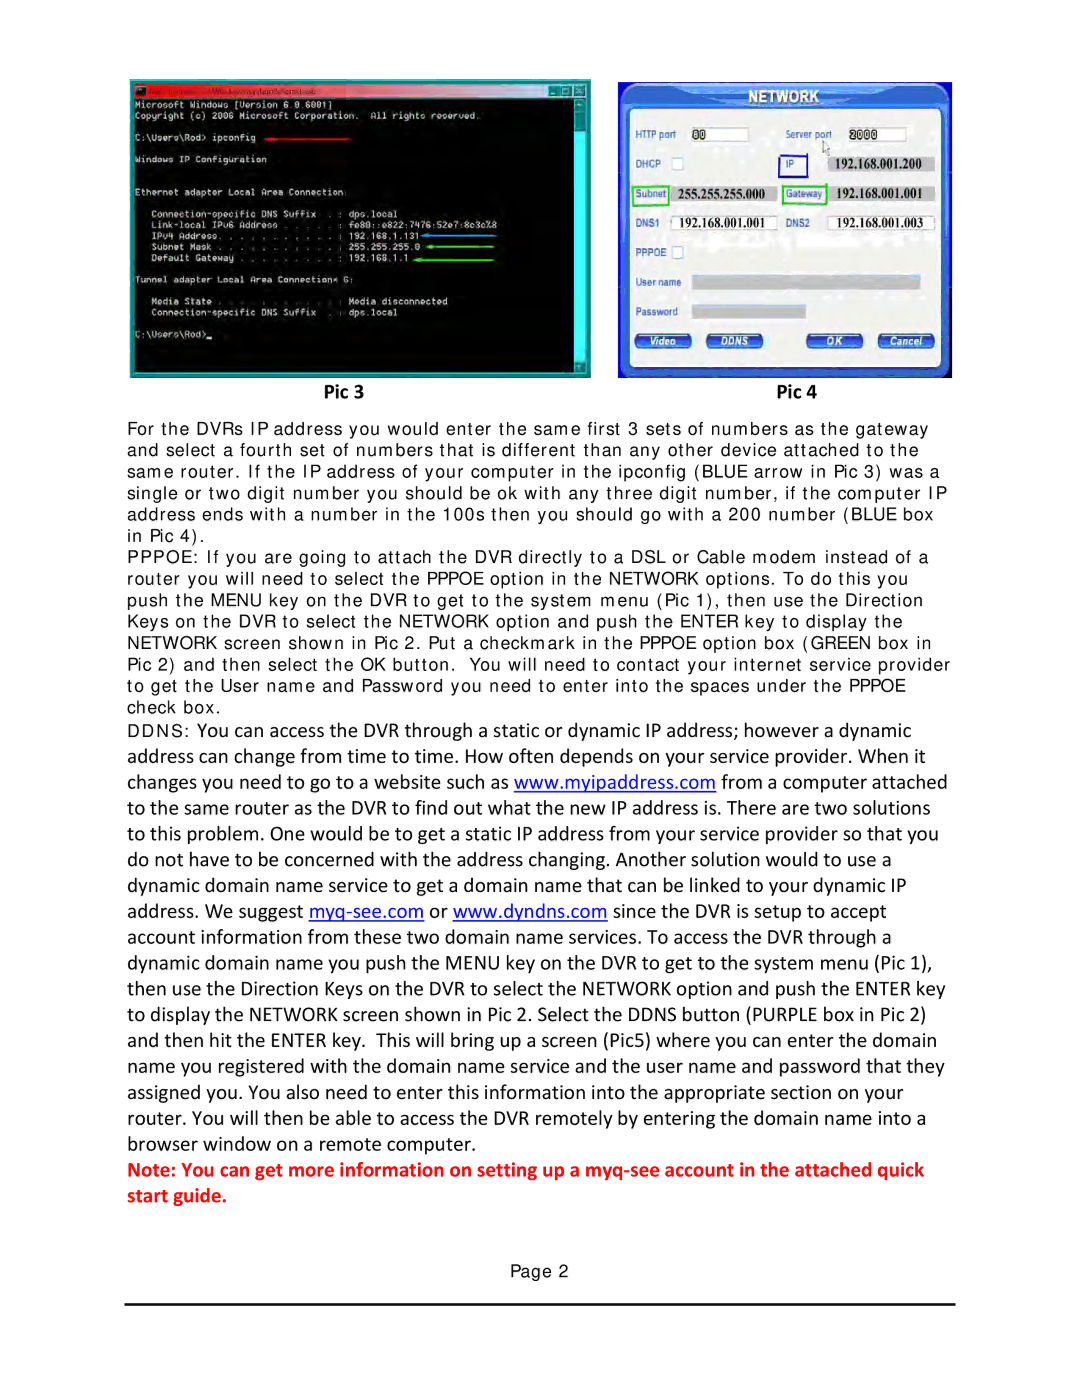
For the DVRs IP address you would enter the same first 3 sets of numbers as the gateway and select a fourth set of numbers that is different than any other device attached to the same router. If the IP address of your computer in the ipconfig (BLUE arrow in Pic 3) was a single or two digit number you should be ok with any three digit number, if the computer IP address ends with a number in the 100s then you should go with a 200 number (BLUE box in Pic 4).
PPPOE: If you are going to attach the DVR directly to a DSL or Cable modem instead of a router you will need to select the PPPOE option in the NETWORK options. To do this you push the MENU key on the DVR to get to the system menu (Pic 1), then use the Direction Keys on the DVR to select the NETWORK option and push the ENTER key to display the NETWORK screen shown in Pic 2. Put a checkmark in the PPPOE option box (GREEN box in Pic 2) and then select the OK button. You will need to contact your internet service provider to get the User name and Password you need to enter into the spaces under the PPPOE check box.
DDNS: You can access the DVR through a static or dynamic IP address; however a dynamic address can change from time to time. How often depends on your service provider. When it changes you need to go to a website such as www.myipaddress.com from a computer attached to the same router as the DVR to find out what the new IP address is. There are two solutions to this problem. One would be to get a static IP address from your service provider so that you do not have to be concerned with the address changing. Another solution would to use a dynamic domain name service to get a domain name that can be linked to your dynamic IP address. We suggest
Note: You can get more information on setting up a
Page 2