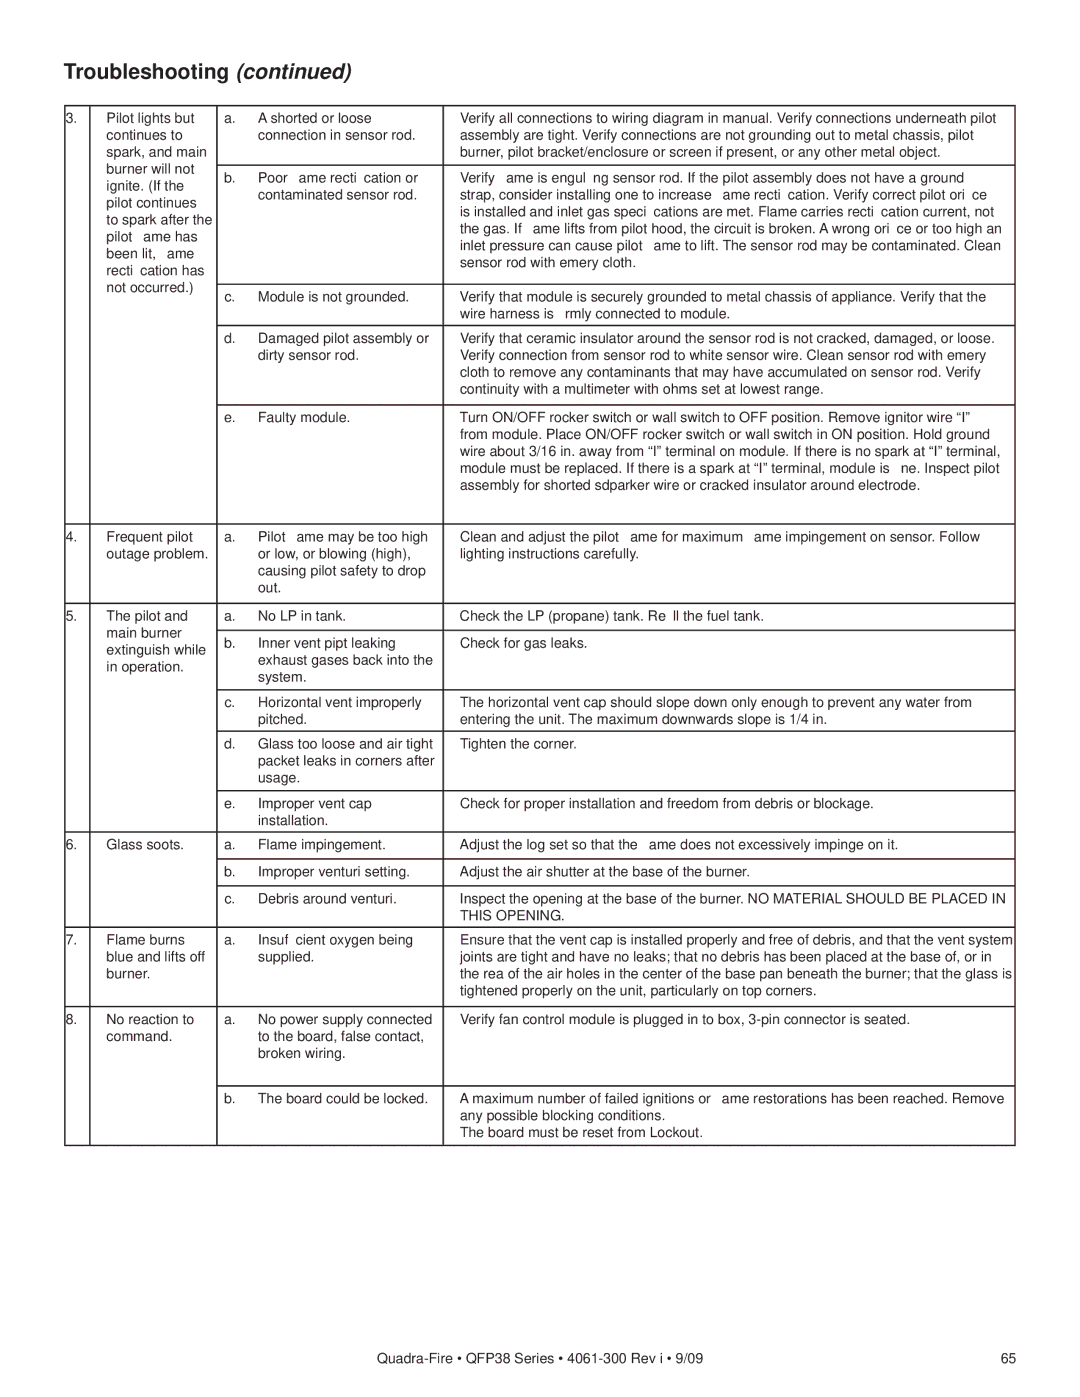
QFP38-NG, QFP38-LP specifications
The Quadra-Fire QFP38-NG and QFP38-LP are high-performance gas fireplaces designed to deliver both warmth and aesthetic appeal to homes. These models are known for their advanced features, reliable technologies, and user-friendly characteristics, making them ideal choices for homeowners looking to enhance their living spaces.One of the key features of the QFP38 series is its efficient heating capability. With impressive BTU output, both the QFP38-NG (natural gas) and QFP38-LP (liquid propane) models provide ample warmth, making them suitable for various room sizes. They utilize a powerful burner system that maximizes combustion efficiency, thereby delivering consistent heat while minimizing fuel consumption.
The QFP38 series is designed with a contemporary and elegant appearance, featuring a large viewing area that showcases the mesmerizing flame. The clean, modern lines and glass front make it an eye-catching centerpiece in any room. Additionally, these fireplaces come with customizable options, allowing homeowners to choose from different interior styles, including log sets and decorative fire glass, to match their decor preferences.
Another standout technology in these models is the advanced control system. The QFP38 series is compatible with remote control operation, enabling users to adjust the flames and heat settings from the comfort of their seating area. This feature enhances convenience, allowing homeowners to set the desired ambiance and warmth with ease.
Safety is a paramount concern, and the QFP38 fireplaces are equipped with several safety features. These include a built-in oxygen depletion sensor that automatically shuts off the gas supply in case of insufficient oxygen levels. Additionally, the sealed combustion design prevents indoor air contamination, providing peace of mind to users.
The installation process of the QFP38-NG and QFP38-LP is straightforward, thanks to their venting options that accommodate various home layouts. Both models are designed to be versatile, with horizontal and vertical venting capabilities, offering greater flexibility for installation.
In terms of maintenance, the QFP38 series is user-friendly, requiring minimal upkeep to ensure optimal performance. Regular cleaning and inspection of the glass and burner components are typically all that is needed to maintain the fireplace's efficiency and aesthetic appeal.
Overall, the Quadra-Fire QFP38-NG and QFP38-LP gas fireplaces combine cutting-edge technology, modern design, and safety features, making them excellent options for anyone looking to add warmth and style to their home. Whether used as a primary heat source or as an elegant focal point, these models are sure to enhance any living space.
