R
VOYAGEUR GRAND Wood Insert
H. All Cast Surround Kit
Size: 40 in. W x 30 in. H
Included in Surround Kit: (2) side pieces, left and right; (1) l top piece; (1) fastener package.
Tools Needed: Powered 4 to 6 inches long Phillips head screw driver; pliers
1.Remove contents from box being careful not to scratch or damage the cast trim pieces.
2.Lay surround pieces face down on a protected surface to prevent scratching.
3.Align the bosses on the top piece to the holes on the side pieces. Secure the 3 pieces together.
4.Attach the mounting brackets to the side pieces included with the kit. Figure 43.1.
5.In order to get a tight seal for the surround, you must reposition a side shield. There are two holes on the shield and it will come from the factory secured in the first (left) hole. Remove the shield and
5.Position the trim on the appliance matching up the mounting brackets with the slots on the appliance.
6.Attach the surround to the appliance 2 screws.
DO NOT OVERTIGHTEN SCREWS - MAY DAMAGE
PROCELAIN FINISH.
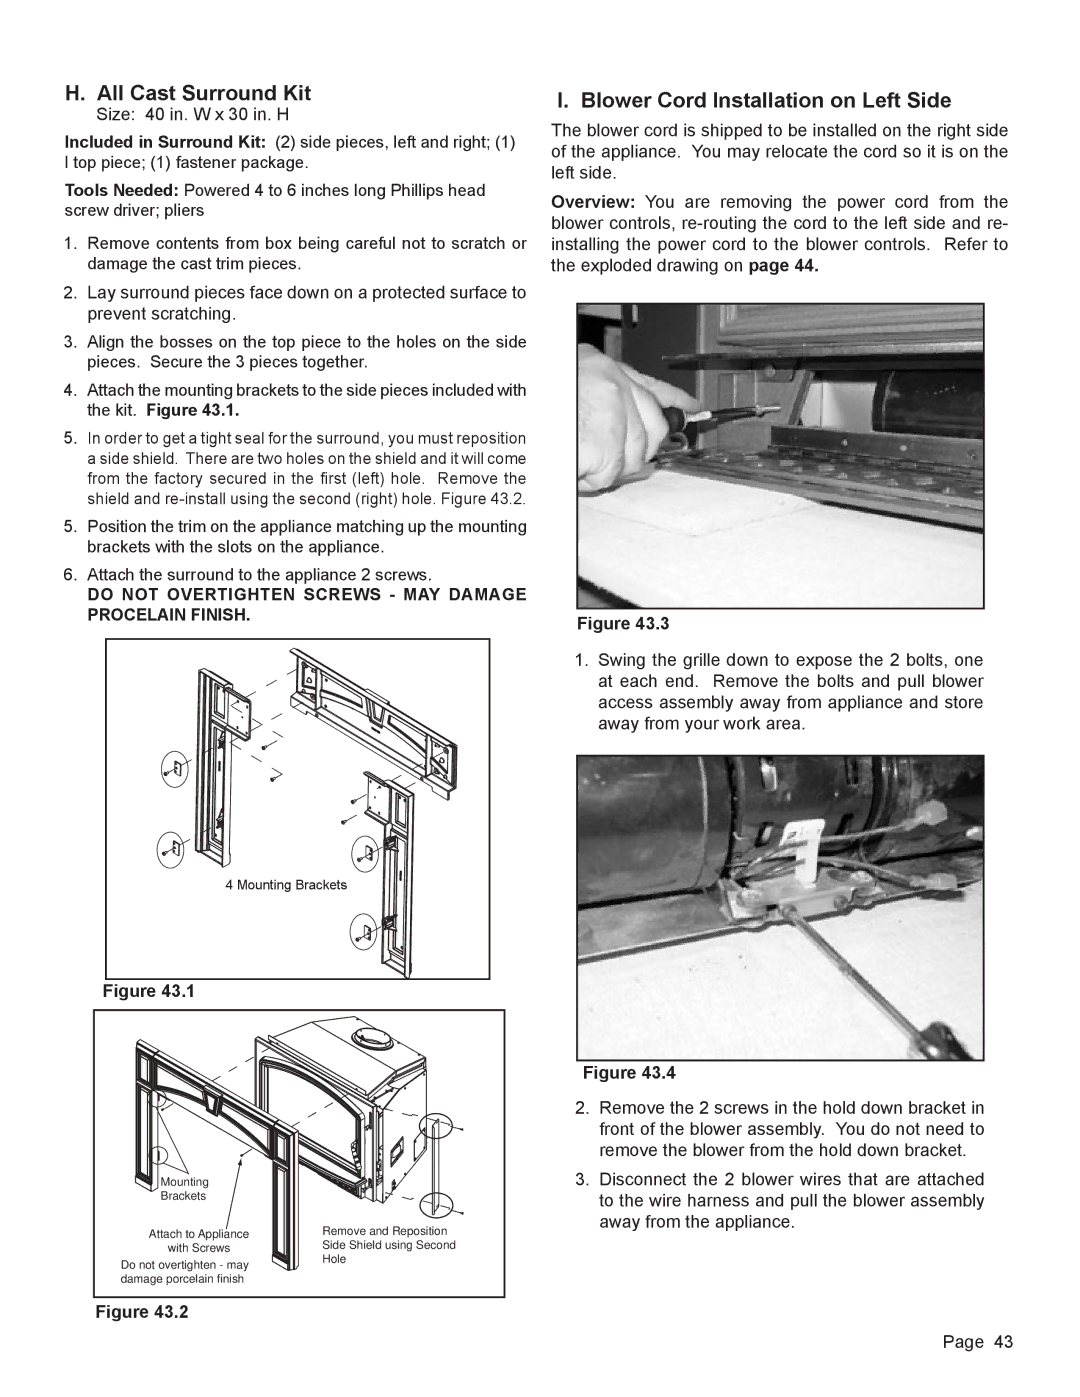
I. Blower Cord Installation on Left Side
The blower cord is shipped to be installed on the right side of the appliance. You may relocate the cord so it is on the left side.
Overview: You are removing the power cord from the blower controls,
Figure 43.3
4 Mounting Brackets |
Figure 43.1 |
Mounting |
|
Brackets |
|
Attach to Appliance | Remove and Reposition |
with Screws | Side Shield using Second |
Do not overtighten - may | Hole |
| |
damage porcelain finish |
|
Figure 43.2
1.Swing the grille down to expose the 2 bolts, one at each end. Remove the bolts and pull blower access assembly away from appliance and store away from your work area.
Figure 43.4
2.Remove the 2 screws in the hold down bracket in front of the blower assembly. You do not need to remove the blower from the hold down bracket.
3.Disconnect the 2 blower wires that are attached to the wire harness and pull the blower assembly away from the appliance.
September 25, 2012 | Page 43 |