R
VOYAGEUR GRAND Wood Insert
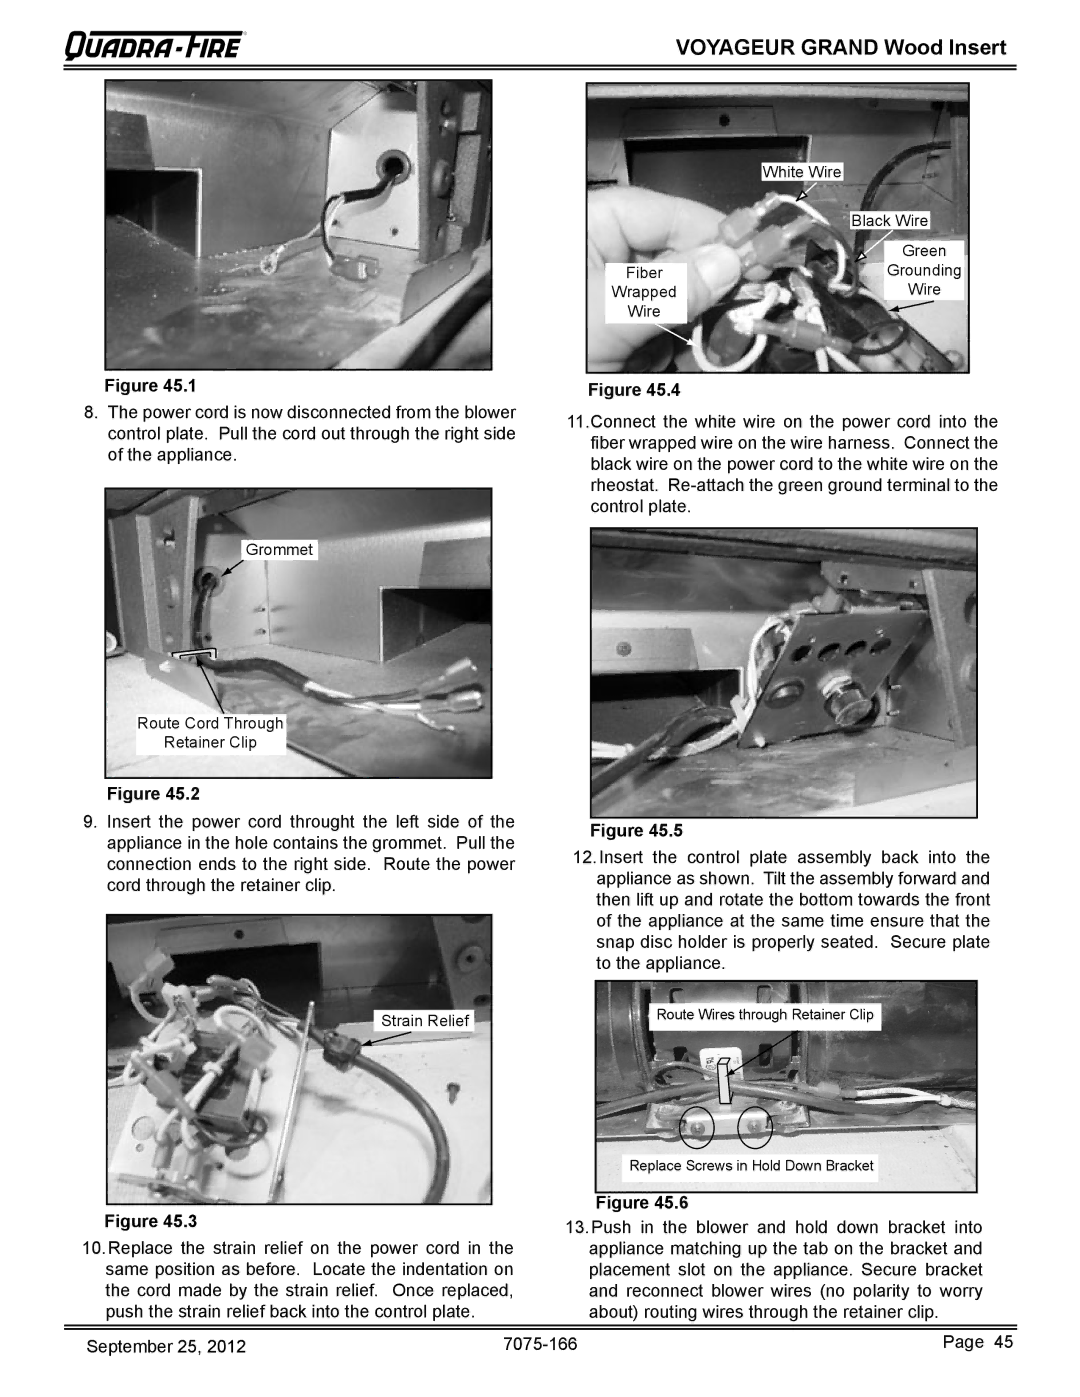
| White Wire |
| Black Wire |
| Green |
Fiber | Grounding |
Wrapped | Wire |
Wire |
|
Figure 45.1
8.The power cord is now disconnected from the blower control plate. Pull the cord out through the right side of the appliance.
Grommet
Route Cord Through
Retainer Clip
Figure 45.2
9.Insert the power cord throught the left side of the appliance in the hole contains the grommet. Pull the connection ends to the right side. Route the power cord through the retainer clip.
Strain Relief
Figure 45.3
10.Replace the strain relief on the power cord in the same position as before. Locate the indentation on the cord made by the strain relief. Once replaced, push the strain relief back into the control plate.
Figure 45.4
11.Connect the white wire on the power cord into the fiber wrapped wire on the wire harness. Connect the black wire on the power cord to the white wire on the rheostat.
Figure 45.5
12.Insert the control plate assembly back into the appliance as shown. Tilt the assembly forward and then lift up and rotate the bottom towards the front of the appliance at the same time ensure that the snap disc holder is properly seated. Secure plate to the appliance.
Route Wires through Retainer Clip
Replace Screws in Hold Down Bracket
Figure 45.6
13.Push in the blower and hold down bracket into appliance matching up the tab on the bracket and placement slot on the appliance. Secure bracket and reconnect blower wires (no polarity to worry about) routing wires through the retainer clip.
September 25, 2012 | Page 45 |