Positioning the Cooker
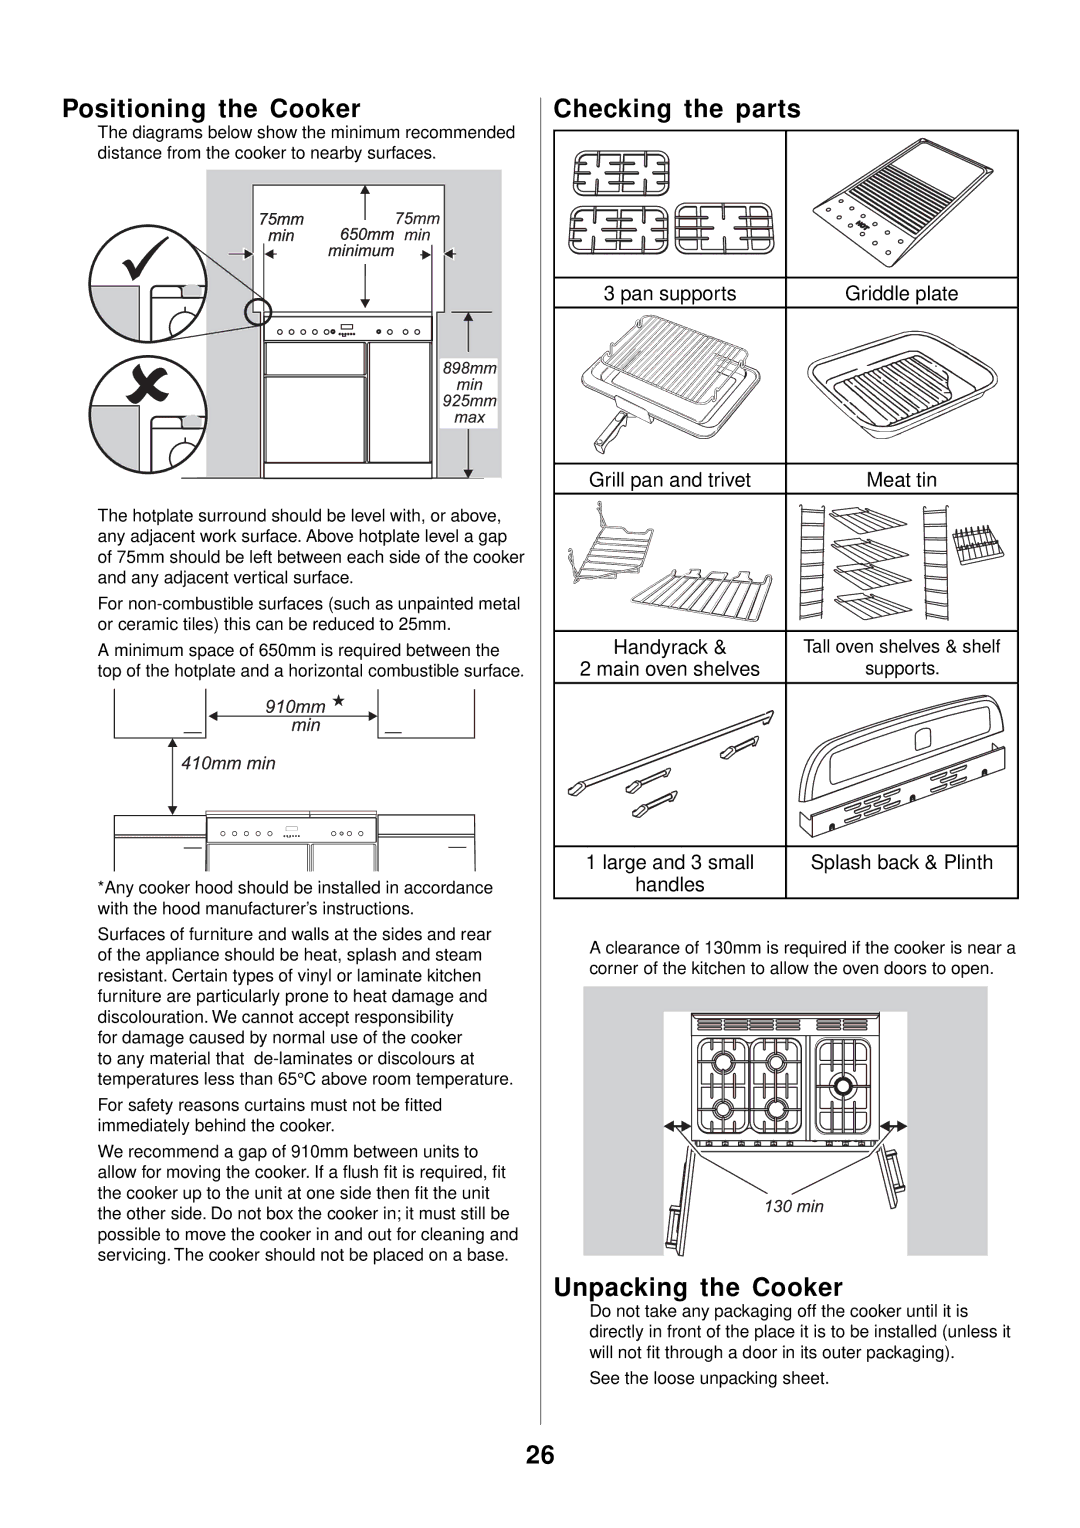
The diagrams below show the minimum recommended distance from the cooker to nearby surfaces.
The hotplate surround should be level with, or above, any adjacent work surface. Above hotplate level a gap of 75mm should be left between each side of the cooker and any adjacent vertical surface.
For
A minimum space of 650mm is required between the top of the hotplate and a horizontal combustible surface.
*Any cooker hood should be installed in accordance with the hood manufacturer’s instructions.
Surfaces of furniture and walls at the sides and rear of the appliance should be heat, splash and steam resistant. Certain types of vinyl or laminate kitchen furniture are particularly prone to heat damage and discolouration. We cannot accept responsibility
for damage caused by normal use of the cooker to any material that
For safety reasons curtains must not be fitted immediately behind the cooker.
We recommend a gap of 910mm between units to allow for moving the cooker. If a flush fit is required, fit the cooker up to the unit at one side then fit the unit the other side. Do not box the cooker in; it must still be possible to move the cooker in and out for cleaning and servicing. The cooker should not be placed on a base.
Checking the parts
3 pan supports | Griddle plate |
Grill pan and trivet | Meat tin |
Handyrack & | Tall oven shelves & shelf |
2 main oven shelves | supports. |
1 large and 3 small | Splash back & Plinth |
handles |
|
A clearance of 130mm is required if the cooker is near a corner of the kitchen to allow the oven doors to open.
Unpacking the Cooker
Do not take any packaging off the cooker until it is directly in front of the place it is to be installed (unless it will not fit through a door in its outer packaging).
See the loose unpacking sheet.
26